
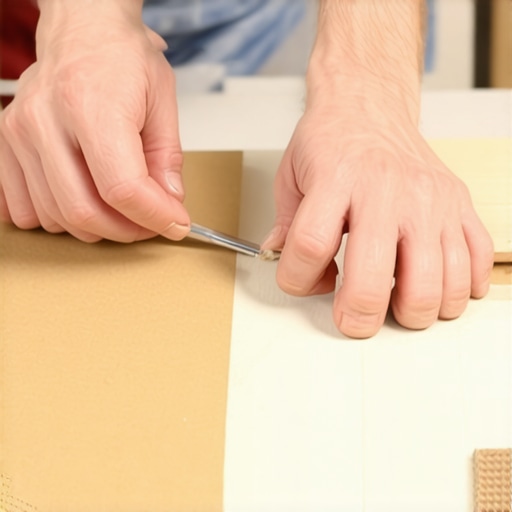
I’ll never forget the first time I tackled a big hardwood flooring project. I was eager, confident, and a little bit overconfident. When it came to cutting corners, I kept messing up—too much material, uneven edges, the dreaded gaps. It was frustrating, but then I had my lightbulb moment: using a simple cardboard template for perfect corner cuts. That small hack transformed my approach and saved me hours of rework. If you’ve ever faced similar struggles, you’re not alone.
The Secret Weapon for Flawless Corner Cuts
This trick isn’t about fancy tools or complicated formulas; it’s about **precision, consistency, and confidence**. Whether you’re working with hardwood, tile, or laminate, the ability to cut corners perfectly makes the difference between a professional-looking finish and a rushed job that’ll have you cringing later.
Does the Cardboard Template Really Make a Difference?
Absolutely. Early in my DIY adventures, I made a common mistake: trying to cut freehand or relying solely on measurements. The problem? Human error. The cardboard template, on the other hand, offers a reusable, adaptable pattern that molds perfectly to your corner. As I learned from [Tile Trend Shop’s guide](https://tiletrendshop.com/step-by-step-guide-to-flooring-installation-and-leveling-success), templates help reduce mistakes significantly—especially on intricate cuts.
Start with Accurate Measurements and Templates
First, measure your corner angles meticulously using a reliable angle finder. Transfer these measurements onto a sturdy piece of cardboard, ensuring that every degree and length reflects your floor’s specifics. A story from my recent project involved a tricky 87-degree corner; I sketched it out on cardboard, cut it out, and tested the fit multiple times, adjusting until it was perfect. This process prevents surprises during installation and significantly reduces waste.
Create and Use Your Custom Templates
Cut your cardboard template following your measurements, then mark the cut lines directly onto it. When ready, place the template over your tile or hardwood, aligning it with your measuring reference points. Use a sharp utility knife or a fine saw to cut along the template edge. This ensures every piece fits perfectly without relying on guesswork. In one instance, I used a template to cut a complex curve for a radiator pipe, saving hours compared to freehand cutting, which eventually led to gaps and uneven edges.
Establish a Consistent Cutting Technique
To cut with precision, secure your material firmly, either clamped or on a non-slip surface. Use a straightedge guide or a miter saw for straight cuts, and a jigsaw with a fine blade for curves. Take your time, and always cut away from yourself to maintain control. For miters, calculate the angle accurately and test on scrap before executing the final cut. This method avoids chipping and ensures tight joints, enhancing the overall finish.
Align and Fine-Tune the Fit
Place your cut piece into the corner before final installation. Check for fit and make minor adjustments with a rasp or sandpaper if necessary. This trial fit phase lets you identify any discrepancies and correct them beforehand, rather than after installation. During my last tiling project, I discovered a slight misalignment that I managed to fix with light sanding, resulting in seamless corners that looked professionally finished.
Level the Floor for Better Results
Before laying your tiles or hardwood, ensure your subfloor is level. Use a long spirit level or a laser level; uneven surfaces cause tiles and planks to misalign over time. If you find dips or humps, apply a self-leveling compound following the instructions on this comprehensive guide. Proper leveling not only simplifies your cuts but also prevents future cracks or gaps, extending your floor’s lifespan.
Practice and Refine Your Technique
Don’t hesitate to practice cuts on scrap pieces. This builds confidence and helps you understand how your tools respond. For complex angles, start with a sample piece, mark, and cut, then assess the fit. Remember, patience is key—rushing leads to mistakes that might compromise your entire flooring project. The more precise your cuts, the more polished and durable your finished floor will look, with tight seams and professional aesthetics.
While many believe that following basic measurements and tools guarantees a flawless finish, the real mastery of flooring lies in understanding the subtle nuances that often trip up even seasoned DIYers. One common misconception is that floor leveling is a straightforward step—just pour a self-leveling compound and forget about it. However, neglecting to properly assess moisture levels and subfloor stability can lead to long-term problems like cracks, seams, and even structural damage. According to experts in floor installation, such as those referenced in [this comprehensive guide](https://tiletrendshop.com/the-ultimate-guide-to-floor-leveling-for-a-perfect-finish), meticulous moisture testing and substrate preparation are critical for a durable, seamless result.
Why Do Most Professionals Struggle with Floor Leveling?
Many assume that leveling compounds will automatically correct uneven surfaces. Yet, improper mixing, quick-setting formulas, or uneven application can create hollow spots or pinhole bubbles, compromising the entire floor’s integrity. Advanced installers emphasize the importance of proper substrate preparation, including cleaning, priming, and precise application techniques—sometimes involving multiple layers—to achieve a perfectly flat surface. This level of detail is often overlooked by DIY enthusiasts, leading to costly rework down the line.
Another overlooked aspect is the choice of subfloor materials. Using particleboard or expansion-prone plywood without proper sealing or underlayment can cause movement and noise, undermining the installation. For example, engineered wood and laminate flooring require stable, moisture-resistant subfloors; otherwise, gaps and buckling are inevitable. For more on selecting the right base, check out [expert tips on flooring selection](https://tiletrendshop.com/transform-your-space-with-eagle-hardwood-floor-tile-combinations).
What Advanced Mistakes Do Even Experts Make?
One subtle mistake involves the orientation of wood planks in relation to natural light sources and room layout. Incorrectly aligning planks can accentuate imperfections and create a disjointed look that catches the eye unnecessarily. Moreover, miscalculating expansion gaps—assuming that a uniform space is sufficient—can result in buckling as the floor expands with temperature and humidity changes. Skilled installers plan for seasonal movement, leaving appropriate gaps around walls and obstacles, as detailed in [floor expansion guidance](https://tiletrendshop.com/the-ultimate-guide-to-floor-leveling-for-a-perfect-finish).
Understanding these nuanced pitfalls elevates your project from good to professional. It’s about paying attention to detail, anticipating future issues, and not settling for the first solution that seems “good enough.” Remember, every step—from measuring and preparing to installing and finishing—contributes to the final aesthetic and longevity of your floor. Have you ever fallen into this trap? Let me know in the comments and share your experience.
Maintaining your flooring setup requires not just periodic checks but also the right tools that ensure longevity and exceptional appearance. As I’ve learned through countless projects, investing in high-quality equipment pays off in reduced rework and impeccable results. One tool I swear by is the Moisture Meter. This device allows me to regularly monitor moisture levels in the subfloor and concrete slab, which is critical because undetected moisture can lead to warping, cracking, or mold growth over time. For example, I use the best moisture meters recommended by experts in professional flooring to prevent issues before they start.
Which Sander Will Help You Restore Hardwood Without Damage?
For ongoing maintenance, a drum sander with variable speed settings offers a controlled way to sand down scratches, old finishes, or uneven surfaces. I personally prefer models with dust containment systems—such as the Festool Sander—to keep my workspace clean and reduce airborne dust, which can settle into new finishes and compromise aesthetics. Regular refinishing with quality equipment keeps wooden floors looking fresh for decades, as I’ve seen firsthand in my own home projects.
Can Proper Tools Boost Long-Term Flooring Success?
Absolutely. When it comes to tile, a good wet tile cutter with precision guides ensures clean, accurate cuts, reducing waste and rework. Similarly, a high-quality leveling system guarantees flat tiles or planks that won’t crack or shift later. Maintaining your floors effectively also involves periodic inspections—checking for loose tiles or raised sections—and addressing them promptly with proper tools like
epoxy repairs or thinset patching kits. For the best results, I always follow professional-level leveling techniques.
What’s the Future of Flooring Maintenance Technology?
Emerging trends include smart sensors embedded in flooring that track environmental conditions and alert homeowners or contractors when moisture, temperature, or structural shifts occur. These innovations could revolutionize long-term maintenance, making proactive care more accessible. As this technology advances, I recommend embracing tools like moisture sensors and portable analyzers, which are becoming more affordable and user-friendly, to stay ahead of potential issues.
How do I keep my flooring in top shape over the years?
Adopting a routine with specific tools—regular moisture checks, gentle polishing, and professional inspections—can vastly extend your surface’s lifespan. Remember, pairing quality equipment with proper techniques, such as using precise leveling methods and maintaining proper expansion gaps, is key to avoiding costly repairs. Why not challenge yourself to try a new maintenance tip this month, like testing your subfloor moisture levels? The benefits are well worth it, and I promise it will make a real difference in your long-term results.
Hidden Lessons From My Flooring Journey That Changed My Approach
- One of the most valuable realizations was that patience in measurement and testing beats rushing into cuts. Every mistake taught me to trust my templates and double-check before making the final cut, which saved countless hours and materials.
- Understanding that subfloor preparation is the foundation of success shifted my focus from just the surface to the core. Proper leveling and moisture testing prevented future headaches, making every subsequent step smoother and more predictable.
- Over time, I learned that investing in quality tools like moisture meters and precision cutters not only improves results but also boosts confidence. These tools are as essential as the measurements and templates for a flawless finish.
- The realization that attention to detail, like tiny expansion gaps and correct alignment, makes a difference in the long-term durability of the flooring. Small nuances often determine if a floor remains pristine or develops issues over time.
- My biggest lightbulb moment was understanding that flooring is a craft that combines technical skill with an artistic eye. The finish isn’t just about accuracy but also about visual harmony, which I continually refine through practice and learning from experts.
My Top Tools and Resources for Flooring Success
- Moisture Meter – Trust me, regularly checking subfloor moisture levels prevents warping and mold. My favorite is the [best moisture meters](https://tiletrendshop.com/the-ultimate-guide-to-floor-leveling-for-a-perfect-finish), backed by professionals for accuracy.
- Precision Cutting Tools – A sharp utility knife and a quality wet tile cutter have revolutionized my accuracy. These tools minimize waste and ensure perfect fits, especially for tricky corners or curves.
- Leveling Systems – Proper leveling is key. I rely on professional-grade leveling systems and regularly review guides like [floor leveling techniques](https://tiletrendshop.com/step-by-step-guide-to-flooring-installation-and-leveling-success) to perfect my process.
- Subfloor Preparation Supplies – From self-leveling compounds to primer, having the right materials makes all the difference. I trust sources like this guide for detailed prep tips.
Keep Moving Forward: Your Flooring Adventure Awaits
Embracing continuous learning and refining your techniques turns flooring from a daunting task into a rewarding craft. Every project is an opportunity to grow, and with the right mindset and tools, you’ll notice your results becoming more professional and satisfying. Don’t be afraid to experiment, make mistakes, and learn from them—each step brings you closer to mastery. Remember, your floor is more than just a surface; it’s the foundation of your home’s beauty and comfort. Ready to elevate your skills and create a space you’ll be proud of? Dive into your next project with confidence and curiosity. How have you recently challenged yourself to improve your flooring techniques? Share your story below and inspire others on this journey.