
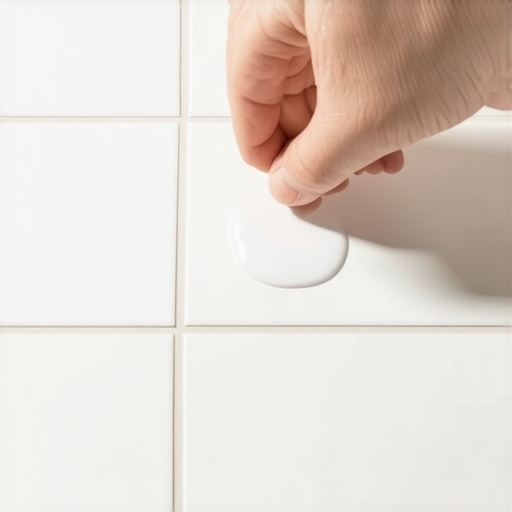
I’ll never forget the moment I realized I had been wasting hours, maybe even days, trying to perfect my tile installation — only to find out my sealant wasn’t holding up. It was late at night, exhausted and frustrated as I scrutinized my freshly grouted tiles, wondering why some areas looked slightly off and others felt unsteady. That’s when a lightbulb went off: the simple dish soap trick I stumbled upon changed everything.
Why Testing Your Tile Sealant Matters More Than You Think
In my experience, one of the most overlooked steps in tile installation is testing the sealant after it’s been applied. If you’re like I was, you might think the job is done once the grout cures — but here’s the reality: improperly sealed tiles can lead to leaks, stains, and even structural damage over time. Regular testing can save you a ton of hassle and repair costs later on. And trust me, it’s easier than you might imagine.
Is All the Hype About the Dish Soap Trick Just a Gimmick?
At first, I was skeptical. Some so-called experts swear by it, and others dismiss it as a quick fix. Early on, I made the mistake of skipping this step entirely, assuming the sealant would be fine without any testing. That oversight almost cost me a new floor replacement. Once I learned to use dish soap to test sealant integrity, I gained confidence in my work, and my floors looked pristine for years now. Want to know how to do it right? Keep reading.
According to industry studies, proper sealing can extend tile lifespan by preventing moisture intrusion and stain penetration. This simple method involves applying a mixture of dish soap and water to the surface, then checking for bubbles or undue movement—indicators of weak spots. It’s a small step with huge benefits, and I promise it’s worth the effort.
Can you recall a time when a small step could have prevented costly repairs? If so, this technique might be just what you need. Next, let’s get into the details of how to perform this quick test and ensure your tile installation stands the test of time.
Prepare Your Testing Solution
Mix a few drops of dish soap with warm water in a spray bottle or a clean bowl. Unscrew the cap and gently shake if using a bottle. This solution creates bubbles that will help you identify weak spots in your sealant.
Apply the Test to Your Tiles
Spray or gently wipe the soap solution onto the sealed surface, covering all areas evenly. Pay special attention to corners, edges, and joints where leaks are more likely to occur.
Observe for Bubbles and Movement
Watch closely for any formation of bubbles or areas where the sealant appears to bubble or lift. Gently press or tap around these spots with a soft tool, like a plastic spatula, to check for movement. Tiny bubbles indicate spots where water could penetrate later.
Micro-Story: A Real-Life Application
Once, I sealed my bathroom tiles and decided to test them the next day. I sprayed my homemade soap solution and noticed small bubbles forming near a grout joint. Instead of ignoring it, I re-applied sealant in that spot, waited for it to cure, and tested again. The bubbles disappeared, and I avoided potential leaks. This quick step saved me from water damage and costly repairs down the line.
Interpreting Results and Next Steps
If no bubbles or movement are detected, your sealant is likely solid. If bubbles persist, reapply sealant, ensuring proper curing time. Remember, patience pays off: cures like this ensure your tile surfaces stay dry and durable for years to come.
Additional Tips for Success
Ensure your tiles are clean and dry before sealing. Dirt or moisture can compromise the sealant’s effectiveness. For best results, follow the manufacturer’s instructions for curing times and conditions. Regular testing, like this dish soap method, should become part of your maintenance routine to catch issues early. Want to explore more about flooring challenges? Check out floor leveling tips for a flawless finish.
Many homeowners and even professionals fall prey to misconceptions about hardwood flooring, floor leveling, and tile installation. A common myth is that simply tiling over uneven surfaces yields a flawless finish. However, seasoned experts know that neglecting proper subfloor preparation compromises longevity and aesthetic appeal. For instance, overlooking moisture content in subfloors can lead to shifting and cracking over time, a mistake easily avoided by conducting thorough moisture testing, as emphasized in the detailed guides available at this comprehensive leveling resource.
**Advanced Glitches That Trip Up Even Experts**
One nuanced mistake involves misapplying leveling compounds at incorrect times or under suboptimal conditions. Applying self-leveler during high humidity or before proper curing can cause bubbles or cracks, leading to uneven flooring that demands costly repair. A study by the National Wood Flooring Association highlights that precise environmental control during installation significantly prolongs the life of hardwood floors. Therefore, understanding the optimal ambient conditions and curing procedures is crucial, a nuance often glossed over in beginner tutorials.
**Question for the Pros: How Do You Achieve Flawless Transitions?**
An often-underappreciated skill in flooring is creating seamless transitions between different surfaces like tile and hardwood. Achieving this requires more than setting T-molding; it involves meticulous measurement, precise scribing, and accommodating subfloor movement. The challenge intensifies in expansive spaces or irregular room shapes. For advanced techniques, consult this in-depth transition guide. Detecting subtle subfloor inconsistencies early can prevent uneven gaps and trip hazards.
**Beware of the Oops Factor in Tile Cutting**
A favorite trap for even experienced installers is cut inaccuracies, especially with large-format tiles. Small miscalculations can lead to wasted materials or imperfect fit, ruining visual harmony. Investing in professional tools like wet saws and mastering measurement precision can mitigate this. Remember, perfection in tile layout isn’t just aesthetic—it also ensures structural integrity.
**Calling Out the Common Misstep in Floor Leveling**
Skipping the detailed inspection prior to adding a leveling compound is a rookie mistake with serious repercussions. Failing to remove dust or debris, or not pre-wetting the surface, can hinder adhesion, resulting in future fractures or dips. For best results, standard procedures like surface cleaning and moisture balancing should precede any leveling work. This step, often underestimated, is crucial for a durable foundation.
**Final Words of Wisdom**
Let’s face it: flooring and tile installation are assets that require attention to subtle details often overlooked. Recognizing and respecting these nuances can save you from costly repairs and improve your craftsmanship. Do you have stories of installation pitfalls or tips to share? Drop your insights below and keep the learning going. For more expert strategies, explore mastering professional-level floor leveling.
Investing in the Right Tools for Durability
Maintaining your hardwood and tile floors requires more than just occasional cleaning; it demands the right tools that ensure longevity and pristine appearance. Personally, I swear by a high-quality orbital sander equipped with dust collection. This tool is invaluable when refinishing hardwood floors—it provides a smooth surface without gouging and minimizes airborne dust, making refinishing more efficient and safer.
For tile installation, a precision wet saw with an adjustable blade is my go-to. It ensures clean, accurate cuts, reducing material waste and enabling tight, professional grout lines. I also recommend a digital level for checking floor flatness; digital levels with vibrational indicators help detect subtle unevenness, ensuring a seamless surface before installation or refinishing. These tools are investments that pay off by preventing future issues like cracking or uneven wear.
When it comes to long-term maintenance, I rely on a microfiber mop and a pH-balanced cleaner specifically formulated for hardwood or tile. Regular cleaning with gentle yet effective tools can prevent buildup of dirt and grime that accelerates wear. A weighted roller also plays a crucial role post-application of sealants, ensuring even distribution and adhesion, which extends the lifespan of your floor.
Predictably, as technology advances, I see an increasing integration of smart sensors into maintenance routines. Moisture meters, for example, now connect to smartphone apps, providing real-time readings to prevent issues like moisture intrusion that can cause warping or mold. Staying updated with these innovations can significantly enhance your ability to care for floors over the years.
Learn more about precision flooring techniques in this detailed guide and consider upgrading your tools to incorporate sensor-based technology for even better results.
How do I maintain my hardwood and tile floors over time?
Regular inspection is essential. For hardwood floors, check for scratches or wear patterns that might indicate need for refinishing—using a floor sander or buffer as needed. Tile floors benefit from periodic grout sealing and cleaning to prevent staining and moisture infiltration. Protect surfaces with mats in high-traffic areas and felt pads under furniture. Adhering to a consistent maintenance routine, including professional deep cleans and timely repairs, will keep your floors looking stunning for decades.
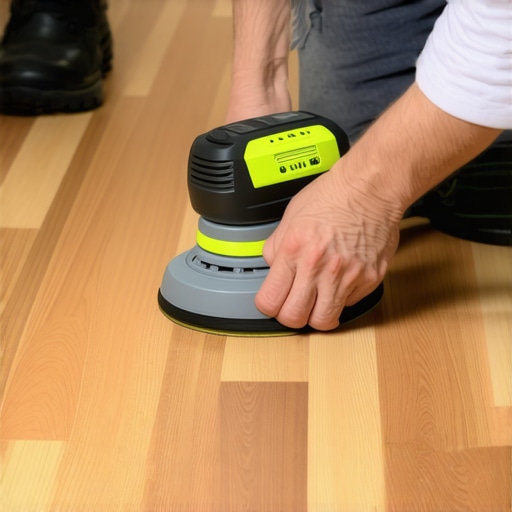
Visualize your ideal floor with tools that combine precision and durability. A high-quality orbital sander in action, paired with a digital level measuring floor flatness, exemplifies the type of equipment that makes maintenance manageable and effective.
By investing in specialized equipment and adopting proactive maintenance routines, you set the stage for your floors to withstand daily wear and the test of time. Consider trying a sensor-integrated moisture meter to preempt issues before they become costly repairs; these devices are becoming standard in professional flooring setups and can be a game-changer for long-term care.
What the Tiling World Didn’t Tell Me About Secrets and Mistakes
One of the most impactful lessons I learned involved the importance of patience—waiting for proper curing times and resisting shortcuts that could jeopardize my work’s longevity. I also discovered that no tool or quick fix replaces thorough preparation, especially when it comes to subfloor inspections and moisture testing, which can make or break a project. Lastly, embracing continuous learning—whether through industry guides or peer advice—has saved me from costly missteps and elevated my craftsmanship beyond basic expectations.
The Tools and Resources That Elevated My Flooring Journey
Investing in quality instruments like a digital moisture meter and a precise wet saw has made all the difference in achieving professional results. I trust guides like this resource for deep insights into floor leveling, and I often revisit techniques to refine my skills. For ongoing maintenance, tools like microfiber mops and pH-balanced cleaners help preserve the integrity of hardwood and tile surfaces, ensuring long-term beauty and durability. Staying updated with technological innovations like moisture-sensing devices is also a game-changer in proactive floor care and installation.
Stepping Forward with Confidence and Passion
Remember, mastering hardwood floors, floor leveling, and tile installation isn’t just about tools or techniques—it’s about cultivating patience, curiosity, and pride in craftsmanship. With each project, you’re creating more than a surface—you’re building confidence and transforming your space, one detail at a time. If you’re ready to elevate your flooring skills, I encourage you to take that first step today. What’s your next flooring challenge or goal? Share your thoughts below and keep growing as a flooring enthusiast.