
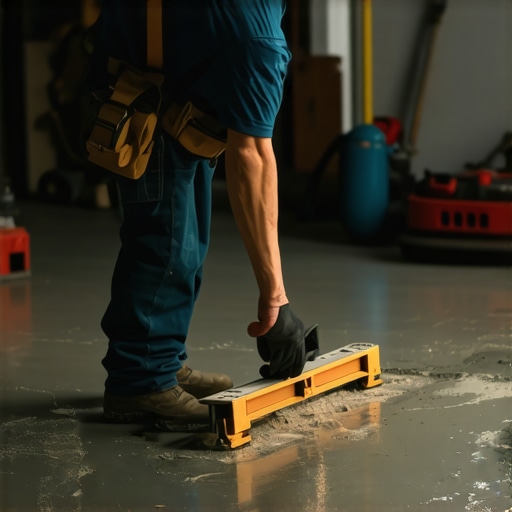
I remember the exact moment I realized I had a major problem on my hands. I was halfway through pouring a self-leveling compound when I looked away for a second. When I returned, the surface was already starting to set, almost as if it was in a rush to finish itself before I even had a chance to spread it properly. Frustration bubbled up—I knew I was in trouble. The surface was uneven, and I’d have to start all over. That experience taught me a crucial lesson: understanding why your floor leveler sets too quickly can save you hours, frustration, and imperfect results.
The Biggest Challenge in Floor Leveling: Timing Is Everything
Published studies show that the success of a flooring project hinges significantly on proper leveling, which depends on how well you manage the setting times of your compounds. If your leveler is setting up too fast, you might think you’re saving time, but in reality, you’re sacrificing quality. Early on, I made the mistake of rushing the process, ignoring the clues that the mixture was going off faster than expected. The key is knowing what causes this rapid set and how to control it, ensuring a smooth, foolproof surface for your tiles or hardwood.
Is Rapid-Setting Leveler Actually a Time-Saver?
One common misconception is that faster setting means quicker completion, but that’s only true if you’re prepared for the quick work needed. If not, it often leads to uneven surfaces and rework. My mistake was using a brand of leveler without understanding its curing characteristics, which resulted in an uneven floor that undermined the entire project. For reliable, professional results, you need to grasp the factors affecting setting times. Want some expert tactics? Check out this guide on flawless floor leveling for essential tips.
Now that you understand the importance of timing, let’s explore what actually causes your leveler to set too fast—and more importantly, how to control it for a perfect finish.
Adjust Your Mixing Ratios for Better Control
Start by modifying the water-to-powder ratio when preparing your leveler. Using less water slows down the chemical reactions, giving you more working time. I once reduced the water slightly on a project when I noticed the leveler was setting faster than usual; this simple tweak doubled my working window, preventing rushed spreads and uneven surfaces. Experiment with small batches first to find your optimal consistency.
Choose the Right Temperature Conditions
Temperature directly impacts setting times. Cooler environments extend working time, while warmer areas accelerate curing. On a summer project, I kept the workspace air-conditioned to slow the setting process. This helped me lay the compound smoothly and avoid hurried applications. Ensure your job site stays within the manufacturer’s recommended temperature range—typically between 65–75°F—to maintain predictable setting times.
Use Accelerators or Retarders Wisely
Adding chemical retarders can significantly delay the set, providing extra working time. Conversely, accelerators speed it up. I once applied a retarder to my mixture, which effectively extended the curing window by 30 minutes. Carefully read product instructions—some additives may affect the final strength or adhesion if used excessively. Always test small batches before scaling up.
Employ Proper Mixing Techniques for Consistency
Mix thoroughly to ensure uniformity, which affects curing speed. I recommend using a paddle mixer for a consistent blend. In a previous job, mixing by hand led to uneven lumps and inconsistent set times, causing frustration. Regularly scrape down the sides of your container to ensure thorough mixing, resulting in predictable setting behavior.
Control Humidity at the Site
High humidity can extend working time by slowing down evaporation, while low humidity accelerates it. I managed a project in a humid basement by deploying a dehumidifier, which prevented the leveler from setting prematurely. Keep the site’s humidity within the acceptable range—typically 50-60%—to regulate curing. Use portable humidifiers or dehumidifiers as needed.
Plan Your Workflow Strategically
Divide your floor into manageable sections with clear timeframes. I once faced a room with challenging conditions—cold corners and warm centers—and split the work accordingly. This approach allowed me to tweak mixing or environmental conditions per section, ensuring each area remained workable before curing started. Have a clear plan so you’re not rushing to finish before the material sets.
Monitor and React in Real-Time
Pay close attention to the mixture’s appearance and the ambient conditions. In a project, I kept a stopwatch and temperature gauge handy, enabling me to adjust environment or mixture as needed. If you notice surfaces already starting to firm, stop applying new batches to avoid uneven levels and rework. Quick reactions maintain quality and prevent uneven finishes.
Embrace these core techniques—they’re your best defense against the frustrations of rapid-set levelers. For more insights on avoiding common errors, see this guide on floor leveling pitfalls. Proper planning and environmental control are pivotal for achieving that smooth, professional-grade finish you envision.
When it comes to flooring, many DIYers and even seasoned professionals often get caught up in surface-level facts, missing the crucial nuances that determine long-term success. One prevalent myth is that choosing the thickest underlayment guarantees a perfectly level floor. In reality, the installation environment and proper preparation matter more—according to a study by the National Association of Home Builders, meticulous surface prep reduces failure rates significantly. Rushing the subfloor leveling process, for example, leads to future cracks or tiles chipping prematurely. Many assume that a quick patch fixes everything, but improper patching or skipping the expansion joints can cause uneven surfaces that crack over time. Conflating the use of popular materials with ideal compatibility is another mistake. For instance, applying cement-based levellers over moisture-sensitive substrates without proper primer results in delamination, as noted in technical guidelines from tile manufacturers. Advanced installers understand that environmental factors, like humidity and temperature fluctuations, influence curing times and adhesion—ignoring these can lead to bonded tiles lifting or self-levelers cracking. Moreover, some believe that thicker thinset always means better bonding, but excessively thick applications trap air and prevent proper curing, weakening the bond. To avoid these traps, consult detailed resources such as this comprehensive guide on flawless floor leveling. Remember, the devil is in the details. Proper environmental control, understanding material compatibilities, and meticulous preparation distinguish a professional result from a botched job. Want to prevent common mistakes and elevate your skills? Dive into this article on precise leveling techniques for expert insights. Have you ever fallen into this trap? Let me know in the comments.
Keep Your Floors in Prime Condition with the Right Equipment
Investing in quality tools is essential for maintaining professional standards over the lifespan of your flooring projects. I personally rely on a high-grade laser level, such as the Bosch GSL2 Professional Cross-Line Laser, because it provides precise, self-leveling lines that ensure consistent flatness across large areas—a critical factor in flooring installations and repairs. Additionally, a damp-proof moisture meter like the Protimeter Surveymaster helps me monitor subfloor conditions over time, catching potential issues before they escalate. These tools are invaluable not only during installation but also for ongoing inspections, ensuring your floors remain level and stable for years to come.
Adopt Routine Maintenance for Longevity
Long-term results hinge on regular upkeep. For hardwood floors, I recommend gentle sweeping combined with occasional damp mopping using manufacturer-approved cleaners. Avoid harsh chemicals that can degrade the finish; instead, opt for pH-neutral solutions designed for wood. Tile floors require proper sealing—reapplying sealant every few years helps prevent grout deterioration and water infiltration. For concrete and self-leveling compounds, inspecting for cracks and applying controlled repairs extend their lifespan. Developing a maintenance schedule tailored to your flooring type ensures your investment maintains its beauty and structural integrity over decades.
Plan for Scaling and Future Prompts
As your projects grow, consider scalable solutions like modular vacuum systems such as the Festool CT MIDI, which simplifies cleanup without interrupting workflow. Using specialized tools like an electric grout saw can expedite renovation phases, especially in high-traffic areas. Staying updated on new coatings, sealers, and leveling compounds—like eco-friendly, fast-curing self-levelers—can significantly improve your capacity to handle larger or more complex jobs. Technology is swiftly advancing; I predict that integrated digital moisture monitoring and augmented reality overlays for layout visualization will become standard tools in the near future, streamlining both installation and long-term maintenance.
How do I maintain my flooring tools over time?
Proper maintenance of your equipment involves regular cleaning after each project—clear dust and debris from laser levels and vacuum systems—and periodic calibration, especially for precision tools like moisture meters. Store your tools in climate-controlled environments to prevent deterioration. For essential power tools, following manufacturer guidelines for lubrication and blade replacement ensures longevity. I’ve found that investing just a few minutes in routine upkeep saves money and maintains accuracy, making your tools reliable companions for numerous projects ahead.
For instance, ensuring your laser level is calibrated annually can prevent misalignment that affects your entire project. Moreover, upgrading to digital moisture meters with Bluetooth connectivity can facilitate long-term tracking of subfloor conditions—keeping your floors perfectly balanced from installation through years of use. Want to enhance your technique? Try regularly checking your leveling tools against known standards or calibration blocks; it’s a small step that yields significant results. Explore detailed insights on tool maintenance at this expert guide.
The Hidden Traps That Can Undermine Your Flooring Success
Throughout my years in flooring installation, I’ve realized that the biggest pitfalls often aren’t evident until it’s too late. For example, I once neglected to double-check environmental conditions before pouring self-leveling compound, only to find it set unevenly—a mistake that cost me hours of rework. These lightbulb moments led me to understand that meticulous planning and attention to detail are crucial, far beyond just mixing the right ratio or choosing the proper tools. Recognizing and avoiding these common traps can dramatically improve your results and boost your confidence in tackling complex projects.
Tools, Resources, and Secrets I Trust for Flawless Floors
Over the years, I’ve curated a set of go-to resources that consistently elevate my work. A high-grade laser level like the Bosch GSL2 helps me ensure perfect flatness, saving time and frustration. I also rely on detailed guides such as this article on tile and hardwood combinations to inspire my designs and address compatibility issues. For troubleshooting, this comprehensive leveling guide has been invaluable in understanding subtle yet critical steps that guarantee a professional finish. These tools and references have become my secret weapons, ensuring precision and peace of mind in my projects.
Your Next Move: Elevate Your Flooring Game
Remember, mastering floor leveling isn’t just about following steps—it’s about embracing continuous learning and refining your approach. Whether you’re a DIY enthusiast or a seasoned pro, the key is to stay curious, use the right tools, and never underestimate the importance of environmental control. Every perfect surface begins with a commitment to detail and a willingness to learn from each project. Dive into the resources and techniques shared here—your future self will thank you for the smooth, flawless floors you create. Now, tell me, have you ever faced a challenge with uneven subfloors or rapid-setting levelers? Share your experience below and let’s learn together.