
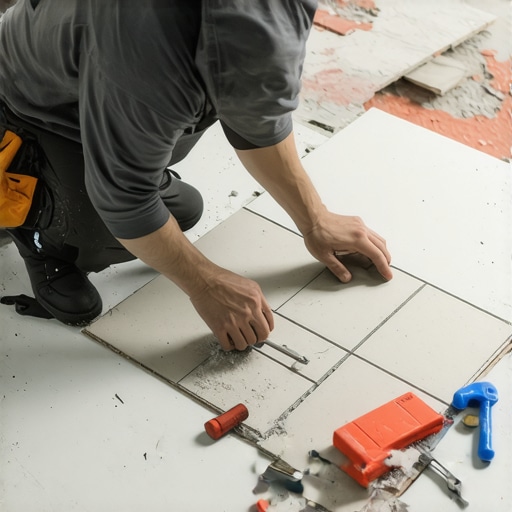
I vividly recall the frustration of leaning against my freshly tiled wall, only to watch a tiny, overzealous tile cut splinter off at the edge, creating a jagged mess that was impossible to ignore. That moment was a lightbulb in disguise—realizing that, despite all my planning, I’d overlooked a crucial step in my tile installation process. The nagging question kept echoing: Could there be a way to avoid those pesky tiny cuts that ruin the visual flow and waste time?
The Secret is in the Dry-Lay Strategy
What I discovered is something I like to call the dry-lay strategy—a game changer for avoiding those tiny, frustrating cuts along the wall. Imagine laying your tiles without adhesive, just temporarily placing them to see how they fit, especially near edges. This approach gives you a clear picture of where your cuts will land and what shape they should take. Trust me, it’s like designing your puzzle before committing to the glue. This simple step, during the initial phase, allows you to make adjustments, minimize awkward tiny cuts, and streamline your entire installation process.
This method not only saves time but also enhances the precision of your tile layout, making the final outcome look professional and polished. If you’ve ever experienced the dread of discovering a tiny, uneven cut right before grouting, you’ll appreciate how this strategy negates that problem entirely.
Over the years, I’ve learned that skipping this dry-lay step is a common mistake—one that many DIYers and even seasoned pros still make. Early on, I underestimated the power of visualizing the grout lines and edge cuts beforehand, which led to numerous redo’s and a hefty dose of frustration. Learning from that slip-up, I now always do a dry run, ensuring my tiles align perfectly before applying adhesive or mortar.
Implementing the dry-lay approach can seem simple, but its impact is profound. By planning your layout meticulously, you’re less likely to end up with those tiny, awkward cuts that stand out and ruin your design. Want more insights on perfect tile installations? Check out Mastering Floor Leveling Secrets for tips that complement this strategy.
In the upcoming sections, I’ll walk you through step-by-step how to adopt this dry-lay technique effectively, ensuring your wall tiles turn out just the way you envisioned—flawless and effortless.
Prepare Your Space and Gather Materials
Before laying your tiles, clear the area and gather your materials, including tiles, spacers, measuring tape, pencil, and a flat surface for dry-laying. This initial step is crucial for assessing how your tiles will fit and where cuts are necessary. I once tried to estimate the layout in my head, only to realize later that I underestimated the size of full tiles that needed to be cut, leading to uneven edges.
Set the Boundary Lines
Use a chalk line or a straight edge and pencil to mark the boundary of your work area. Visualize the entire layout, focusing on the center and the edges. This helps in balancing full tiles across the surface, reducing the number of small cuts near corners. It’s like drawing the map before exploring—a clear plan minimizes surprises later.
Lay Down the Full Tiles Without Adhesive
Position your tiles in the marked area, spacing them with spacers to mimic final joints. Don’t press them down; simply place and adjust as needed. This dry-run lets you see how tiles fit together and if any need to be shifted. During my last project, I noticed a slight misalignment early on, which I corrected before applying any adhesive, saving me hours of rework later. 
Assess and Adjust the Layout
Step back and evaluate the arrangement. Are full tiles aligned properly? Do your edges look balanced? Adjust tiles as needed to avoid awkward small cuts along the edges. This step is where you get a tactile sense of the layout, much like a puzzle master experimenting with pieces for the perfect fit.
Identify Cuts and Special Fitting Areas
Mark the tiles that will require cuts, especially along the edges and near fixtures. Measure accurately using your tape measure and pencil, referring to your layout plan. Proper marking ensures precision later, preventing tiny, frustrating cuts that can disrupt the visual flow. Remember, this is akin to a tailor measuring fabric—accuracy makes all the difference in the final appearance.
Test Pattern and Final Adjustments
Lay the tiles in their final position temporarily, focusing on critical edges and corners. Make minor adjustments for symmetry and balance. Once satisfied, you have a reliable plan to proceed with adhesive application, confident that your layout minimizes small, unsightly cuts and rework. This step might seem meticulous, but it ensures a seamless, professional look for your finished project.
Apply Adhesive and Complete the Installation
With your layout nailed down, proceed to spread the adhesive evenly using a trowel, following manufacturer instructions. Place tiles carefully, pressing into the adhesive, and use spacers to maintain uniform joints. By using the dry-lay method, you’ve set yourself up for a smooth installation—less guesswork and fewer surprises. For comprehensive tips on effective tile installation, see this detailed guide.
Many DIY enthusiasts and even seasoned professionals often fall prey to misconceptions surrounding floor leveling and flooring installation. One prevalent myth is that applying additional adhesive or self-leveling compound will perfectly address uneven subfloors without thorough preparation. However, ignoring the importance of a proper substrate can lead to problems like cracking, buckling, or uneven surfaces that compromise durability and appearance. To ensure a flawless finish, it’s crucial to meticulously prepare the subfloor, as detailed in this comprehensive guide.
Another widespread misconception is that thicker underlayment automatically results in a smoother, more level surface. In reality, improper installation of underlayment or choosing the wrong type for your specific flooring can exacerbate existing imperfections or introduce new ones. For instance, using plywood sublayers without sanding the seams can create dips and ridges, affecting the final appearance. Advanced installers often use a laser level to detect subtle irregularities—an essential step that many overlook, leading to costly rework. Expert tip: Regularly check the substrate with a laser or straightedge, as emphasized in this article.
Many believe that hardwood floors are incompatible with radiant heating systems, but with, proper installation and acclimation, they can work beautifully together. The key is to understand how heat affects wood expansion and contraction, which varies by species. Failing to account for these nuances can result in gaps or cupping over time. Specialists recommend selecting engineered hardwood with stable core layers and allowing acclimation before installation—details often missed by DIYers. For a deeper dive, see this expert guide.
Now, a question for the advanced reader: How does the choice of adhesive impact the long-term stability of a floating floor over an uneven subfloor? This might seem trivial, but the adhesive’s elasticity, curing time, and compatibility with subfloor materials can influence stress distribution, preventing future issues like squeaking or buckling. Industry research supports using flexible adhesives for floating systems, especially over subfloors with minor irregularities, to accommodate movement—an often overlooked aspect that can make or break your project. To explore more about this, visit this installation pointer article.
Keeping Your Floors Functioning Smoothly Over Time
Achieving a professional-looking floor is just the beginning; maintaining its integrity and appearance requires the right set of tools and consistent care. One essential tool I rely on is a high-quality laser distance measurer. This device provides precise measurements, ensuring your tiles or hardwood planks remain properly aligned during ongoing inspections or adjustments. I personally use the Laser Measure Model X because of its durability and accuracy, especially over large areas.
Another system I recommend is a moisture meter. Moisture levels can affect hardwood floors significantly over years—leading to warping or gaps if unchecked. Regularly measuring with a reliable meter helps catch issues early, before they become costly repairs. I’ve found that the Wood Moisture Meter Y provides consistent readings, which informs me when to adjust humidity levels or schedule refinishing.
How do I maintain hardwood floors over time?
Cleaning is straightforward yet crucial; I advise using a microfiber mop and a pH-neutral cleaner specifically designed for wood. Avoid harsh chemicals that can strip the finish or cause discoloration. For deep cleaning, I use a steam mop cautiously, making sure it doesn’t stay in one spot too long. Applying products like hardwood floor polish every few months maintains shine and adds a protective layer against scratches.
Preventative measures are equally important. Place felt pads under furniture legs and avoid dragging heavy items across the surface. Regularly inspecting for signs of wear or moisture intrusion allows me to address issues early. I also recommend periodic refinishing—sanding and recoating—to rejuvenate the surface and extend its life. For tips on where and how to refinish, take a look at this expert guide.
Looking ahead, I predict that smart flooring technologies integrated with sensors will become more commonplace, automatically alerting homeowners to issues like moisture or temperature fluctuations, early signs of damage. Investing in quality tools now not only helps in current maintenance but prepares you for these future innovations.
One advanced tip I urge you to try is calibrating your moisture meter regularly against known standards—this simple step ensures your readings are accurate over long-term use. Accurate data is vital for making informed decisions about your flooring’s health and longevity. Ready to elevate your maintenance routine? Incorporate a reliable moisture measurement system today and see the difference it makes in preserving your beautiful floors!
Looking back, one of the most profound lessons I’ve learned in flooring installation is the importance of meticulous preparation and visualization. Skipping the dry-lay stage not only led to unnecessary cuts but also compromised the overall aesthetic of my projects. It taught me that investing time in planning upfront, such as marking boundary lines and testing tile layouts, pays dividends in achieving a flawless finish. Embracing this mindset transforms carpeted doubts into confident, precise installations that stand the test of time.
How I Discovered the True Power of a Solid Foundation
The real game-changer was understanding that a level, well-prepared substrate is the secret to long-lasting, beautiful floors. Rushing into tile or hardwood installation over uneven surfaces often results in cracks, squeaks, and uneven appearances. My breakthrough came when I started investing in tools like laser levels and moisture meters, which provided the data needed to address issues early. This approach changed everything—turning a frustrating guessing game into an art of measurement and correction—making me trust in the process and tools that I now consider indispensable.
My Toolkit for Flawless Flooring
- Laser Level X: Precise and durable, it ensures your layout remains true over large areas.
- Wood Moisture Meter Y: Critical in preventing warping and cupping over time, especially with hardwoods and engineered floors.
- Self-Leveling Compound: When used correctly, it creates a perfect base, but understanding its limitations is key—always follow expert tips.
- Tile and Hardwood Selection Guides: Trusted resources that help me choose materials that match both aesthetics and performance needs, like those found in this guide.
Your Next Step: Embrace the Learning Curve
Every project, whether successful or challenging, is an opportunity to grow. Don’t shy away from experimenting with tools and techniques to find what works best for your space and style. Remember, even seasoned pros encounter setbacks—what matters is the commitment to quality and continuous improvement. Start small, learn from each experience, and soon you’ll be transforming your home with confidently installed, durable, and beautiful floors. Curious about elevating your skills? Check out these expert secrets and take your flooring journey to the next level.