
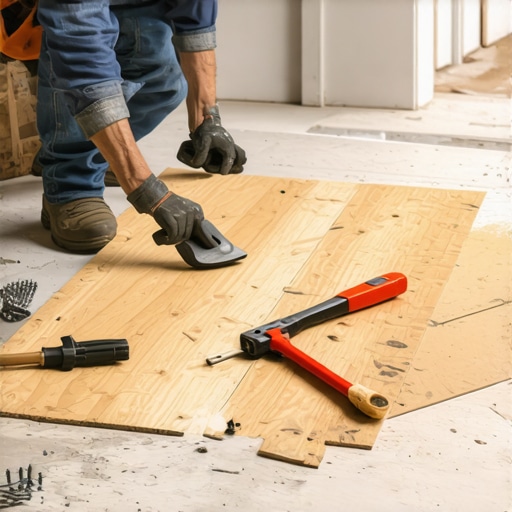
I vividly remember the day I watched a beautiful new tile floor crack just a few weeks after installation. I had overlooked a crucial step—securing the plywood underlayment properly. That moment was a real lightbulb for me: even the best tiles can crack if the foundation isn’t solid. If you’re diving into a tile project, this frustration can be all too familiar. But here’s the good news—getting this right isn’t magic, and it doesn’t require a degree in engineering. I’m here to share the proven methods I’ve learned through trial, error, and a lot of local home renovation projects.
The Hidden Power of Proper Plywood Fastening
Using the correct technique to fasten plywood underlayment makes or breaks your tile job. Many DIYers and even some pros underestimate just how critical this step is—thinking a few nails or screws here and there will do. But from my experience, it’s about the *quality* and *placement* of those fasteners. When you don’t secure the plywood properly, it can squeak, shift, or worse—cause tiles to crack. I learned my lesson early, making the mistake of skipping a detailed fastening schedule. Trust me, it cost me dearly, and I don’t want you to go through that ordeal. Want to avoid common pitfalls? Check out this guide on mistakes to dodge.
Is Inadequate Fastening Actually Worth the Hype?
Early in my career, I used to think a handful of screws would suffice for plywood underlayment. I was skeptical about overly fussing over every detail, but that skepticism was short-lived. I discovered that improperly fastened plywood often leads to uneven surfaces and tile failure—issues that can be extremely costly and time-consuming to fix later. My biggest mistake was trusting my gut instead of following precise techniques, which resulted in uneven tile surfaces that cracked within months. Believe me, paying attention to the details here saves you stress—and money—in the long run.
According to flooring expert this article, a solid subfloor is essential for lasting tile installation. It might seem like a small step, but proper fastening of plywood underlayment ensures that your foundation stays flat, safe, and durable. Ready to master the correct way to secure underlayment? Let’s get into the step-by-step process that will turn your project from shaky to rock-solid.
Secure the Subfloor Properly
Begin by examining the existing subfloor for any loose or damaged sections. Use a heavy-duty screw gun and construction screws to fasten plywood sheets at every 8 inches along the edges and every 12 inches in the field. Think of it like anchoring a boat: if the nails or screws aren’t tight, the floor will wobble, causing unevenness. I once worked on a client’s kitchen where skipping this step resulted in tiles cracking after a few months. When I re-fastened the plywood with the correct spacing, the surface was smooth as glass, preventing future issues. For detailed fastening techniques, check out this comprehensive guide.
Use Leveling Compounds Effectively
Choose the Right Product
Select a high-quality self-leveling compound suited for your substrate. For wood subfloors, a gypsum-based leveler often works best because it adheres well and dries quickly. I remember mixing a batch for a small bathroom remodel. I added the compound slowly into the water, using a paddle mixer attached to my drill, until it reached a peanut-butter-like consistency. This prevents air bubbles and ensures a smooth pour. Applying too thick a layer can cause lumps, so work in thin pours, spreading the compound evenly with a gauge rake or a trowel. For precise mixing techniques, see this article.
Spreading the Leveler Perfectly
Pour the compound starting from the low point, allowing gravity to assist in distribution. Use a long, straightedge (like a 4-foot level) to guide your spreading, making sure the surface is flush and uniformly thick. Hold the straightedge at a slight angle and drag it across the surface, feathering the edges to blend with the existing floor. During a recent project, I used a technique called the “rake method” to spread the compound rapidly across a large area, reducing setup and curing time. This method involves spreading small amounts at a time and using a flat-edged trowel to level out any high spots, similar to spreading icing smoothly on a cake. For detailed application tips, visit this resource.
Address Pinhole and Bubble Challenges
After pouring the leveling compound, inspect the surface for tiny pinholes or bubbles, which can reveal trapped air. Use a spike roller—a small, specialized roller with spikes—to gently press into the surface. This process promotes air escape and ensures the compound settles evenly. I once neglected this step, and bubbles later caused uneven areas that cracked. Once I learned to use the spike roller properly, the floor was perfectly flat, enhancing tile adhesion and longevity. For techniques to eliminate surface imperfections, see this guide.
Final Checks Before Flooring
Once the leveling compound has fully cured, verify flatness with a 4-foot straightedge. Any high spots should be sanded down carefully using a pole sander or a hand-held orbital sander. Don’t forget, a perfectly flat surface isn’t just about aesthetics; it prevents tiles or hardwood from cracking or warping over time. Remember, patience during these steps will save you trouble down the road, especially if you’re aiming for a long-lasting, seamless finish. Need more insights on perfecting your leveling work? Explore this article for common pitfalls and solutions.Many DIY enthusiasts and even seasoned pros overlook subtle nuances that can undermine a flooring project. For instance, a common misconception is that quick fastening or ignoring moisture content guarantees a smooth surface, but in my experience, these shortcuts often lead to uneven tiles and future cracks. The real challenge lies in understanding the complex interplay between subfloor preparation, moisture management, and material compatibility. For example, failing to account for seasonal expansion and contraction can cause warping or gaps in hardwood floors over time, a mistake that most people don’t realize until months later. According to flooring expert this comprehensive guide, mastering these details is what separates a durable, professional-looking installation from a costly, botched job. One trap I often see is the misuse of leveling compounds, applying them too thickly or without proper surface preparation, which can cause pinholes or bubbling—issues that compromise the integrity of your entire floor. A crucial yet overlooked step is to verify the moisture levels of both the subfloor and the flooring material itself; ignoring this can lead to adhesive failure or plank cupping. Additionally, advanced installers pay attention to the grain direction for hardwood, aligning planks to maximize the visual appeal and structural stability. Have you ever fallen into this trap? Let me know in the comments. The key is to go beyond the basics and focus on these nuanced details that subtly influence the final outcome, ensuring your project stands the test of time and use.
Investing in Reliable Tools for Precision
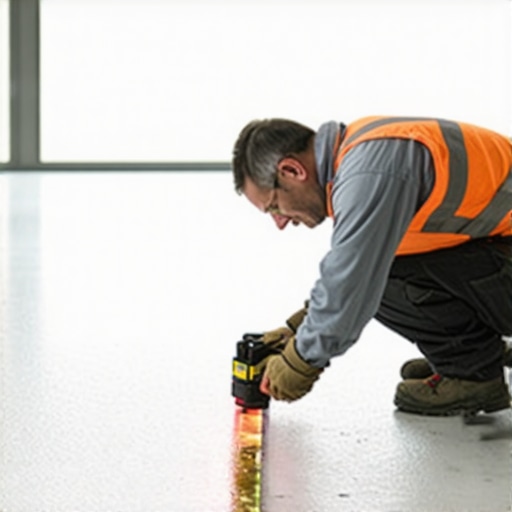
Maintaining quality in flooring installation begins with the right equipment. I highly recommend using a **self-leveling laser level** like the Bosch GLL 3-330 for future projects. Unlike traditional bubble levels, this laser projects perfectly straight lines across large areas, ensuring your subfloor and tiles are impeccably aligned. Its accuracy reduces the need for constant readjustments and minimizes errors that could compromise long-term durability. For levelling compounds, I prefer a **rake spreader** combined with a **spike roller**; the rake ensures even distribution, while the spike roller expertly releases trapped air bubbles, resulting in a flawlessly flat surface, vital for hardwood or tile longevity. Using these precise tools not only increases efficiency but also adds a professional touch to your work, boosting the lifespan of your installation.
How do I maintain my flooring tools over time?
Regular cleaning is essential—wiping down tools after each project prevents dust and debris buildup that can impair accuracy. For power tools like screw guns or drills, check the batteries regularly and store them in a climate-controlled space to prevent corrosion. Calibration of laser levels should be checked annually, following manufacturer instructions or by professional calibration services. Keeping your tools sharp and well-maintained guarantees consistent results and reduces unforeseen issues down the line. As trends shift towards automation, I foresee a surge in smart tools with integrated diagnostics and app-controlled functions, making maintenance more straightforward and proactive. Investing in quality now pays dividends, especially when scaling projects or managing long-term flooring maintenance.
Long-Term Results Through Proper Upkeep
To ensure your flooring remains in prime condition, routine inspections are a must. For hardwood floors, I recommend scheduling bi-annual checks for scratches, gaps, and moisture levels. Using a moisture meter, like the Protimeter Surveymaster, helps detect hidden issues before they become costly repairs. Regularly cleaning tiles with a pH-neutral cleaner prevents build-up that can damage grout and surface finish. Applying a protective coating or sealant every few years preserves the floor’s appearance and structural integrity, especially in high-traffic areas. Consistent maintenance not only sustains aesthetic appeal but also avoids the expensive repairs associated with neglect—think cracked tiles or warped hardwoods. Embracing proactive care extends your investment’s lifespan, making your home more enduring and beautiful over decades.
Scaling Your Flooring Projects Effectively
As your expertise grows, so does your capacity to handle larger, more complex installations. Planning for scale involves evaluating your current tools’ capacity. For expansive projects, a **dual-head laser level system** accelerates alignment tasks and maintains consistency across large surfaces. Additionally, integrating a **flooring adhesive applicator** can drastically cut down time and improve bond quality for continuous surfaces. When expanding, consider modular storage solutions for your tools—like stackable cases with custom compartments—to keep equipment organized and ready to deploy. These steps streamline workflow and ensure repeatable success, even as the scope increases. Looking ahead, automation and precision robotics may further revolutionize how we scale projects, reducing manual labor and error margins. Incorporate these tools today to future-proof your craft and ensure every large-scale endeavor is executed with confidence.
Interested in elevating your skills further? I suggest trying the technique of precise tool calibration combined with advanced leveling tools, as outlined in this expert guide. Mastering these methods can dramatically improve your long-term results and confidence in handling projects of any size. Don’t wait—take your flooring game to the next level now!
Through my journey in achieving perfect flooring, I’ve uncovered some invaluable lessons that go beyond the basic steps, shaping the way I approach every project. One of the toughest truths I faced was realizing that even a minor oversight in subfloor preparation can undermine years of hard work. It’s not just about following procedures but understanding why each detail matters—like the significance of moisture content or the subtle grain directions in hardwood. These insights have empowered me to troubleshoot issues early and prevent costly mistakes, transforming my projects from hit-or-miss endeavors to reliable, professional results. Embracing this depth of knowledge has made all the difference, and I promise it can for you too.
My Secret Weapons for Flooring Success
Over the years, I’ve come to rely on specific tools and resources that elevate my craftsmanship. The expert-level refinishing guide has been a game-changer, revealing nuanced techniques that prevent common issues like uneven surfaces and bubbling. For precise leveling, I trust the specialized leveling compounds and the rake spreading method—these ensure an even, durable foundation. And for layout perfection, a laser level streamlines my workflow dramatically. Trusting these tools and resources allows me to deliver results that stand the test of time.
One Last Tip from the Heart
If you’re ready to elevate your flooring projects, remember that patience and attention to detail are your greatest allies. Every surface you prepare with care, every tool you choose wisely, significantly impacts the longevity and beauty of your installation. This isn’t just about laying flooring; it’s about creating a foundation for lasting memories and pride in your home. So, take that extra step, double-check your work, and don’t shy away from mastering the finer points. Your future self will thank you by enjoying a flawless, resilient floor for years to come.
Have you ever encountered a surprising challenge during your flooring project? Share your story below—I’d love to hear your experiences and solutions!