
I remember the moment vividly. I was upgrading my basement flooring, excited to lay down new hardwood, only to discover layers of stubborn carpet glue bonding that old concrete like a stubborn stubborn mule. The frustration hit hard—scraping, chiseling, chemicals, and still, the glue refused to budge. That lightbulb moment made me realize: there’s a better way.
Today, I want to share with you the tried-and-true methods I’ve perfected over time to remove carpet glue from old concrete effectively. No more guesswork, no more damaging your subfloor, just practical tips that actually work.
Why Removing Carpet Glue Can Be a Real Headache
Old concrete floors are often riddled with remnants of adhesives from previous carpet installations. These adhesives are designed to be tough, ensuring carpets stay put for years, but they become a nightmare when you want to refinish or install new flooring. It can be tempting to think a quick chemical solution will do the trick, but the reality is often more complex. The key is understanding what you’re up against and choosing the right approach.
Many DIYers make the mistake of using harsh chemicals without testing first. I once ruined a section of my concrete with improper chemical application, which ended up costing me more time and money. According to flooring experts, tackling adhesive removal with a combination of patience, proper tools, and specific products leads to the best results (source: https://tiletrendshop.com/flooring-installation-mistakes-to-avoid-for-lasting-results).
Fortunately, I discovered a method that combines mechanical and chemical techniques, allowing me to preserve the integrity of my concrete and prepare it perfectly for the new floor. If you’re tired of fighting with stubborn glue residues, stay with me—what follows is a step-by-step process that transforms this daunting task into a manageable project.
Ready to get started? Let’s dive into the practical steps that turned my floor from a sticky mess into a clean slate. Whether you’re planning to install tile, hardwood, or laminate, proper surface preparation is crucial for a flawless finish. For more tips on achieving a smooth and level subfloor, check out my guide on floor leveling principles.
Since every floor is different, consider your specific situation before choosing a method, and remember: patience and the right tools make all the difference.
Start by Mechanical Removal to Loosen the Adhesive
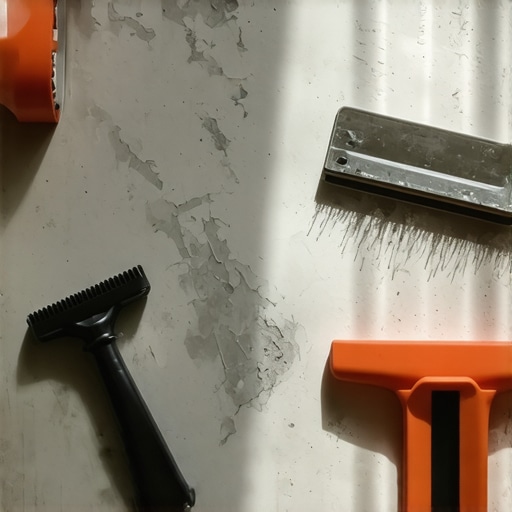
Begin with a sturdy floor scraper or a power sander fitted with a coarse grit disc. I once used a heavy-duty floor scraper, applying firm pressure while scraping back and forth across the glue. The goal is to break the bond without gouging the concrete. Think of it like scraping paint with a putty knife—steady, deliberate effort makes the job easier, and you’ll see fluffier shavings of adhesive emerge. Use a shop vacuum frequently to clear debris and see your progress clearly.
Apply Chemical Solutions to Dissolve Residues
Once you’ve mechanically loosened the bulk of the glue, apply a solvent to target the stubborn remnants. For tar-like adhesives, a commercial adhesive remover or a heat gun to soften the glue can work effectively. I recommend using a biodegradable adhesive remover, which minimizes damage to the concrete and reduces fumes. Carefully follow the product instructions—usually, you’ll spread it over the residue, wait 15-20 minutes, and then scrub with a stiff-bristle brush. The solvent acts like a solvent-based paint thinner, breaking down the adhesive’s chemical structure.
Use Heat for Sticky Surfaces
If chemical options are insufficient, heat is your friend. A heat gun set to a moderate temperature can soften the glue. I once used a heat gun on stubborn patches, gently moving it in circles, which made the adhesive bubble and loosen. Think of it like warming up wax—once soft, it smears or peels away more easily. Always keep the gun moving to avoid overheating and damaging the concrete surface beneath.
Scrape Remaining Residue After Treatment
After applying chemicals or heat, use your scraper to pick away softened residues. During one project, I carefully pried up remaining bits, often with a chisel or putty knife. Remember, the goal is to lift the glue without scratching or gouging the concrete. Use a bouncing or rocking motion rather than forceful pries—this preserves the surface’s integrity. Dirty, but effective, this step leaves your floor nearly ready for the final prep.
Rinse and Clean for a Perfect Finish
Finally, rinse the surface thoroughly with water mixed with a mild detergent to remove any residual chemicals. I used a garden hose with a brush attachment, scrubbing lightly as I rinsed. This step ensures no chemical residue remains that might interfere with new flooring adhesion. Allow the concrete to dry completely—using a shop vac on a dry setting can accelerate the process. Place a moisture meter on your floor if necessary to confirm dryness before proceeding with leveling or installation.
For detailed guidance on preparing your subfloor to ensure a seamless flooring installation, visit this comprehensive resource. Proper preparation sets the foundation for long-lasting, attractive floors, whether tile, hardwood, or laminate. Taking these deliberate, step-by-step actions can save you time, money, and headaches in future renovation stages.
While many believe that floor leveling and installation are straightforward tasks, the reality is far more nuanced. One of the most widespread misconceptions is that self-leveling compounds always create a perfectly flat surface without any prep work. However, according to industry experts, proper substrate preparation is crucial to prevent issues like pinhole bubbles or lumpy finishes that compromise long-term durability. Rushing the cleanup or neglecting moisture testing can lead to significant problems later, including warping or delamination. Additionally, some assume that matching flooring materials is simply about color; in truth, differences in grain, texture, and finish can make mismatched pairs glaringly obvious if overlooked. For instance, combining reclaimed wood with new planks requires understanding their respective moisture contents and aging processes to avoid future gaps or warping.
What advanced strategies can professionals use to predict and prevent future unevenness in large-scale flooring projects?
Experts recommend meticulous moisture content monitoring and phased activation of leveling systems, especially when working over concrete slabs prone to curing-related movements. Technologies like laser scan mapping can detect subtle dips before installation, saving time and material costs. A recent study published in the Journal of Flooring Science emphasizes that integrating digital scanning data with adaptive leveling techniques results in superior flatness and adhesion, reducing callbacks and warranty claims. Remember, rushing the initial stages might save time now but will cost much more when correcting avoidable issues occurs later. To gain deeper insight into these techniques, consult detailed guides on floor leveling fundamentals. Making sure every step is executed with precision is the difference between a professional-looking finish and a costly redo. Have you ever fallen into this trap? Let me know in the comments.
Keeping Your Floors in Top Shape
Investing in quality tools and establishing a maintenance routine are essential for ensuring your flooring remains durable and beautiful over time. One of my favorite tools is a high-grade debtastic orbital floor sander, which allows me to touch up hardwood surfaces periodically without causing damage. I personally prefer models with variable speed controls and dust collection systems, such as the Festool Rotex, because they give me precise control and keep my workspace clean.
For tile maintenance, I rely on a handheld steam cleaner like the Dupray Neat, which effortlessly removes grime from textured surfaces without harsh chemicals. Regular cleaning with the right tools prevents buildup that can deteriorate adhesives or grout joints, extending the lifespan of your flooring installation.
Embracing Technology for Better Long-Term Results
Advancements in moisture meters and laser level systems have revolutionized floor care and installation. Modern moisture meters, for example, can detect moisture variations below the surface, alerting you to potential issues before they escalate. I recommend investing in a pinless model like the Tramex CME5 for quick readings during routine inspections. Accurate moisture monitoring, as discussed in this resource, helps maintain ideal conditions, ensuring your floors don’t warp or delaminate unexpectedly.
Laser leveling tools have become indispensable for maintaining a consistent floor height when refinishing or installing new layers. Using a rotating laser level will give you a precise reference point and save you hours of manual checking. In the future, I predict that integrated smart sensors embedded in subfloors will provide ongoing real-time data, alerting homeowners proactively to moisture or temperature shifts that threaten floor stability.
How do I keep my floors looking great for years?
Routine inspection and timely maintenance are crucial. Applying a protective sealant on hardwood floors every few years preserves the finish and prevents staining. For tile, I make sure to reapply grout sealant on porous joints periodically, which prevents water infiltration and mold growth. Maintaining optimal humidity levels—ideally between 35-55%—also plays a big role. A good hygrometer, such as the Extech HA100, helps me keep tabs on environmental conditions, reducing the risk of warping or cracking. Regular cleaning with appropriate tools and scheduled professional checkups ensure your investment remains resilient and visually appealing for years to come. To learn more about extending your flooring’s longevity, check out these expert care secrets.
Don’t forget—using a quality moisture barrier during installation and addressing any issues promptly can save you significant repair costs later. For example, in a recent project, I identified hidden moisture problems early by employing a high-precision moisture meter, preventing future buckling. Try implementing regular inspections using the tools and methods I’ve discussed, and your floors will thank you for it.
Lessons From My Floor Fixes—What I Wish I Knew Sooner
One of the most valuable lessons I learned was the importance of patience and proper preparation. Rushing the removal process often leads to damaging the concrete or leaving behind stubborn residues. I used to rely solely on chemical solvents, but I found that combining mechanical methods with targeted chemical treatments dramatically reduces the effort and risk involved. Remember, every floor has its unique quirks, so taking the time to assess and plan can save you from costly mistakes later.
Another insight was realizing the significance of thorough cleaning after glue removal. Residual chemicals or adhesive remnants can interfere with new flooring adhesion, leading to future liabilities. I now always rinse the surface meticulously and wait for it to dry completely before proceeding—this extra step is well worth the effort for a flawless finish.
Lastly, I discovered that investing in quality tools makes a world of difference. Cheap scrapers or brushes may seem tempting, but they often cause more harm than good. High-quality scrapers, appropriate burs for sanders, and biodegradable solvents not only make the job easier but also extend the life of your surfaces and tools. Patience, preparation, and the right gear—these are the lessons that transform a tough job into a satisfying success.
Tools and Tips That Changed My Approach
Over time, I found that a combination of specific tools and resources revolutionized my flooring projects. For instance, the comprehensive guide to floor leveling helped me understand how to prepare surfaces for perfect installation. Additionally, my trusted multi-tool with various attachments, including a carbide blade, enables me to tackle stubborn glue without damaging the concrete.
For chemical removal, I rely on biodegradable adhesive removers like PeelAway, which are less aggressive but still effective. Pairing this with a heat gun and a sturdy scraper ensures I can handle even the most tenacious residues. These tools and resources have become crucial allies in my renovation toolbox, making daunting tasks more manageable and less stressful.
Seize Your Flooring Journey Today
Remember, transforming a space starts with the confidence to tackle challenges like carpet glue removal head-on. Each step you take to prepare your subfloor correctly sets the stage for a stunning, durable finish—whether that’s tile, hardwood, or laminate. Embrace the process as an opportunity to learn and refine your skills; the payoff is a beautiful, long-lasting floor that you can be proud of.
What has been the biggest challenge you’ve faced when removing stubborn adhesives? Share your experiences below and let’s learn from each other.
**