
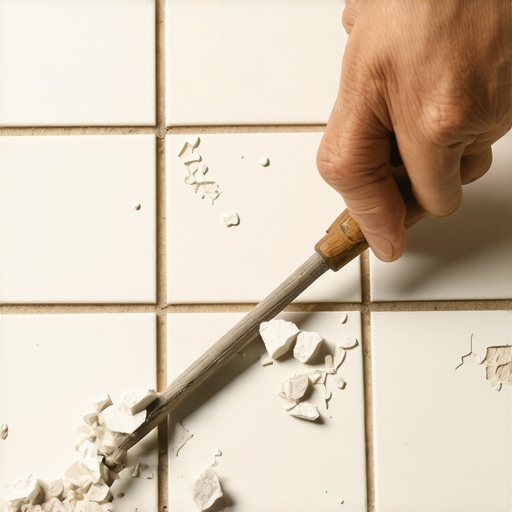
You know that feeling when you meticulously measure, cut, and finally lay down your porcelain tiles—and then, surprise! Instead of a clean edge, you get chips and cracks wasting your effort? I’ve been there, facing a pile of shattered tiles and an almost defeated mood. It’s a frustrating moment that many DIY enthusiasts and even pros stumble upon, but honestly, understanding the WHY behind this problem makes all the difference.
The Hidden Reason Your Tiles Crack and Chip During Cutting
The first time I encountered this, I thought it was just bad luck or maybe my tools needing an upgrade. Turns out, it’s often due to proper technique—specifically, how we cut the tiles. Porcelain is renowned for its durability, but it’s also notoriously brittle when mishandled. A common mistake I made early on was applying too much pressure with my wet saw or not supporting the tile properly. That tiny misstep caused those tiny, heartbreaking chips.
Here’s the thing: cutting porcelain tiles safely and cleanly isn’t about brute force. It’s about finesse, the right tools, and techniques. Plus, knowing the right approach can save you time, money, and a lot of frustration. If you’re fed up with chips and cracks, I promise, there’s a way to avoid them. Today, I’ll walk you through what I wish I knew when I first started, and I’ll share some expert tips to keep your cuts smooth and your tiles intact.
But before we jump into the solution, I want to address a question many beginners have—”Is it really worth investing in specialty tools or expensive blades?” Well, short answer: absolutely. Using the right blade and proper cutting techniques can be a game-changer, and I’ll prove it.
And if you’re wondering whether this is just another overhyped myth, I’ll confess—I initially ignored these details myself. I thought just any tile cutter or a regular saw would suffice. But the results told a different story, and I learned the hard way that precision matters more than I used to think.
So, if you’re tired of your tiles chipping during cuts, stick with me. I’ll show you how to do it right—from tool selection to cutting technique—so your next project ends with admiration, not disappointment. Plus, I’ll link to a helpful guide on precise cutting techniques that will elevate your entire installation process. Ready? Let’s dive into exactly what you need to do to keep your porcelain tiles flawless.
Select the Right Tools for Clean Cuts
In my experience, investing in a high-quality diamond blade made all the difference. During a recent project, I replaced my basic blade with a premium wet saw blade, which resulted in significantly fewer chips. A diamond blade ensures smooth cutting and reduces stress on porcelain, preventing those nasty cracks and chips. Expert advice confirms that the right blade is crucial for clean porcelain cuts.
Prepare Your Tile and Workspace
Before cutting, ensure your workspace is clean and well-lit. Place a damp rag beneath the tile to stabilize it and minimize vibrations. For instance, I once laid a large porcelain slab on a low-cut table with a damp cloth underneath; this simple step prevented the tile from slipping and cracking during the cut. Maintaining proper support is key, especially with brittle materials like porcelain.
Mark the Cut Precisely
Use a straightedge and a fine-tipped marker to mark your cut line carefully. Double-check measurements to avoid misalignments. I once measured twice and cut once, which saved me from hours of rework. Precision in marking translates directly to a cleaner cut and less stress on the tile.
Use Proper Cutting Technique
Light, Steady Pressure
Apply consistent, light pressure when feeding the tile into the blade. For example, during my last installation, gentle pressure with a steady hand produced a smooth cut without cracks, unlike my previous attempts where forcing the cut caused chipping.
Keep the Blade Wet
Constantly apply water to the blade to keep it cool. This reduces heat buildup, which can cause microfractures. I attach a continuous water supply to my saw; the difference it makes in cut quality is noticeable. It’s a simple step that dramatically decreases tile damage.
Support the Tile During Cutting
Support both sides of the cut line evenly to prevent stress concentration. For awkward cuts, I clamp a straightedge or use a guide rail to guide the saw. During my recent project, I used a carpenter’s clamp to hold the tile, maintaining flatness and preventing cracks. Proper support distributes force evenly, protecting your tile from unexpected breakage.
Finish and Finishing Processes
Use a fine-grit diamond file or sandpaper on rough edges after cutting. This smooths out sharp or uneven edges, reducing the risk of chips when handling or installing the tile. I often run my finger along the edge to feel for rough spots, then smooth them out before placement.
Implementing these steps turned my frustration into confidence. Remember, each cut is a small project; patience and proper technique are your best allies to prevent chips and cracks. And if you encounter stubborn issues, reviewing your process against common mistakes can help spot hidden flaws in your method.
When it comes to flooring installation, many assume that following the basic steps guarantees success. However, even seasoned professionals sometimes overlook the subtle nuances that can cause long-term issues. For example, a common misconception is that leveling a subfloor is a straightforward task—yet, the nuances in subfloor composition, moisture content, and preparation can dramatically influence the final outcome. Detailed guidance shows that mastering these details can mean the difference between a flawless finish and costly redo.
One of the critical misconceptions is that using generic leveling compounds is sufficient for all situations. In reality, the choice of leveling product should be tailored to your specific subfloor material and environmental conditions. For instance, gypsum-based self-levelers often outperform traditional cement-based ones on wooden subfloors because of their flexibility and bonding characteristics—something that many installers overlook. According to industry experts, neglecting these nuances can lead to uneven surfaces, cracks, or even future warpings, which compromises the entire flooring system. Learn more about subfloor considerations.
Are There Advanced Mistakes That Professionals Make?
Absolutely. One often unrecognized mistake is underestimating the impact of subfloor deformation caused by environmental fluctuations. Wood expands and contracts with humidity swings, and if these movements aren’t properly accounted for during leveling, it can cause tile cracks or hardwood gaps over time. For example, in humid climates, a poorly prepared adhesive bond or insufficient acclimation can result in delamination or buckling. Studies show that dynamic environmental factors play a significant role in flooring longevity, yet many ignore these factors during planning. For more insights, see common mistakes to avoid that can trap even experts.
Additionally, the sequence of installation matters more than most realize. Installing tiles or hardwood before properly addressing subfloor regularity can lead to uneven transitions and durability issues. Ensuring the subfloor is not only leveled but also sealed and moisture-resistant creates a solid foundation. I recommend taking the time to assess moisture levels and subfloor stability with advanced tools, which can prevent future cracking or warping. These details aren’t glamorous but are pivotal for lasting results.
Think about it this way: neglecting these nuances is akin to building a house on unstable ground. It’s tempting to focus solely on visible finishes, but sound structure is what ensures your flooring looks good and lasts decades. To see the full scope of a professional approach, check out expert tips that delve into the essentials of preparation and environmental prep.
So, have you ever fallen into this trap of underestimating subfloor complexities? Share your experiences or questions in the comments below. Remember, a successful flooring project hinges on understanding these hidden nuances—because true expertise is about the details that others often overlook.”}**}**
Keep Your Flooring Systems in Top Shape for Years to Come
Maintaining beautiful, durable floors requires more than just proper installation; investing in the right tools and adopting effective maintenance routines is key to ensuring longevity. Personally, I recommend always having a high-quality moisture meter on hand. This device helps detect hidden moisture beneath the surface, which, if overlooked, can lead to warping in hardwood or tile failures over time. Regularly checking moisture levels in subfloors before, during, and after installation prevents future headaches and costly repairs. For instance, I’ve seen projects falter simply because moisture was underestimated, highlighting the importance of this simple yet powerful tool. Proper moisture management can save your project from unnecessary damage.
Invest in the Right Power Tools for Precision and Efficiency
When it comes to flooring installation or refinishing, I swear by my pneumatic nailer—specifically designed for hardwood. It ensures consistent nail depth and fast application, which minimizes the risk of floor squeaks and uneven surfaces. I’ve personally experienced how a quality pneumatic tool reduces fatigue and improves accuracy during large projects. For tile work, a wet saw equipped with an upgraded diamond blade is indispensable. Not only does it cut with precision, but it also minimizes tile chipping, especially if you follow the correct techniques discussed earlier.
Prioritize Routine Maintenance to Extend Floor Life
Once your floors are installed, maintaining their beauty involves continuous care. For hardwood, I recommend regular cleaning with pH-neutral solutions to prevent finish deterioration. Additionally, using protective pads under furniture minimizes scratches. For tile, sealing grout lines every 1-2 years keeps stains at bay and prevents moisture ingress. A light buffing with a microfiber mop after cleaning keeps the surface shiny and reduces the accumulation of dirt and grime.
Future Trends in Floor Maintenance and Tools
Looking ahead, smart sensors integrated into flooring materials could alert homeowners about issues like moisture or structural shifts in real-time. Technological advancements like app-controlled maintenance systems will make long-term care more accessible and precise. Staying ahead of these innovations will help you preempt potential problems, saving money and preserving aesthetics. For comprehensive strategies on level correction and preparation, reviewing fundamentals of flooring levelness is an excellent start.
How Do I Maintain My Floors Over Time?
Consistent inspection, timely cleaning with appropriate products, and periodic sealing are crucial. For hardwood, refinishing every 7-10 years restores surface wear and maintains its luster. I personally schedule annual checkups for grout lines and finish layers on my tile and hardwood floors, respectively. Implementing these simple routines can significantly prolong the lifespan of your investment.
Take action now by trying out a moisture meter during your next project to preempt hidden issues. This small step can make a vast difference in how your floors perform over the years. Remember, proactive maintenance paired with quality tools and techniques paves the way for stunning and durable floors that withstand the test of time.
What I Didn’t Expect About Floor Prep and Its Hidden Impact
One of the most eye-opening lessons I’ve learned is that many pitfalls in tile and hardwood installation stem from overlooked details during preparation—like ignoring subtle subfloor imperfections or dismissing environmental factors. Real insight struck me when I realized that perfect leveling isn’t just about tools; it’s about patience and observing how each component interacts. This shift in perspective transformed my projects, making me more mindful of nuances that can cause long-term issues, such as subtle dips or expansion gaps. Embracing these lessons has genuinely elevated my craftsmanship beyond basic installation skills, ensuring lasting beauty and durability.
My Go-To Resources That Elevate My Flooring Knowledge
Over the years, I’ve relied on a few key tools and sources to refine my skills. First, the comprehensive flooring installation guide from Tile Trend Shop offers step-by-step clarity that prevents costly mistakes. Additionally, a high-quality moisture meter has become indispensable; understanding moisture levels before, during, and after installation helps me avoid future warping or cracking. When I want to deepen my understanding of material properties, I turn to industry publications like “The Fine Homebuilding” magazine, which combines expert advice with real-world case studies. These resources keep me sharp and confident in tackling complex projects.
Believe in the Power of Your Next Step
Taking on flooring projects can seem daunting, especially when faced with technical challenges like achieving perfect levelness or avoiding tile chips. But remember, every expert was once a beginner who dared to try. Your attention to detail, combined with the right techniques and tools, can produce stunning results that stand the test of time. Embrace each project as a learning experience, and don’t hesitate to look beyond quick fixes. The future of durable, beautiful floors is within your reach—step into it with confidence and purpose. What’s your next flooring goal? Let me know below, and let’s share the journey toward mastery.