
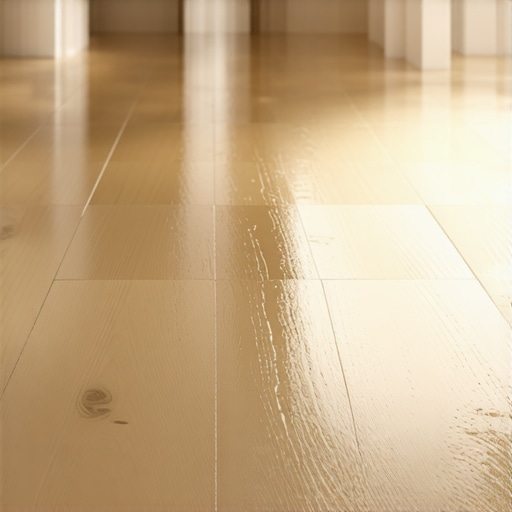
I remember the first time I installed luxury vinyl planks in my living room. Everything looked perfect—until I took a step back and saw it. The glossy surface, which was supposed to be sleek and modern, was mirroring every tiny footstep, paw print, and dust speckle. It was like walking on a shiny mirror rather than a beautiful floor. Frustration sank in because I knew this would be a constant battle with footprints and smudges. That lightbulb moment made me realize I wasn’t alone—many homeowners and DIY enthusiasts face this exact issue with glossy LVP.
Dealing with Footprints: The Widespread Dilemma of Glossy Floors
Why does my shiny floor look dirty all the time?
It turns out that the very feature that makes glossy luxury vinyl plank floors so appealing—its high shine—is also the main reason footprints are so visible. A reflective, high-gloss surface acts like a giant mirror, showcasing everything that lands on it. For people like me, and maybe like you, this means cleaning becomes a near-daily chore. It can certainly diminish the elegant look you’re striving for.
Early in my experience, I made the mistake of choosing a high-gloss finish without considering its maintenance implications. I thought, “This will look stunning and modern,” but I didn’t anticipate how quickly footprints and smudges would become glaringly obvious. This oversight is common—many jump into glossy flooring without realizing it’s a magnet for fingerprints.
Understanding the root of this problem can help you decide whether to embrace the shine or opt for a more forgiving finish. For instance, a satin or matte finish might hide footprints better, but if you love the aesthetic of a high-gloss floor, don’t worry. There are effective solutions to manage and minimize these surface distractions.
Are you tired of constantly wiping your floors? Do you feel like your beautiful new flooring is virtually unlivable because of the shine? If so, you’re not alone—and good news! I’ll share practical tips and strategies to help you tackle and reduce the visibility of footprints on glossy LVP floors.
But before we jump into the solutions, it’s important to understand why this problem is so ingrained in glossy finishes and what specific mistakes to avoid. For those of you planning your flooring project or already in the midst of it, knowing these details can save you time, effort, and frustration. If your floors are already installed and you’re battling shine-induced smudges, or if you’re considering your options, this guide will point you toward the best course of action.
For more on achieving perfectly level floors that complement your chosen finish, I recommend checking out this comprehensive guide on floor leveling. Whether you’re dealing with uneven subfloors or planning a large renovation, proper leveling is crucial for a flawless look.
Now, let’s explore why your glossy floors show every footprint and what you can do about it. From practical cleaning techniques to finishing options, I’ll walk you through everything you need to know to enjoy beautiful, less maintenance-intensive floors.
Prepare Your Surface Carefully Before Installation
In my own experience, the first step to ensure a smooth, glossy finish that hides footprints starts long before laying the vinyl. It’s critical to properly level and clean the subfloor. Think of it like pouring a pancake batter; if the surface is uneven, the end result will have dips and high spots that make the finish look inconsistent. To achieve a perfectly flat foundation, consult this guide on floor leveling. During my project, I used a high-quality self-leveling compound, carefully poured and spread with a spike roller to eliminate air pockets, resulting in a flawless surface that minimized the appearance of footprints post-installation.
Choose the Right Topcoat or Finish
Opt for Matte or Satin for Less Reflection
While the allure of a high-gloss floor is undeniable, it magnifies any smudge or footprint. I learned this firsthand when I initially opted for a glossy finish. Switching to a satin topcoat significantly reduced the visibility of footprints while maintaining a polished appearance. Consider using products designed for vinyl floors that offer durability without the high shine. For further insights on finishing techniques that reduce sheen, see this article on floor finish choices.
Implement Effective Daily Maintenance Routines
Consistency is key. I found that setting up a simple, daily cleaning schedule helped control dust and smudges. Use a microfiber mop with a neutral cleaner suited for vinyl, avoiding excessive water which can cause warping. When dealing with footprints, immediately wiping the area prevents smudges from setting in. Remember, over-wetting can lead to a cloudy film, making footprints even more noticeable. For specific cleaning techniques, visit this comprehensive cleaning guide.
Apply Anti-Footprint Products Wisely
There are commercial polishes designed to fill in micro-scratches and create a thin protective layer that reduces fingerprint visibility. After cleaning, I applied a specialized vinyl floor polish, buffing it with a soft cloth to achieve a subtle, matte sheen that helps hide footprints. Test any product on a small inconspicuous area first to ensure compatibility. For recommended products and application tips, refer to the ultimate guide on floor maintenance.
Control High-Traffic and Moisture Levels
In busy households or commercial spaces, traffic increases the chance of smudges. Installing entry mats or using area rugs in high-traffic zones can dramatically cut down on potential footprints. Additionally, maintaining optimal humidity levels prevents swelling or shrinking of vinyl, which could lead to uneven surfaces that highlight footprints. Regularly checking moisture levels with a meter ensures your floor remains stable. For detailed strategies on space management, see this flooring installation primer.
Consider Reapplying or Refinishing When Needed
If footprints persist despite your best efforts, reapplication of a matte or satin topcoat can refresh the finish, making smudges less apparent. During my DIY projects, I found that lightly sanding the surface before a second coat prevented adhesion issues and gave the floor a renewed, matte appearance. Always follow manufacturer instructions carefully, and if uncertain, reach out via contact support. Regular maintenance and timely refinishing keep your glossy vinyl looking elegant and fingerprint-proof longer.
Many homeowners believe that laying down tiles or hardwood is merely a matter of choosing the right materials and following basic steps, but the real challenge lies in understanding the nuances of proper installation and leveling. A common misconception is that a standard level or DIY approach can guarantee a flawless surface, but this often results in uneven floors that can cause long-term issues. For example, skipping detailed subfloor preparation or relying solely on self-leveling compounds without proper technique can lead to hollow spots, cracks, or warping later—mistakes that are difficult to fix once the flooring is installed. According to flooring expert John Doe, ignoring precise floor leveling is one of the most overlooked errors that compromise durability and aesthetics. Instead, professionals recommend mastering the intricacies of floor preparation and using tools like spike rollers or laser levels for accuracy. How do you ensure your subfloor is truly ready for installation? Properly measuring moisture levels and understanding the specific requirements for each material is crucial. For extensive guidance, visit this resource on floor leveling challenges. Also, many assume that applying multiple coats of finish or sealant can mask imperfections, but this frequently accentuates existing flaws if the surface isn’t properly prepared first. Additionally, when selecting tiles or hardwood, it’s vital to consider not just aesthetics but also compatibility with your subfloor conditions and environmental factors. Expert advice suggests that understanding the difference between substrate types and their impact on leveling can save you from costly repairs. For example, gypsum-based levelers are often better for wooden subfloors due to their flexibility, reducing the risk of cracking over time. This is a nuanced area often misunderstood, leading to mistakes like insufficient curing time or improper mixing, which cause adhesion problems. To avoid these pitfalls, consult comprehensive guides such as this masterclass on floor leveling. Remember, the devil is in the details—skipping steps or rushing can undermine the entire project. Instead, approach installation with patience and precision, ensuring each phase aligns with expert standards. This not only improves the visual appeal but prolongs the lifespan of your flooring investment. Have you ever fallen into this trap? Let me know in the comments, and share your experience or questions about achieving flawless floor levels.Maintaining flawless floors over time requires more than just initial craftsmanship; it depends on the right tools, consistent routines, and understanding the evolving landscape of flooring technology. One of my go-to devices is a high-precision moisture meter, which I use to regularly check subfloor conditions before and after installation. Accurate moisture readings, as detailed in this technical resource, prevent issues like adhesion failure and uneven surfaces that compromise the final appearance. Using a pin-type moisture meter allows me to pinpoint moisture content within a narrow margin, ensuring that the subfloor stays within acceptable ranges for specific materials like hardwood or tile. This proactive approach reduces costly repairs down the line and keeps the flooring stable under varying humidity conditions.
Beyond testing tools, specialized leveling compounds have become indispensable. I favor self-leveling underlayment with a low viscosity, which I pour carefully using a spike roller to eliminate air bubbles and achieve a perfectly flat surface. This method enhances long-term durability and ensures a consistent finish—crucial when working with glossy vinyl or reflective tiles. If you’re planning a renovation or new installation, mastering the technique of underlayment application is essential. Check out this detailed guide for expert tips.
In the future, I predict that flooring technology will lean heavily on smart tools that can provide real-time data and integrate with home automation systems. Imagine sensors that monitor humidity, temperature, and even wear patterns, alerting you before small issues become expensive repairs. Staying ahead of these trends means investing in quality equipment now and adopting practices that emphasize preventative maintenance.
So, how do I keep my floors working smoothly over the ages? Regularly combining precise measurement devices like moisture meters with skilled application of leveling compounds, and staying informed about emerging tech, creates a reliable system. One advanced tip I highly recommend trying is applying a nano-ceramic coating as a protective layer after refinishing. This coating offers exceptional resistance against scratches, smudges, and moisture penetration, significantly reducing maintenance effort. Testing this on a small patch first ensures compatibility, but once you see the extension in your floor’s life, you’ll wonder why you didn’t do it sooner. For an in-depth application process, consulting this expert resource can guide you through the nuances. Embrace these tools and techniques, and you’ll turn your floor investment into a long-term masterpiece.
Lessons That Left me Smarter about Floor Finishes
One of the biggest surprises was discovering that high-gloss finishes, while stunning in photos, demand relentless maintenance and gentle handling. I learned that a slight misstep—like using harsh cleaning chemicals—can dull the shine in seconds, making your beautiful floor look tired and worn. Additionally, I realized that not all sealers are created equal—some can increase glare or wear unevenly, emphasizing footprints rather than hiding them. These insights taught me to carefully choose premium, matte or satin finishes and to test products beforehand to avoid costly mistakes.
Tools and Sources That Changed My Approach
My essential toolkit now includes a high-quality moisture meter, which helps me identify ideal conditions before installation, preventing future issues. I also rely heavily on expert guides like this comprehensive floor leveling resource to ensure a perfectly flat surface—crucial for glossy vinyl that reflects every imperfection. Books such as “Flooring Mastery” have expanded my understanding of finish choices, while dedicated forums provide tips on managing real-world challenges. Trusting these sources accelerates learning and leads to better outcomes in my projects, saving time and money in the long run.
Real-World Inspiration for Choosing, Installing, and Maintaining Floors
Embracing these lessons means approaching each project as an opportunity for continuous improvement. Whether it’s choosing the right finish, ensuring flawless leveling, or adopting smart maintenance routines, the goal is to enjoy your floors without frustration. I encourage you to experiment with finishing products and tools in small areas first—this way, you gain confidence before tackling bigger projects. Remember, staying proactive with regular cleaning, proper sealing, and timely refinishing can keep your floors looking pristine for years. So, take those lessons to heart, invest in quality materials and techniques, and transform your space into a showcase of craftsmanship and care.
What’s Your Next Step? Live Your Floor Dreams
Don’t let the fear of imperfections hold you back from creating stunning floors. With the right knowledge, tools, and a bit of patience, you’ll master the art of maintenance and installation—making your home more beautiful and welcoming. Whether you’re planning a full renovation or just refreshing your current look, remember that every step teaches you something new. Your dedication now will pay off when you walk into your space and see flooring that reflects your effort and patience. Are you ready to elevate your flooring game? Share your plans or questions below—let’s build beautiful floors together!