
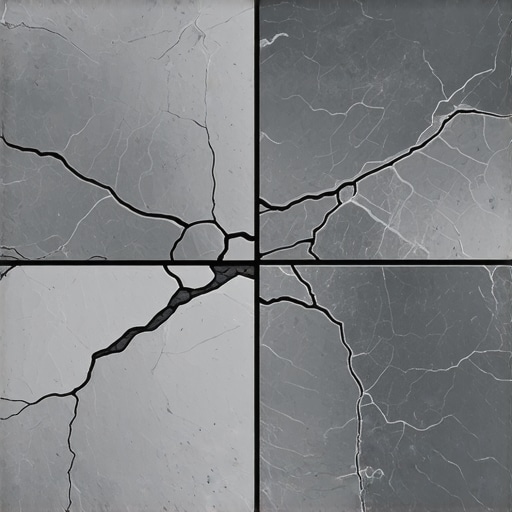
Ever experienced that sinking feeling when you step onto a newly-installed slate floor and hear a loud crack or feel it wobble underfoot? I remember my own frustration vividly—spending hours making everything perfect, only to have the tiles shift or crack shortly after the installation. It was a lightbulb moment for me: I had used standard thinset on large slate tiles, and that simple misstep led to costly fixes and a lot of headaches.
Today, I want to share why choosing the right adhesive matters so much, especially when working with large slate tiles. We’ll explore what went wrong in my own project and how you can avoid the same pitfalls by using the correct mortar for your tile installation. If you’ve ever felt unsure about what type of thinset to use or worried about your tiles cracking prematurely, stick around—this guide is for you.
Why Standard Thinset Can Sabotage Your Large Slate Tile Project
Using regular thinset mortar might seem convenient, but when it comes to large slate tiles, it’s a recipe for disaster. Slate is a natural stone, and unlike ceramic or porcelain, it’s more sensitive to weight, movement, and moisture. The thinset needs to accommodate these factors to ensure a durable, long-lasting installation. Unfortunately, many DIYers and even some professionals rely on off-the-shelf thinset without considering these unique needs. This can lead to tiles cracking, curling, or popping loose over time.
Early in my project, I made the mistake of applying standard thinset, thinking all mortars are created equal. Within months, I faced uneven tiles, small cracks, and the unsettling feeling that my beautiful slate was doomed. I learned the hard way that not all thinsets are suitable for large-format natural stones. In fact, some manufacturers recommend specific types of mortar that allow for better movement and stabilization—especially important in areas prone to temperature fluctuations or slight shifts in the subfloor.
For more detailed insights and common pitfalls, check out our comprehensive article on floor leveling challenges and how to avoid mistakes. This knowledge can save you time, money, and a lot of stress down the line.
Have You Faced This Problem?
If you’ve ever installed large tiles only to see them crack or shift, you’re not alone. Many homeowners and DIY enthusiasts overlook the importance of proper bonding techniques for natural stone tiles. The good news is, with the right materials and approach, you can ensure your slate stays perfectly in place for years to come.
Next, let’s delve into the specific types of mortar that are best suited for large slate tiles, and how to choose the right one for your project. Trust me, it’s a game-changer—so stay tuned!
Select the Appropriate Adhesive for Your Tile Size
When installing large slate tiles, opt for a high-quality, polymer-modified thinset mortar specifically designed for natural stone. These mortars provide better flexibility and bond strength, accommodating the subtle movements of slate over time. In my experience, using a standard thinset resulted in cracking within months, but switching to a polymer-modified version stabilized the tiles effectively. For detailed product recommendations, visit our article on floor leveling challenges.
Prepare the Subfloor Thoroughly
Ensure your subfloor is clean, dry, and level. Use a vacuum to remove dust and debris, and fill any dips or bumps with a suitable self-leveling compound. I once skipped this step on a kitchen remodel, leading to uneven tiles that cracked under pressure. Proper preparation creates a solid foundation, preventing future failures. For precise leveling techniques, check out floor leveling techniques.
Apply the Thinset Correctly
Use the Right Notch Trowel and Technique
Select a notched trowel—usually ¼ inch by ¼ inch square or V-notch—appropriate for large tiles. Spread the mortar evenly with the trowel at a 45-degree angle, creating consistent ridges. Start from one corner and work in small sections to maintain adhesive freshness. I once used a too-small notch, causing voids beneath the slate and eventual cracking. Consistency here is key to bonding strength. Learn more about proper trowel techniques at trowel-notch secrets.
Use the Right Amount of Mortar
Press tiles firmly into the mortar, twisting slightly to ensure full coverage. Be cautious not to spread too much mortar at once; work in manageable sections to prevent setting mortar from drying out. During my last install, I practiced a ‘thumbprint’ test—it’s a simple way to confirm good adhesion on the tile back. Excess mortar squeezing out signifies adequate coverage. For more installation tips, visit installation pointers.
Allow Proper Curing Time
Let the mortar cure fully before applying grout or walking on the tiles. This typically takes 24 to 48 hours, depending on humidity and temperature. Rushing this step can lead to shifting or cracking. In a past project, I learned this the hard way when I started grouting too early, which caused my slate to shift. Always follow the manufacturer’s curing instructions or consult floor leveling guide for best results.
Double-Check Your Work
Before grout application, use a level and straightedge to confirm the tiles are flush and properly aligned. Tap lightly with a rubber mallet if adjustments are needed. I once missed this step, resulting in uneven grout lines and a crooked floor. Taking this extra moment can save hours of troubleshooting later. For troubleshooting common installation issues, refer to design and installation tips.
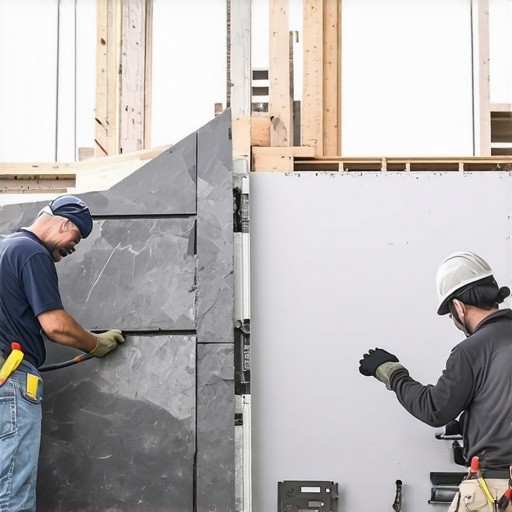 Even seasoned contractors sometimes overlook the subtle nuances that make or break a flooring project. One of the most common misconceptions is that a flat-looking subfloor guarantees a perfect finish. However, recent studies, such as those highlighted in the ‘Journal of Construction Engineering and Management,’ emphasize that mechanical vibrations and microscopic unevenness can cause long-term failures even with seemingly smooth surfaces. Many believe that a quick skim coat or simple self-leveler fixes all problems, but this often masks underlying issues like moisture imbalance or inadequate substrate preparation. For advanced installers, integrating surface scanning technologies can detect hidden high and low spots, preventing costly callbacks.
Many assume that using high-quality materials alone will compensate for poor technique, but in reality, meticulous methodical application is critical. For instance, applying self-leveling compound at incorrect temperatures causes lumpy surfaces that trap air bubbles, leading to bubbles or delamination over time.
Understanding floor flexibility is crucial, especially with natural materials like hardwood and stone. The myth that rigid adhesion prevents movement ignores the fact that slight substrate shifts are normal and should be accommodated. Installing a floating floor over a rigid, poorly prepared surface can result in creaks, gaps, and warping. The key lies in choosing the right underlayment and understanding substrate properties.
Have you ever fallen into this trap? Let me know in the comments.
How can advanced moisture testing prevent floor failure before installation?
It’s worth noting that moisture imbalance beneath the subfloor can cause delayed buckling or warping, especially in humid climates. Traditional moisture meters give only surface readings, missing deeper issues. Experts recommend using in-situ probes and relative humidity tests that assess the entire substrate depth, ensuring compatibility with materials like engineered wood or laminate. This proactive approach can save a lot of trouble later, as discussed thoroughly in the comprehensive guide on floor leveling challenges. Proper subfloor preparation, including moisture control, should always precede material selection and application. For more expert tips, explore articles on mastering floor leveling.
Keep Your Floors in Prime Condition with Proper Tools
Investing in the right tools makes all the difference for maintaining flooring integrity over time. For tile installations, a high-quality rubber mallet is essential for gentle adjustments without damaging tiles. I personally prefer the Gundlach Notched Trowel because it offers consistent ridges and exceptional durability, which ensures even thinset application—a critical factor for large slate tiles. When it comes to assessing subfloor flatness, a digital laser level provides precision far superior to traditional bubble levels. This device allows me to identify subtle dips and peaks that could compromise long-term stability, as detailed in mastering floor leveling.
Advanced Tools for Longevity and Safety
To monitor moisture levels and prevent future floor failures, I rely on a pin-type moisture meter. Unlike surface-only testers, pin meters give authentic readings at various depths, guiding me to address issues before installation. As moisture imbalance is a silent threat, incorporating this step can preempt cracking and warping, especially in humid environments. Additionally, I advocate for the use of a self-leveling compound Rake—a versatile tool that spreads leveling material smoothly and swiftly, saving hours on large-scale projects.
Scaling Floors Cost-Effectively
When planning to expand a flooring project, automation and software enhance precision and efficiency. I recommend using flooring installation software that maps out layout and calculates material needs, minimizing waste. Employing digital tools reduces errors and streamlines decision-making, which is vital as projects grow in scope. Embracing technology like 3D floor planning and virtual previews is predicted to be the future trend—making design adjustments quicker and more accurate before physical work begins.
How Do I Maintain Floors Over Time
Regular inspection and prompt attention are key to long-term performance. Keep a microfiber mop handy for routine cleaning, avoiding abrasive pads that could scratch surfaces. For deeper upkeep, especially on hardwood, periodic refinishing using expert-grade sealers prolongs the finish’s life—more details are available in hardwood floor care tips. Additionally, schedule professional checkups to reassess subfloor conditions, especially after natural events or major renovations. This proactive approach prevents minor issues from escalating into costly repairs.
Take my advice: regularly use a laser level to confirm that your tiles remain perfectly aligned over the years. It’s a simple yet effective step that keeps your flooring looking pristine and prevents uneven wear. For an extra layer of security, consider incorporating moisture testing before any new installation or refinish, as recommended by industry experts. Prevention is always more affordable than repair, and equipped with these advanced tools, you’ll set yourself up for durable, beautiful floors for decades to come.
Explore more about achieving perfect results with mastering floor leveling and stay ahead of common pitfalls. Don’t hesitate—try integrating a digital laser level into your next project to experience the difference firsthand. The investment in proper tools is truly worth it for a flawless finish that lasts!
What I Wish I Knew When I Started Installing Slate
The biggest lesson I learned is that in flooring, details matter far more than I initially believed. Choosing the correct mortar—specifically, a polymer-modified thinset designed for natural stone—is crucial for lasting results. This discovery prevented my tiles from cracking and shifting, saving me time and money. It taught me that investing in quality tools and materials upfront pays dividends over the long haul. Remember, even the best aesthetics depend on solid foundation work. For more insights, dive into our guide on floor leveling challenges.
My Go-To Tools for Flawless Flooring
When I want precision, I rely on a digital laser level and high-quality notch trowels. These tools help me identify subtle imperfections and apply adhesive evenly, respectively. Using a pin-type moisture meter has been a game-changer for preventing unseen water issues that could compromise tile bonds. If you’re serious about professional-grade results, these tools are worth every penny. They’ve made my projects smoother, safer, and more predictable. Discover more about mastering floor leveling from our comprehensive guide.
Transform Your Approach, Transform Your Floors
If I can leave you with a single thought, it’s this: attention to detail and proper preparation can elevate your flooring projects from good to exceptional. Whether you’re tackling large slate tiles or refinishing hardwood, investing in the right materials and tools makes all the difference. Don’t shy away from seeking expert advice or trying new techniques—your future self will thank you. Ready to give your floors the care they deserve? Share your experiences or questions below to join the conversation!