
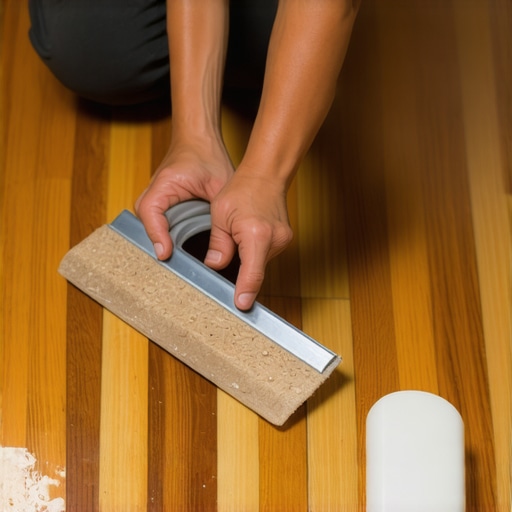
I’ll never forget the moment I peeled back the old, stubborn carpet in my living room, only to be greeted by a thick, glistening layer of dried glue clinging desperately to the distressed hardwood beneath. It was like uncovering a stubborn scar; I knew I had a challenge ahead, and I wasn’t sure how to tackle it without damaging the precious wood or resorting to harsh chemicals that can do more harm than good.
Why Removing Carpet Glue from Hardwood Can Feel Like an Uphill Battle
Over the years, I’ve tried just about every trick in the book—scrapers, solvents, even aggressive sanding—and each method had its pitfalls. The truth is, old hardwood floors are delicate, and aggressive removal can lead to scratches, gouges, or uneven surfaces that diminish their beauty and integrity. Plus, many chemical removers contain solvents with fumes that I prefer to avoid, especially in a home environment. So, I set out to find a way to remove that stubborn glue safely, effectively, and without chemicals. And let me tell you, it’s absolutely doable—even for stubborn residues that seem impossible at first glance.
This post will walk you through my proven strategies, based on personal experience and practical knowledge, to help you restore your hardwood floors without risking damage or exposing yourself to harmful substances. Whether you’re preparing for a new finish or just want to unveil the natural beauty underneath, these tips will help you handle this daunting task confidently.
Is a chemical-free approach really effective for old carpet glue?
It’s my biggest skepticism early on—will natural methods work on stubborn, decades-old residue? I made the mistake of rushing into a chemical remover without testing a small area first. The result? Discoloration and, worse, a patchy surface that required sanding. That experience taught me that patience and the right techniques matter more than quick fixes. For comprehensive guidance, check out this resource on avoiding common flooring mistakes. But now, I know that with the right gentle techniques, you can lift old glue without harming your floors or exposing yourself to unnecessary hazards.
Now, imagine transforming those sticky, unsightly patches into the smooth, pristine surface your hardwood was meant to have. That’s exactly what we’re aiming for. Ready to dive into the practical steps? Let’s get started on how to safely and effectively remove that old carpet glue, so your floors can shine once more.
.
Start with Gentle Detachment
Begin by carefully scraping loose remnants of carpet padding using a plastic putty knife to avoid scratching the wood. I remember gently lifting sections that loosen easily; forcing stubborn parts only risked gouging the surface. Work slowly to minimize damage and ensure you don’t push the glue deeper into the wood grain.
Use Warm Water to Loosen Residue
Next, dampen a clean cloth with warm water and lay it over the glue. Keep it there for 10-15 minutes to soften the adhesive. During one project, I found that softening the glue made scraping much easier and reduced the need for aggressive force. This step helps break down the bond without chemicals.
Apply Natural Adhesive Remover
If water alone doesn’t do the trick, create a mixture of equal parts white vinegar and warm water. Dab a sponge into the solution and gently apply it to the remaining glue. Vinegar’s acetic acid helps break adhesive bonds naturally. I soaked a rag in the mixture and pressed it onto stubborn patches, allowing the vinegar to penetrate for 10 minutes before scrapping again.
Mechanical Removal Techniques
After softening, use a stiff-bristled brush or a plastic scraper to lift residual glue. I found that a plastic putty knife with a wide edge facilitated even, controlled pressure. For tight corners or edges, a nylon scrub pad can work. The key is steady, even pressure—press too hard and you risk gouging the hardwood.
Sand and Finish for Smoother Results
Once the glue is removed, some minor scratches or uneven patches may remain. Lightly sanding the area with fine-grit sandpaper (220-grit) can level the surface. This step is crucial if you plan to re-finish or stain the floor. During my own refinishing project, careful sanding transformed rough patches into a seamless, glossy surface. Be sure to vacuum the dust thoroughly before applying any finish.
Preventing Damage During Removal
Remember, patience is your best ally. Rushing or using aggressive tools can damage the hardwood planks permanently. Consider testing your removal method on a small hidden area first. For further guidance on achieving a flawless finish, visit this resource. Also, using a damp cloth and natural solutions minimizes chemical exposure and preserves your floor’s integrity, just as I learned from my initial mistakes. By following these steps, you can lift old glue safely while maintaining the beauty and durability of your hardwoods.When it comes to flooring, many assume that following the basic instructions guarantees a perfect result. However, even experienced installers fall into traps rooted in misconceptions. One such myth is that level subfloors are always sufficient for seamless tile or hardwood installation. In reality, subtle imperfections can lead to uneven surfaces that become glaring over time, especially in large areas. Professional experts stress the importance of precise floor leveling, not just basic flatness. For a comprehensive view, see this guide on achieving flawless leveling.
Many installers also underestimate the nuance of substrate preparation. A common mistake is assuming that a clean surface is enough. In practice, proper sealing, moisture barriers, and appropriate adhesives are critical, especially on concrete slabs prone to moisture vapor transmission. Neglecting these factors can cause tile de-bonding or hardwood warping years later. Advanced practitioners recognize that the substrate’s condition directly affects longevity and appearance.
Another widespread misconception is that underlayment is optional or just a matter of comfort. In truth, the choice and installation of underlayment can make or break the final look and durability. For instance, using the wrong underlayment under vinyl planks can lead to bouncing, squeaking, or bubble formation. For perfect results, consult this resource on common pitfalls.
Have you ever fallen into this trap? Let me know in the comments.
Now, let’s address a more advanced question that even seasoned installers ask—how does substrate movement influence the choice of flooring materials and installation methods? The answer is complex. Movement, often caused by temperature fluctuations, soil shifts, or improper sub-slab preparation, can lead to cracks, buckling, or tiles popping loose. Expert installation accounts for these factors by incorporating expansion joints, flexible adhesives, and reinforced underlays. Using these techniques ensures the floor can adapt to subtle shifts without damage. For an in-depth discussion, visit this article on advanced leveling techniques.
Being aware of these nuances can save you costly repairs and provide a truly professional finish. Remember, the devil is in the details, and understanding the common misconceptions allows you to make smarter, long-lasting choices. Whether installing hardwood or tile, investing in proper preparation and technique pays dividends in durability and beauty.
Keeping Your Floors in Top Shape: Tools I Trust
Maintaining beautiful and durable flooring requires not just careful installation but also the right tools for ongoing care. Over the years, I’ve refined my toolkit to include equipment that ensures longevity and a professional finish. One indispensable item is a quality spike roller, which I use regularly to press down grout lines and self-levelers. It helps eliminate voids and air pockets, resulting in a seamless surface that resists cracking over time. This resource explains how a spike roller can be pivotal for professional results.
Why Invest in a Good Floor Leveling System
For any serious flooring project, a reliable self-leveling compound and a high-quality trowel are essential. I recommend a trowel with a properly notched blade—for example, a V-notched trowel when applying thinset or leveling compounds. Using a consistent notch size ensures even coverage and optimal adhesion. I personally prefer a 1/4″ notch for most tile installations, as it balances coverage without excess material. Equipment like a laser level — specifically one with grade and angle capabilities — helps maintain perfect flatness, a critical factor in both hardwood and tile projects. Check out this article for advanced leveling strategies.
How Do I Keep Floors Looking Fresh Over Time?
Routine maintenance is the key. In my experience, a combination of gentle cleaning and periodic inspections can prevent minor issues from escalating. For hardwood, I swear by a microfiber mop and a pH-balanced cleaner to remove dust and grime without stripping the finish. Tile floors benefit from a quick scrub with warm water and a mild detergent—saving the appearance and preventing buildup. Additionally, applying a quality sealant on porous surfaces once a year can prolong their lifespan and keep out moisture that causes damage. As long as you stay attentive with these simple steps, your floors will continue to impress for decades to come. For detailed care routines, visit this resource.
Future Trends in Flooring Maintenance
Looking ahead, I see an increasing shift toward smart technology. Sensors embedded into flooring materials will monitor moisture, temperature, and wear in real time, alerting homeowners before damage occurs. Innovations like AI-powered vacuum systems will automatically detect and fix minor issues, reducing maintenance effort and extending the life of your floors. Staying ahead of these trends means investing in quality tools now and being ready to adapt as new technologies emerge.
Now, I challenge you to incorporate one of these advanced tips—perhaps starting with a spike roller or upgrading your leveling tools. Precision and care now will pay dividends later, ensuring your flooring projects last for years to come. For expert guidance on flawless installation and maintenance techniques, explore this comprehensive guide.
What I Wish I Knew Before Jumping Into Flooring Projects
- One of the toughest lessons I learned was that patience truly pays off. Rushing through steps like leveling or glue removal often led to more work down the line. Taking the time to test small areas and double-check measurements saved me headaches later.
- Investing in quality tools, like a laser level or a reliable spike roller, made a significant difference. These tools cut down on errors and ensure a professional look, which is worth every penny.
- Skimping on substrate preparation is a mistake I won’t repeat. Proper sealing, moisture barriers, and a clean surface are the backbone of durable flooring that won’t warp or delaminate over time.
- Understanding the subtle nuances—like the importance of expansion joints and the right adhesive—can make or break a project. These details helped me avoid future cracks or buckling.
- The most surprising insight? The finishing touches matter just as much as the installation. Finishing with gentle cleaning, sealing, and routine maintenance extends the life and glow of your floors.
My Go-To Resources for Flooring Success
- Mastering Floor Leveling Secrets: This guide transformed my understanding of achieving perfect flatness, which is crucial for both hardwood and tile installations.
- Elegant Tile Designs: Inspired me to think creatively about tile patterns that complement hardwood floors seamlessly.
- Common Mistakes to Avoid: Saved me from rookie errors that could have compromised my entire project, emphasizing the importance of preparation and precision.
- Hardwood Care Tips: This resource helps maintain the natural beauty and durability of hardwood long after installation, ensuring my floors stay stunning for years.
Keep Moving Towards Flooring Excellence
Every step in the flooring process is an opportunity to improve and craft something enduring. Whether you’re lifting stubborn glue or choosing the perfect finish, embracing meticulous technique and continuous learning elevates your work. Remember, floors are the foundation of a comfortable, beautiful home—investing in knowledge and quality tools makes your efforts worthwhile. Now, I want to hear from you—what’s been your biggest challenge or breakthrough with flooring? Share your story below and let’s grow together.