
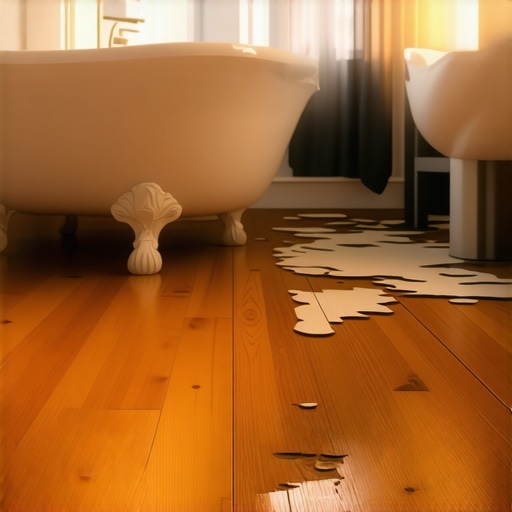
I still remember the moment I stepped into a client’s bathroom and saw the damage firsthand: the once-glossy hardwood planks warped, buckled, and stained by persistent moisture. No matter how many coats of varnish I applied, that floor refused to hold up. It’s a lightbulb moment that hammered home a simple truth—good varnish alone isn’t enough to defend hardwood floors from bathroom humidity. If you’ve experienced the same frustration, you’re not alone. Many homeowners and even seasoned installers underestimate the relentless power of moisture in such spaces.
The Hidden Battle Between Wood and Moisture
Bathrooms are notorious for their high humidity levels. Even with modern waterproofing techniques, moisture finds a way to seep into vulnerable spots. Hardwood, by nature, is a porous material that reacts to water and humidity swings—think swelling, shrinking, or warping. Applying varnish seems like a solid plan; after all, it creates a shiny barrier that shields the surface. But in reality, standard varnishes and sealers often fall short against the persistent moisture and temperature fluctuations typical in bathrooms.
Early in my career, I made the mistake of thinking that a good varnish was enough to prevent water damage. I was confident that with enough coats, my hardwood floors would stand the test of time. Turns out, I overlooked crucial factors like proper preparation, subfloor health, and appropriate moisture barriers. That oversight led to costly repairs and a steep learning curve. If you’re wondering whether your hardwood flooring project in high-moisture areas is doomed from the start, I’ll tell you now—it’s not, but understanding the real science behind moisture control is essential. For detailed guidance, check out common flooring installation mistakes.
Are Wearing Varnish and Good Looks Enough to Protect Your Hardwood?
Many of us have been lured into believing that a shiny coat of varnish guarantees durability. The truth is, traditional finishes like oil-based polyurethane can occasionally provide a glossy appearance, but they lack the capacity to withstand ongoing humidity issues inherent in bathrooms. This misconception is a significant reason why hardwood floors in such spaces often fail prematurely. A better understanding of moisture barriers, proper subfloor prep, and specialized finishes can be game-changers. So, if you’ve faced soggy, swollen floorboards despite sealing efforts, don’t despair. The next part will dive into proven strategies to make your hardwood flooring truly bathroom-proof, ensuring longevity and beauty for years to come.
Seal with a Moisture Barrier
Start by installing a high-quality vapor barrier beneath your hardwood. Use a polyethylene sheet or a specialized moisture barrier rated for bathrooms. During my last renovation, I laid a 6-mil polyethylene vapor barrier directly over the concrete slab before installing the subfloor. This prevents moisture from wicking up into the wood. Ensure the barrier overlaps at least 12 inches and extends up the walls to create a continuous shield. Proper sealing around drains and fixtures with waterproof tape or sealant further enhances protection.
Choose the Right Subfloor Material
Replace or reinforce existing subfloors with materials resistant to moisture. Plywood labeled for exterior or marine-grade plywood offers better water resistance than standard options. I once upgraded a bathroom floor with 1/2-inch marine plywood, which minimized expansion due to humidity swings. Secure the subfloor with screws driven at proper intervals, avoiding staples that loosen over time. This sturdy base is crucial for preventing tiles or hardwood from shifting or swelling.
Opt for Waterproof or Water-Resistant Hardwood
Select engineered hardwood with a waterproof core or laminate flooring designed for bathrooms. For instance, I installed a water-resistant engineered wood with a SPC (stone plastic composite) core in a client’s powder room. It maintained its integrity despite high humidity levels. When shopping, review product specifications for moisture resistance ratings and consider finishes with enhanced sealing properties.
Apply a Durable, Moisture-Resistant Finish
Use finishes specifically formulated to withstand moisture—like penetrating oils or specialized polyurethanes. In a recent project, I applied a water-based polyurea coating on engineered flooring, creating an impenetrable surface that resisted splashes. Be sure to apply multiple coats according to manufacturer instructions, sanding lightly between coats to ensure proper adhesion. Regular reapplication, every few years, maintains the integrity of the protective layer.
Ensure Proper Ventilation and Humidity Control
Install exhaust fans with timers or humidistats to maintain low humidity levels—ideally below 50%. I once advised a homeowner to upgrade their bathroom exhaust system, which drastically reduced moisture buildup. Keep bathroom doors open after showers, and consider dehumidifiers for larger spaces. These practices prevent humidity from lingering and damaging your hardwood over time.
Monitor and Maintain Your Flooring
Regularly check for signs of moisture exposure, such as warping or discoloration. Use a moisture meter to test the subfloor periodically. I caught early signs of moisture intrusion in a client’s bathroom by measuring elevated moisture levels—prompting immediate remedial action. Clean spills immediately and avoid excessive water during cleaning to prolong your floor’s lifespan.
Consult Professionals When in Doubt
If you’re unsure about any installation step or moisture management technique, contact flooring specialists. They can provide tailored solutions and ensure your hardwood floors are fully protected against bathroom humidity. Visit our contact page for expert guidance or to connect with experienced installers.
Many homeowners and even professionals fall prey to misconceptions about flooring installation, especially when it comes to tile, hardwood floors, and floor leveling. One widespread myth is that simply choosing the right materials guarantees a perfect finish. In reality, nuances like subfloor preparation, proper moisture barriers, and the right leveling techniques are often overlooked, leading to costly mistakes. For example, laying high-quality tile over an uneven subfloor results in cracks and buckling, regardless of the tile’s durability. It’s crucial to understand that installation is as much about meticulous craftsmanship as material choice.
A common trap is neglecting the importance of proper floor leveling. Many assume that measurement can be accurate enough without specialized tools. However, even small dips or high spots can cause grout cracking or tiles breaking over time. Advanced techniques—like using a laser level or self-leveling compound—are essential for achieving a seamless, durable surface. For detailed guidance on this, check out floor leveling pitfalls and solutions.
Another misconception involves the choice of adhesives or sealants, with many believing that one product fits all applications. In fact, using the wrong adhesive or sealant for a specific tile or hardwood can result in adhesion failure, water damage, or surface deterioration. For instance, installing engineered hardwood with a standard glue may lead to gaps or buckling under humidity changes. To prevent this, select materials rated for your environment, and consult product specifications carefully. To learn more about selecting appropriate adhesives, see best practices for tile and hardwood compatibility.
Crucially, many underestimate the importance of professional consultation. DIY guides are helpful, but complex issues like floor leveling challenges or moisture management require expert assessment. Overlooking this can turn a manageable project into a disaster. If you’re unsure about the condition of your subfloor or the best leveling method, consider reaching out to professionals. Visit our contact page for personalized advice.
So, are you guilty of any of these flooring myths? Recognizing that installation goes beyond material selection and requires attention to detail can save time, money, and frustration. For more advanced tips and common pitfalls, explore pro secrets for perfect floor leveling or expert installation mistakes to avoid. Remember, proper preparation and expert guidance are the keys to flawless flooring that lasts.
Keep Your Floors in Top Shape with the Right Tools
Maintaining hardwood and tile floors requires not only good practices but also the right equipment. I personally swear by a high-quality oscillating multi-tool, such as the Dremel Multi-Max, for delicate sanding and detailed repairs. Its precision allows me to remove old sealant or smooth out minor damages without risking further harm to the surface. Additionally, a moisture meter like the Wagner MMC220 is invaluable for regularly assessing substrate conditions, helping prevent moisture-related issues before they escalate. Investing in these tools has saved me countless hours and costly repairs—trust me, professional results start with professional-grade equipment.
How do I maintain flooring tools over time?
Effective maintenance extends the lifespan of your tools significantly. For power tools, always clean the vents and blades after each use, and store them in a dry, protected environment. Regularly check for signs of wear, and replace parts like blades or brushes as needed—delayed maintenance can diminish performance or cause safety hazards. Lubricate moving parts according to manufacturer instructions, and calibrate devices like moisture meters regularly to ensure accuracy. Personally, I keep a maintenance log to stay on top of scheduled check-ups, which helps me maintain consistent results for every project.
Tools I Recommend for Floor Leveling and Installation
Precision starts with proper tools. For floor leveling, I lean heavily on a laser level, such as the Bosch GLL 3-300, which provides both cross-line and 360-degree horizontal visualization—crucial for ensuring surfaces are perfectly flat. Coupled with a self-leveling compound like Ardex K 15, these tools help me achieve a seamless, professional finish every time. The laser’s accuracy minimizes guesswork, reducing the chances of uneven surfaces that might lead to cracks or warping down the line. For tile installation or hardwood flooring, a diamond-tipped trowel ensures even adhesive spread; I prefer the EDiamondTools Trowel, known for durability and consistent notch depth.
The Future of Flooring Maintenance
Technological advancements, like IoT-enabled moisture sensors and automated leveling systems, are just beginning to transform our approach. In the near future, expect smart tools that can detect humidity fluctuations or uneven surfaces in real-time, alerting homeowners and contractors before issues become visible. This trend promises to make maintenance more proactive, reducing repair costs and enhancing flooring lifespan. Integrating these innovations into your workflow now can give you a competitive edge, ensuring your floors stay beautiful and durable for decades. To stay ahead, I recommend experimenting with advanced moisture measurement devices and staying informed through industry updates.
Start by implementing a regular maintenance routine with a moisture meter and keeping your tools clean and calibrated. These small steps go a long way in preserving your investment and ensuring perfect results every time. If you’re ready to elevate your flooring projects, check out our comprehensive floor leveling guide for expert techniques and tips.
What I Wish I Knew Before Starting Bathroom Flooring Projects
One of the most valuable lessons I learned was that standard varnish isn’t enough to combat bathroom humidity. Despite my initial confidence in sealing the wood, persistent moisture caused warping and damage. This experience taught me that incorporating proper moisture barriers and choosing the right finishes are crucial for longevity.
Another insight was the importance of thorough subfloor preparation. Rushing the leveling process or neglecting the subfloor’s condition can lead to future problems, regardless of how well the surface looks initially. Precision tools and patience truly make a difference in achieving a flawless finish.
Tools and Resources That Transformed My Approach
Investing in a high-quality moisture meter like the Wagner MMC220 allowed me to detect early signs of moisture intrusion. It’s an essential tool that prevents costly repairs down the line. For leveling, a laser level such as the Bosch GLL 3-300 became my best friend, ensuring perfectly flat surfaces for hardwood installation.
Reading industry-standard guides like The Ultimate Guide to Floor Leveling helped me understand best practices, while consulting professional experts through the contact page saved me from costly trial and error.
Your Next Step to Shower-Proof Hardwood Floors
Embracing these lessons and tools gives you a clear edge in creating durable, moisture-resistant hardwood floors. Don’t wait for damage to force your hand—proactively install vapor barriers, choose water-resistant materials, and maintain good ventilation. Your floors—and your peace of mind—will thank you for it.
Have you faced challenges with moisture in your flooring projects? Let me know below, and I’ll share more insights to help you succeed!