
It was a typical Saturday morning when I stepped into my living room and noticed that a corner of my beloved dark-stained maple floor was marred by a fresh scratch. My heart sank. Despite all my careful precautions, accidents happen—especially with busy households or pets. That lightbulb moment struck me: I didn’t need to resort to sanding every time there’s a mark. I realized there are effective ways to handle scratches in dark maple floors without the mess and hassle of sanding.
Why Do Dark Maple Floors Show Scratches So Clearly?
Dark maple floors, with their rich hues and smooth finishes, are stunning—they bring warmth and elegance to any space. But there’s a catch. The darker the stain, the more visible every tiny imperfection becomes. A superficial scratch can look glaring, almost as if someone intentionally marked the floor. This is because the dark stain highlights light-colored wood beneath any surface damage.
Early in my flooring journey, I made a mistake I see many homeowners repeat: using harsh chemical cleaners or abrasives to clean up scratches. That actually made the problem worse, lightening the finish or dulling the shine. Over time, I learned that patience and the right techniques are key. Interestingly, a study shows that properly maintaining hardwood floors can extend their life by years, saving you money and frustration (source: [hardwood floor care secrets](https://tiletrendshop.com/hardwood-floor-care-secrets-to-longevity-and-shine)).
So, if you’re tired of hiding those scratches or thinking of costly refinishing, I promise there’s hope. Today, I’ll share practical, proven methods to minimise and even conceal scratches in dark maple floors—without the dust and mess of sanding.
Is It Really Possible to Fix Dark Maple Scratches Without Sanding?
Initially, I was skeptical. My early attempts involved aggressive rubbing and chemical fixes that only deepened the scratches or ruined the finish. I didn’t realize that delicate, targeted approaches could restore beauty with minimal effort. If you’ve also faced this dilemma, you’re not alone. Many homeowners believe that sanding or professional refinishing is the only solution, but that’s simply not true for minor scratches. Next, I’ll show you how I learned to use simple tools and products to do quick touch-ups—saving time, money, and the integrity of my floors. Ready to get started?
Choose the Right Touch-Up Products
Start by selecting a wood stain that matches your dark maple finish. Test it on a hidden corner to ensure a perfect match. I once tried a generic dark stain, but it looked off until I mixed it slightly lighter, which made the touch-up seamless.
Clean and Prepare the Area
Thoroughly remove dust, debris, and any loose finish around the scratch with a soft damp cloth. Avoid harsh cleaners, as they can dull the shine. I learned this the hard way after noticing dull spots where I scrubbed too vigorously.
Apply a Stain Pen or Touch-Up Kit
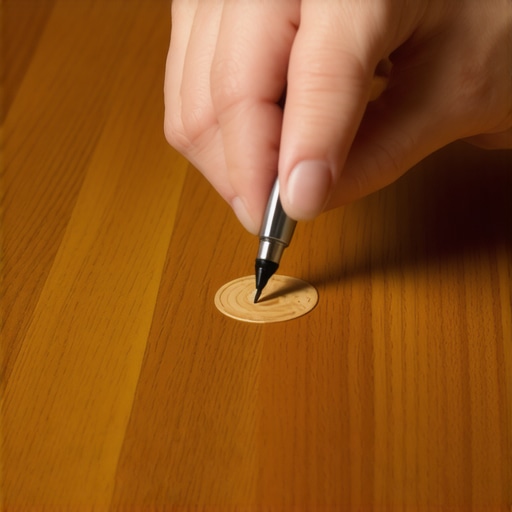
Use a fine-tip stain pen that matches your floor’s color to fill in the scratch. Gently glide the pen along the damaged area, blending it with the surrounding finish. Once dry, lightly buff with a soft cloth for a smooth look. I once dabbed too hard, creating a noticeable difference; patience is key here.
Use Walnut or Carnauba Wax for Concealment
If the scratch remains visible, apply a small amount of walnut stain (using a crushed walnut shell) or a commercial wax stick designed for dark floors. Rub it into the scratch, then buff. This technique works great for minor imperfections and gives an instant repair. I found that warming the wax slightly makes it easier to apply.
Blend and Finish the Repair
After applying the stain or wax, gently buff the area to blend it with the surrounding finish. You can use a microfiber cloth or a soft brush. To lock in the repair, consider applying a tiny amount of clear polyurethane or floor wax, which I did after testing on a scrap piece—improved durability plus a shiny touch.
Regular Maintenance to Prevent Future Scratches
Place felt pads on furniture, trim pet nails, and use rugs or runners in high-traffic areas. Regular cleaning with gentle products and a soft mop helps maintain the finish. I also discovered that applying a maintenance wax every few months keeps the dark sheen intact and minimizes the impact of scratches.
Eventually, I realized that a combination of proper repair techniques and preventative care can keep dark maple floors looking stunning even after years of use. It’s about patience, the right tools, and regular upkeep. If you want to explore more about maintaining your floors or tackling specific issues, check out our guide on hardwood floor care secrets.
Many homeowners and even some DIY enthusiasts often believe that installing tile or hardwood floors is a straightforward process, but in reality, there are many misconceptions that can lead to costly mistakes. One widespread myth is that floor leveling is always unnecessary if the subfloor looks flat enough. However, even minor dips or high spots can cause tiles to crack or hardwood planks to warp over time. Properly addressing these nuances with techniques like screeding or self-leveling compounds is crucial for a flawless finish, as discussed in our floor leveling guide.
A common oversight involves assuming that all adhesives or mortars are interchangeable. In truth, choosing the wrong type can result in poor adhesion, moisture problems, or tile lippage—all of which compromise durability and appearance. Expert tips recommend using premium thinsets suited for the specific tile size and substrate, as outlined in installation pointers. Mistakes like rushing this step or ignoring manufacturer instructions can undermine your entire project.
Another myth is that hardwood floors don’t need acclimation before installation. This is false; failure to allow the wood to adapt to home’s humidity levels can lead to expansion, contraction, or warping later on. Industry standards suggest acclimating wood for at least 72 hours in the environment where it will be installed, which helps prevent cracking or buckling. For advanced insights on this process, see our hardwood acclimation articles.
Now, let’s address a frequently overlooked detail that trips up even seasoned pros: the importance of perimeter gaps in floating floors. Some think they can fill these gaps with caulk or sealers; however, leaving a precise expansion space allows the flooring to expand naturally with temperature changes, reducing the risk of buckling. This tiny but vital step is often neglected, leading to long-term issues. Learn more about correct gap implementation in expansion gap strategies.
What about the role of subfloor material choices? Many believe that plywood is always suitable, but engineered options with specific compositions can offer better moisture resistance and stability, especially in challenging environments. Choosing the wrong subfloor can cause squeaks, uneven surfaces, or damage to your finished flooring, as outlined in our subfloor selection guide. Additionally, improper sealing or preparation can trap moisture, accelerating deterioration.
Finally, understanding the critical nature of proper fastening methods is crucial. For example, overdriving nails or staples can weaken the bond or split the wood, leading to squeaks or looseness. Using the right tools and techniques, such as pneumatic nailers set to correct depth, makes a big difference. Our installation step-by-step section provides detailed best practices.
In essence, mastering flooring installation involves more than just following basic steps. It requires grasping these nuanced details, avoiding common myths, and implementing advanced techniques that ensure longevity and aesthetics. Don’t fall into the trap of thinking the process is simple—let’s dig deeper and get it right. Have you ever fallen into this trap? Let me know in the comments.Maintaining your flooring’s pristine condition requires more than just basic cleaning. I rely on precision tools like a high-quality laminate floor roller and a soft-bristle vacuum to prevent debris from scratching surfaces. These tools help distribute pressure evenly during touch-ups and ensure thorough debris removal, minimizing future damage. Additionally, investing in a fine artist’s brush allows precise application of stain or wax in tight spots, providing a seamless repair that blends naturally. I also recommend using a moisture meter before any refinishing project to assess wood stability, preventing future warping or buckling—something I learned firsthand by avoiding unnecessary fixes. Looking ahead, I believe automation and smart sensors will revolutionize floor maintenance, alerting homeowners about moisture levels or wear patterns in real-time.
How Do I Keep My Floors Looking Excellent Over Time?
Maintaining floors long-term involves scheduled inspections for scratches, loose boards, or moisture intrusion. Regularly reapplying a topcoat of polyurethane or a maintenance wax can restore shine and create a protective barrier against scratches. For hardwood floors, I recommend using a microfiber mop with gentle cleaning solutions—never harsh chemicals—to preserve the finish. If you notice persistent issues like high spots or uneven surfaces, consulting an expert for precise floor leveling will save you costly repairs later. For detailed techniques, explore our guide on achieving perfect floor leveling.
To ensure your tools stay reliable, I suggest periodically calibrating your moisture meter and replacing worn pads on your floor roller. This proactive approach keeps your maintenance routine effective and prevents minor issues from escalating. Remember, maintaining your floors is an ongoing process. Investing in the right equipment and practices today will yield beautiful, durable results for years to come. For more advanced tips, visit mastering hardwood refinishing. Don’t hesitate—try incorporating a moisture meter into your next maintenance routine to catch problems early and extend your flooring’s lifespan.
The Hardest Lesson I Learned About Dark Maple Floors
One of the most profound lessons I discovered was that patience and precision outweigh brute force when it comes to restoring dark maple floors. I once believed that heavy-handed sanding or aggressive chemical cleaners would quickly fix scratches, but I quickly learned these methods often damage the delicate finish, making matters worse. The lightbulb moment was realizing that gentle touch and targeted repairs yield far better results, preserving the natural beauty and depth of dark maple.
How Small Tricks Save Big on Floor Care
I found that using a fine artist’s brush for applying stain or wax in tiny scratches not only minimizes mess but also ensures a seamless blend. Pairing this with a high-quality microfiber cloth for buffing creates a polished, almost invisible repair. These seemingly minor techniques, adopted consistently, prolong the lifespan of my floors, saving money and frustration in the long run. Tiny adjustments, like warming a wax stick before application, also make a noticeable difference—making repairs quicker and more effective.
When to Know It’s Time to Call a Pro
Despite mastering many DIY fixes, I realized there are situations—like deep gouges or widespread damage—where professional help is invaluable. Recognizing your limits and understanding the signs of needing expert intervention is essential. For instance, if the scratches are too deep or the finish is dull despite multiple touch-ups, seeking advice from flooring specialists ensures your investment remains protected. Learning these boundaries through experience informs smarter decisions and results in a better-looking, longer-lasting floor.