
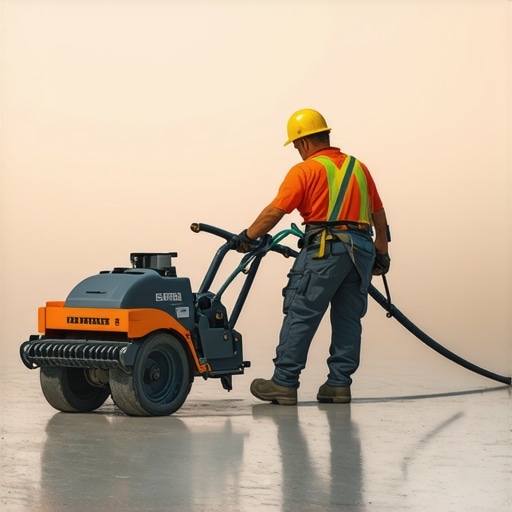
I remember the first time I attempted to level a bathroom floor myself. I was eager, confident, and convinced I could handle it without much trouble. But in the middle of the process, I realized something was off—big time. The self-leveling compound hadn’t settled evenly, and I ended up with stubborn high spots and dips that made tiling a nightmare. That lightbulb moment hit me hard: I didn’t have the right tools to make this work smoothly.
The Secret Weapon I Wish I Knew About Sooner
If you’ve ever felt that sinking frustration—spending hours or even days trying to correct uneven floors—you’re not alone. The truth is, many DIY enthusiasts and pros alike overlook a simple yet crucial tool: the spike roller. Using a spike roller during your self-leveling process can save you from a headache or two, making the entire project easier, faster, and more professional-looking. Today, I promise we’ll dive into exactly why this little roller is a game-changer for your flooring projects, and how you can master its use for flawless results.
Will a Spike Roller Really Make That Big of a Difference?
Early on, I made the mistake of thinking a regular roller or smoothing tool would suffice. Boy, was I wrong. I learned that the tiny spikes on a spike roller serve a vital purpose—popping air bubbles that get trapped in the compound, which can lead to weak spots and uneven surfaces. As explained by experts in floor leveling, removing these trapped bubbles ensures a more uniform, durable finish. Trust me, investing in a good spike roller is one decision you won’t regret.
The Big Question: Is the Spike Roller Really Worth the Hype?
Honestly, I was skeptical at first. It seemed like an extra step, and I wondered if it was just another fancy tool. But I quickly discovered that skipping this step could result in surface imperfections that spoil the final look—and sometimes require redoing the whole job. A well-used spike roller can eliminate those tiny air pockets, helping your self-leveler lay perfectly flat and firm—a crucial factor to avoiding costly mistakes later. Want to learn how to avoid common pitfalls? Check out this guide for expert tips on perfecting your floor leveling skills.
So, before your next flooring project, ask yourself—have I taken all the steps to ensure a smooth, flawless finish? If you’re serious about getting professional results, incorporating a spike roller into your toolkit is a smart move. Now, let’s explore how to choose and use one effectively, so your floors come out perfect every time.
Hang tight. Next, I’ll walk you through the step-by-step process of using a spike roller for stunning results, backed by professional secrets. Ready to level up your DIY game? Let’s go!
,
Prepare Your Surface and Gather Your Tools
Before you begin, clear the area of furniture, debris, and dust. Ensure your subfloor is clean and free of loose particles, which can interfere with leveling. Assemble your tools: self-leveling compound, a spike roller, a trowel, a mixing paddle, protective gloves, and a clean agitation bucket. Think of this step as setting your kitchen for successful cooking—you need everything in place.
Mix the Self-Leveling Compound Correctly
Follow the manufacturer’s instructions closely. Pour the appropriate amount of water into a clean bucket, then gradually add the leveling compound, mixing with the paddle at a slow to medium speed. Achieve a smooth, pourable consistency similar to heavy cream—neither too runny nor too thick. Proper mixing prevents air entrapment and ensures better flow.
Pour and Spread the Compound Strategically
Start pouring the mixture at the lowest point of your floor. Use a trowel to gently spread the compound, guiding it across the surface. Don’t worry about perfection—the self-leveling process will do most of the work. Think of yourself as a painter laying a foundational coat, prepping for the next layer of perfection.
Use the Spike Roller to Eliminate Air Bubbles and Expand Coverage
Once the compound begins to set, immediately roll over the surface with a spike roller. Apply moderate pressure to push the spikes into the leveling compound, moving slowly in a crisscross pattern. This action is like popping bubbles in a wet paint layer—essential for a flat, durable finish. Remember, the goal isn’t just smoothing but also removing trapped air that can cause dips or weak spots. An anecdote: I once neglected this step and ended up with visible air pockets that made the surface uneven—lesson learned the hard way.
Pay Attention to the Micro-Details During Rolling
Focus on overlapping your passes and maintaining consistent pressure. Don’t press too hard; instead, let the spikes do the work. Think of it as untangling knots gently rather than pulling them tight. Rolling too quickly or unevenly can re-trap air, so take your time. For complex corners or edges, use a smaller roller or a brush to reach tight spots.
Allow Proper Curing Time and Check for Flaws
Let the compound cure undisturbed according to the manufacturer’s recommendations, typically 24 hours. Avoid foot traffic or vibrations that can disturb the level surface. Once cured, inspect the floor with a straightedge or the flashlight test to catch any high or low spots. If imperfections are present, lightly sand or reapply compound, then reroll with the spike roller for reinforcement.
Tip for Consistent Results
Practice makes perfect. I suggest trying this technique on a small test patch before tackling your entire floor. Consistency in mixing, pouring, spreading, and rolling ensures a smooth, professional finish. Remember, the spike roller isn’t a one-and-done tool—it’s a crucial step to ensure your leveling compound achieves its maximum strength and flatness. Want to learn more about achieving flawless floor leveling? Check out this detailed guide for expert techniques.
Final Thoughts
Employing the spike roller effectively transforms a potentially messy DIY project into a professional-grade finish. It’s like squeezing out the last bit of toothpaste—every press counts. Keep practicing, stay patient, and soon your floors will be level and ready for the final layer, whether that’s tile or hardwood. Once comfortable, you can explore advanced techniques, but mastering this core step will drastically improve your results across all flooring projects.
Many DIY enthusiasts and even seasoned pros often get caught in misconceptions about floor leveling and installation. One common myth is that using standard smoothing tools suffices for a perfectly flat surface—however, this overlooks the importance of air bubble removal and surface prep nuances. Skipping steps like the use of a spike roller for removing trapped air can lead to weak spots, tile lippage, or dips that compromise longevity and aesthetics. A notable trap is neglecting substrate irregularities; even minor high spots can cause significant issues down the line. It’s essential to ensure the subfloor is thoroughly inspected and prepared before applying leveling compounds or tiles, as this prevents uneven settling and cracking.{
Investing in Quality Tools for Durability
When it comes to maintaining your floors, whether it’s hardwood, tile, or new installations, having the right tools is crucial for achieving long-term results. I personally rely on a combination of professional-grade equipment and smart maintenance products to keep my flooring in top condition. One tool I can’t do without is a high-quality microfiber mop paired with an optimized cleaning solution—this duo ensures gentle yet thorough cleaning without damaging delicate finishes, as detailed in this comprehensive guide.
Why Use a Floor Buffer with Variable Speed Settings?
For regular polishing and removing minor scratches, I recommend a floor buffer equipped with variable speed controls. This allows precise control to prevent over-polishing or accidental damage, especially on hardwood surfaces. Personally, I set mine to a low speed for routine maintenance and higher speeds for deeper cleaning. This adaptability extends the lifespan of your finish and preserves the floor’s aesthetic. Anticipating future trends, I believe advancements like vibration-controlled buffers and eco-friendly polishers will become standard for sustainable and efficient maintenance.
How do I maintain my floor installation tools over time?
Routine cleaning and proper storage are key to prolonging the life of your tools. After each use, I disassemble and clean my tools thoroughly, paying attention to moving parts like brushes and motors, to prevent buildup. Sharpen or replace pads on buffers as needed to ensure optimal performance. Regularly inspecting these tools, as recommended in this expert resource, helps catch potential issues early. Investing in quality brand-name tools may seem costly initially, but it pays off through durability and better results, saving money in the long run.
Smart Tools for Tile and Hardwood Maintenance
For tile floors, I prefer using a grout cleaning drill attachment and a steam cleaner with specialized nozzle heads. These tools effectively remove dirt and prevent staining, preserving the clean look for years. Hardwood floors benefit from a dedicated dust-free sanders and micro-abrasion pads, which I use before applying repair finishes to preempt long-term wear.
What is the future of flooring maintenance? Predicting the trends
Automation and smart sensors are poised to revolutionize flooring care. Imagine vacuum robots with damp-mop capabilities or IoT-connected sensors that alert you when moisture levels rise—preventing water damage before it happens. As technology advances, investing in these innovations will become more accessible and essential for maintenance routines.
To get started with elevating your flooring care, I highly recommend trying techniques like regular use of specialized cleaning tools combined with scheduled inspections. These small yet impactful steps will significantly extend the lifespan of your floors and keep them looking pristine longer. Want to explore more expert-level tips? Check out this upcoming guide for in-depth advice on hardwood maintenance and refinishing strategies.
3 Surprising Lessons I Discovered About Achieving Perfect Floors
One of the most impactful lessons I learned was that no matter how prepared I felt, rushing the process often led to mistakes. Patience truly pays off when working with self-leveling compounds and spike rollers. Additionally, I realized that understanding the subtle signs of trapped air and uneven substrate can save you from costly rework later. Finally, embracing the importance of quality tools and proper surface prep became a game-changer; cheap equipment seldom delivers professional results. These insights transformed my approach and can do the same for your flooring projects.
Tools and Resources That Elevated My Flooring Knowledge
For consistent and professional results, I trust the Mastering Floor Leveling Secrets guide, which offers invaluable tips beyond basic techniques. My personal toolkit also includes a high-quality spike roller, a reliable self-leveling compound, and a sturdy trowel—investing in these has proven worthwhile. When seeking to refine my skills, I often turn to custom tutorials from industry experts available on professional platforms. These resources continuously inspire me to push for monolithic, durable floors.
Your Next Step to Flawless Floors Starts Now
The journey to flawless flooring is as much about mindset as technique. By applying what I’ve shared and practicing patience, you can elevate your DIY game and enjoy the satisfaction of perfectly level floors. Remember, mastery builds over time—every project is a step closer to expert results. Ready to transform your space with confidence? Dive in, embrace the tools and tips, and redefine what’s possible in your home improvement journey.
What’s been your biggest challenge in floor leveling, and how did you overcome it? Share your story below—I’d love to hear about your experiences and insights!
,