
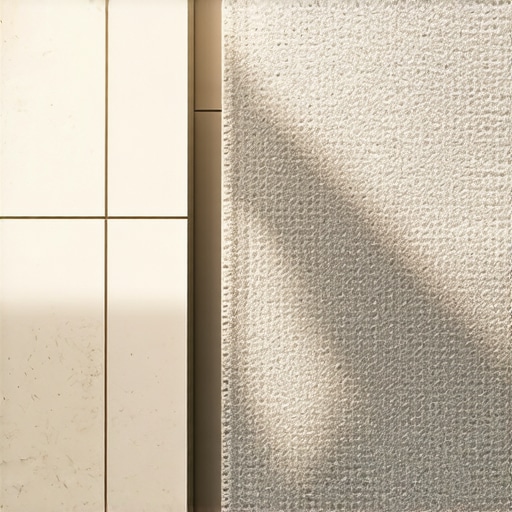
I remember the moment vividly—standing in my living room with tiles in one hand and a thick, plush carpet in the other, realizing how glaring the transition between the two was. It was early mornings and late nights trying to make that edge look smooth, but every time I thought I had it perfect, a tiny misalignment or an uneven gap reminded me of how tricky this simple-seeming task could be. Have you ever faced that frustrating gap where the tile ends and the carpet begins, leaving an ugly, uneven line that ruins the entire look of your space?
Why Getting a Clean, Invisible Transition Matters More Than You Think
That experience was a lightbulb moment for me. I learned that a harsh, obvious gap doesn’t just look bad—it can cause safety hazards, trap dirt, and devalue the overall aesthetic of your home. A seamless transition isn’t just about aesthetics; it’s about creating a safe, functional, and visually appealing space that feels intentionally designed. Believe it or not, addressing this issue can be easier than you think, especially once you understand the common pitfalls and proven techniques. According to flooring experts, a well-executed transition can significantly improve both the look and durability of your flooring, especially when blending different materials like tile and plush carpet. This isn’t just DIY folklore; it’s backed by professionals who know that smart transitions boost your home’s value and comfort.
Skeptical? I Was Too at First
Early on, I mistakenly thought that a simple threshold strip would be the magic fix. Spoiler: it often isn’t enough, especially with uneven subfloors or different material heights. I once added a basic metal strip, only to find it shoved out of position after a few months—disappointing, to say the least. The key is to understand that a long-lasting transition requires more than just a strip; it’s about preparing the surface, choosing the right materials, and precisely installing them for a perfect fit. If you’re curious about how to level your subfloor properly or select the perfect materials, I recommend checking out guides like [floor leveling basics](https://tiletrendshop.com/step-by-step-guide-to-flooring-installation-and-leveling-success) or [tile installation strategies](https://tiletrendshop.com/installing-tiles-like-a-pro-step-by-step-strategies-for-2025). These resources helped me get my transition right—and I am confident they can do the same for you.
Up next, I’ll share my tried-and-true methods for hiding that stubborn gap and achieving a flawless, professional look that lasts. Whether you’re doing a quick fix or a full remodel, these tips will help you walk across your beautiful new space without missteps or unsightly transitions. Ready to ditch the eyesore and create a clean, cohesive floor? Let’s dive into the details.
Prepare Your Subfloor meticulously
Start by removing any debris, dust, or loose material from the subfloor to ensure a clean, flat surface. Use a level or straightedge to identify high or low spots, which can cause uneven transitions. Think of your subfloor as the foundation of a house; if it’s uneven, everything above will be compromised. For precise leveling, consider applying a gypsum-based self-leveling compound, following best practices outlined in [floor leveling success](https://tiletrendshop.com/the-ultimate-guide-to-floor-leveling-for-a-perfect-finish). This step is crucial for a smooth, durable transition.
Targeted Floor Leveling for Flawless Finishes
Address high and low spots
Use a long straightedge or a laser level to pinpoint uneven sections. For high spots, sand them down carefully with a floor sander or hand grinder. For low areas, fill with a suitable leveling compound, spreading it evenly with a trowel. Remember, the goal is a uniformly flat surface—akin to leveling a water surface for a perfect reflection. I once had a stubborn low spot near a doorway; after applying a leveling compound and sanding once dry, I achieved a nearly invisible transition that surprised even my spouse.
Choose the right leveling materials
Select a gypsum-based floor leveler for wood subfloors, as it adheres better and dries smoothly, reducing the risk of future cracks. Read more about [proper leveling techniques](https://tiletrendshop.com/precise-floor-leveling-techniques-to-achieve-flawless-surfaces) to understand the nuances of application and drying times. Proper material choice prevents common mistakes, like cracking or delamination, that can ruin your transition.
Install the Tile with Precision
Lay out tiles according to your design plan before adhering them. Use spacers to maintain consistent grout joints, envisioning your pattern like a puzzle that needs perfect alignment. Apply a high-quality thinset mortar with a notched trowel, ensuring full coverage without voids. The recommended trowel notch size depends on tile thickness and size; check [trowel guidelines](https://tiletrendshop.com/the-trowel-notch-secret-for-stronger-floor-tile-bonds). Placement is critical; verify with a straightedge or laser line to keep the tiles aligned and level. I recall a moment when misaligned tiles became painfully obvious, but reworking a few with patience restored a seamless look.
Blend the Height Difference Creatively
Use transition strips or thresholds designed for your specific flooring materials. For instance, a pigmented caulk can fill gaps up to 1/4 inch, smoothing the visual transition. I suggest testing your chosen sealant on a scrap piece first to match color and flexibility. If the height difference exceeds standard thresholds, consider a ‘ramped’ threshold or a gentle slope made by a thin layer of leveling compound. Doing this carefully can turn an eyesore into a design feature, adding character and safety to your space. For detailed ideas on design options, explore [tile and hardwood pairing](https://tiletrendshop.com/transform-your-space-with-expert-hardwood-floor-tile-combinations).
Seal and Finish for Lasting Results
Once tiles are set and grout has cured, apply a clear sealer over grout lines to prevent staining and cracking. For carpet edges, ensure the carpet tack strip is flush with the tile surface; use a pry bar to adjust if necessary. Sealers and careful edge finishing protect your work and prolong the lifespan of your transition. Keep in mind, regular maintenance like cleaning grout haze with a damp sponge prevents buildup that can compromise the look. A well-executed transition not only enhances aesthetics but also ensures safety, durability, and comfort in your living space. By following these concrete steps, you’re well on your way to a flawless floor that invites you to walk with confidence.Many homeowners believe that flooring installation is simply about laying tiles or hardwood planks, but in reality, there are critical nuances that can make or break your project. One prevalent myth is that a perfect surface isn’t necessary if you lay the flooring carefully. However, neglecting proper subfloor preparation can lead to uneven floors, cracked tiles, or squeaky boards later on. I’ve seen countless DIYers skip the crucial step of leveling the subfloor, only to face costly repairs down the line. To truly master flooring, understanding the importance of precise floor leveling is essential. For advanced insights and techniques, I recommend reviewing [mastering floor leveling secrets](https://tiletrendshop.com/mastering-floor-leveling-pro-secrets-for-perfect-installations), which detail strategies for achieving a flawlessly flat surface that ensures longevity and aesthetic appeal.
Maintaining your flooring and equipped with the right tools are crucial for ensuring long-term durability and a flawless appearance. Over the years, I’ve learned that investing in quality equipment not only makes the installation process smoother but also significantly extends the lifespan of your floors. For example, a high-grade laser level has become my go-to for quick, precise assessments of floor flatness, which is vital before laying down tiles or hardwood. Unlike traditional bubble levels, laser levels provide a 360-degree view, allowing me to detect even the slightest unevenness that could sabotage your transition or flooring finish.
How do I maintain my flooring tools over time?
One simple yet effective maintenance tip is to regularly clean all your equipment after each project. Dust, grout, and adhesive residues can cause tools like trowels, levels, and saw blades to lose accuracy or function prematurely. I always wipe down my laser level and recalibrate it monthly, following manufacturer instructions, ensuring consistent performance. Sharp blades on saws and utility knives are another critical component—dull blades can lead to uneven cuts and compromised flooring integrity. Keep them sharpened or replace them when needed; it’s a small investment that pays off in cleaner, safer cuts.
For power tools, investing in a quality vacuum attachment will prevent dust buildup, which can clog motors or reduce cutting precision. Using a dedicated tool kit designed for flooring tasks, such as a flooring nailer or stapler, also enhances your efficiency and reduces the risk of mistakes. Remember, the key to flawless long-term results lies in both the initial installation and ongoing maintenance. For more advanced insights into keeping your tools in top shape, I recommend exploring this detailed guide.
Looking ahead, tools are becoming smarter and more integrated
Technology trends point toward the integration of digital measurement devices with smartphone apps, allowing for real-time adjustments and error detection. Imagine having instant feedback on your floor’s flatness via an app that communicates directly with your laser level or leveling system. This evolution will streamline the installation process and help even DIY enthusiasts achieve professional-grade results. To stay ahead, consider upgrading your toolkit with smart laser levels or leveling systems that connect to your mobile device and provide step-by-step calibration assistance—saving time and minimizing costly mistakes.
If you haven’t already, try applying a calibrated laser level for your next project. It’s a game-changer that can drastically improve your floor’s levelness, ensuring that your tile or hardwood installation remains perfect for years. Regular maintenance of your tools, combined with the right advanced equipment, will keep your projects running smoothly and your floors looking stunning for the long haul. Mastering these tools and techniques will give you the confidence to handle even the most challenging flooring tasks with professional results.
My Biggest Wake-Up Calls in Flooring Mastery
The toughest lessons I learned about flooring installation often came from my early mistakes, like underestimating the importance of subfloor preparation. I once skipped thorough leveling and paid for it with cracked tiles and squeaky boards that took weeks to fix. That experience taught me that patience and precision upfront save heartache later. Additionally, I realized that choosing the wrong transition materials—like relying solely on metallic strips without addressing height differences—could turn a seamless look into an eyesore, emphasizing that every detail counts. Lastly, I discovered that investing in quality tools, especially laser levels and proper trowels, makes the difference between a professional finish and a DIY disaster, a lesson I wish I had learned sooner.
Tools and Resources That Transformed My Work
Over the years, I’ve curated a set of go-to resources and tools that significantly improved my flooring projects. The step-by-step installation guide is invaluable for understanding the nuances of leveling and precise tile placement. My trusty laser level from a trusted brand ensures my floors are always flat. For selecting materials, this guide on tile and hardwood pairing helped me blend aesthetics with function. Moreover, the latest design trends keep my spaces modern and inspiring. These resources aren’t just tools—they’re my partners in creating lasting, beautiful floors.
Your Next Step Starts Now
Embarking on a flooring project is both exciting and daunting, but with the right knowledge and attitude, you can achieve results that feel truly rewarding. Remember, the key lies in meticulous preparation, selecting quality materials, and honing your technique. I encourage you to embrace every mistake as a learning opportunity—they’re often the stepping stones to mastery. Don’t hesitate to experiment with new tools or techniques, as innovation can lead to stunning outcomes. Every home deserves a foundation that’s both durable and beautiful, and you have the power to create it. So go ahead—start your project with confidence and transform your space into something extraordinary.
What part of flooring installation has you most excited or nervous? Share your thoughts below—I’d love to hear about your projects and help you succeed!