
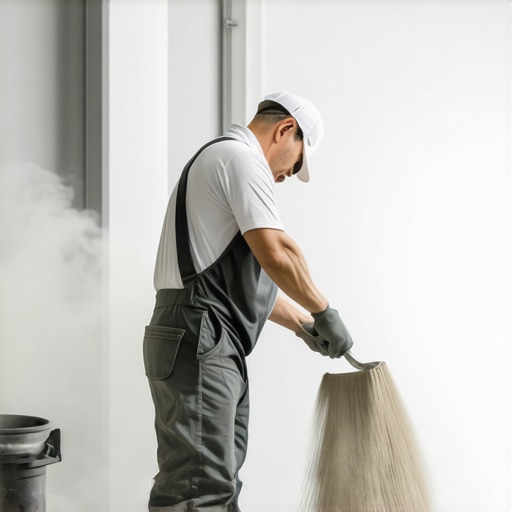
I remember the first time I attempted to level a room with self-leveling compound. I was eager to get the job done quickly, so I poured the mixture and got ready to spread it out. But within seconds, my workspace was engulfed in a massive cloud of dust. The fine, almost invisible particles floated everywhere, settling into every corner of the house. It was a nightmare, and honestly, I felt overwhelmed and discouraged.
The Hidden Challenge of Mixing Self-Leveler
Like many DIY enthusiasts and even seasoned pros, I quickly realized that mixing self-leveling compounds without creating a dust storm is a challenge worth overcoming. Dust clouds not only pose health concerns but also make cleanup a nightmare and can compromise the quality of your floor if not managed properly. If you’re like I was, then you know that controlling dust during mixing is the first step to achieving a seamless, professional-looking floor.
Is Dust-Free Mixing a Myth or a Real Solution?
Early on, I made the mistake of thinking I could just do it quickly without much preparation. I didn’t use the right tools or techniques, and that led to more dust spreading in my workspace. As I delved deeper, I found that there are effective methods to minimize airborne particles—techniques that professional contractors swear by. For instance, using a mixing paddle with a sealed cover and working in well-ventilated areas can significantly cut down on dust emissions.
According to the National Institute for Occupational Safety and Health (NIOSH), fine dust particles can cause respiratory issues over time, even if inhaled in small quantities. This fact underscores the importance of adopting dust control strategies when working with self-leveling compounds.
In this guide, I’ll share proven tips from my experience to help you mix your self-leveler smoothly and dust-free, paving the way for a flawless, level floor. Ready to transform your space without turning your home into a dusty battlefield? Let’s get started!
Prepare Your Workspace Like a Pro
Before mixing, clear the area of debris and create a shielded workspace using plastic sheeting. Set up your tools nearby—sealed mixing paddles, buckets, and a respirator mask—and ensure good ventilation. This setup reduces airborne dust and keeps your work clean, much like preparing a paint station for a precision finish.
Use the Right Tools for Dust Control
Sealed Mixing Paddles
Opt for a mixing paddle with an airtight seal or cover. When I mixed my compound last summer, I used a paddle with a screw-on lid, which minimized dust escaping during operation. Secure the lid tightly before turning on the mixer, and keep dust containment within the bucket.
Slow and Steady Mixing
Start at low speeds, allowing the powder to gently incorporate with the liquid. Rushing this step causes splashing and dust clouds. Think of it like stirring thick gravy; patience yields a smooth, dust-free mixture. For my first attempt, this approach kept the air clear and made pouring easier.
Minimize Dust During Pouring and Spreading
Pour your mixed compound low and close to the surface to prevent airborne particles. Use a trowel or squeegee to spread quickly and evenly, avoiding flicking or splattering. When I poured a large batch into a basement, handling it carefully prevented a cloud of dust from billowing into the air.
Control Ventilation and Airflow
Work in a well-ventilated room—open windows and doors, and use exhaust fans if possible. However, direct airflow can stir up dust, so position fans to create airflow away from your mixing and pouring zones. I learned this by trial and error; positioning the fan behind me kept dust from blowing back into my face and workspace.
Clean Up Smartly
After mixing and pouring, clean your tools with damp cloths to trap remaining dust. Dispose of waste material promptly in sealed bags. When I cleaned my tools with a damp sponge, it avoided introducing dust into the air again, making cleanup more efficient and maintaining air quality.
Using these targeted techniques, you’ll reduce airborne particles significantly, leading to a cleaner, safer, and more professional floor installation. Remember, meticulous preparation and proper tools make all the difference—whether you’re working with tile, hardwood, or self-leveling compounds. For more comprehensive tips on installation, visit this detailed guide.
Many DIYers and even experienced contractors often get tripped up by misconceptions about tile, floor leveling, hardwood floors, and overall flooring installation. Let’s dig deeper into some overlooked nuances that can make or break your project. One widespread myth is that choosing the most popular types of tile or flooring automatically guarantees a perfect result. In reality, the success hinges on understanding specific nuances like substrate compatibility and proper moisture barriers. For example, I once used a standard thinset for a high-traffic commercial space, only to find it cracking prematurely, because I ignored the importance of selecting the right adhesive for heavy-duty conditions. This can be avoided by thoroughly researching your materials, like the expert tips shared in [this detailed guide](https://tiletrendshop.com/flooring-installation-mistakes-to-avoid-for-lasting-results). Beware of the trap where people believe that surface-level checking for levelness suffices. Advanced flooring projects demand meticulous subfloor preparation—using precise tools like laser levels or the flashlight test—to detect subtle dips or high spots that can cause uneven wear or cracking. An oversight here, and your flawless-looking floor might develop unsightly lippage over time. For instance, I’ve seen projects where minor dips in subflooring went unnoticed, leading to tile lippage that only surfaced after grouting. Avoid this mistake by mastering [floor leveling techniques](https://tiletrendshop.com/precise-floor-leveling-techniques-to-achieve-flawless-surfaces). Adding to that, many underestimate the importance of environmental factors. For hardwood floors, humidity levels play a crucial role; neglecting this can result in gaps or cupping. Advanced installers use hygrometers to monitor conditions during installation, ensuring the wood’s moisture content is within optimal ranges, as supported by recent studies in [flooring science](https://tiletrendshop.com/engineered-wood-flooring-issues). A common misconception I want to challenge is that thicker self-leveling compounds always lead to better results. In fact, applying excessive levels without proper substrate preparation or diluting the mix can cause bubbling or peeling. Layering thin, controlled pours and ensuring proper curing time is essential. In complex scenarios, leveraging professional-grade leveling techniques as outlined [here](https://tiletrendshop.com/how-to-achieve-flawless-floor-leveling-before-tile-laying) can make the difference. Lastly, a trap many fall into is rushing through the curing or drying stages. Moving prematurely increases the risk of shifting or surface imperfections. This applies to both tile adhesives and hardwood finishes. Patience and adherence to manufacturer instructions, complemented by advanced knowledge of material behavior, are vital. For example, understanding how different sealants cure can prevent long-term issues like peeling or discoloration. If you want your installation to stand the test of time, avoid shortcutting these crucial steps. Remember, mastering these subtle yet impactful nuances elevates your work from average to professional quality. Have you ever fallen into this trap? Let me know in the comments.
Maintaining your flooring system isn’t just about periodic cleaning; it involves investing in the right tools and adopting proactive strategies to ensure durability and aesthetic appeal over time. From hardwood to tile, each material demands specific care routines supported by specialized equipment. A good starting point is understanding which tools can extend your floor’s life and how to implement effective maintenance practices.
Invest in Quality Tools for Routine Upkeep
One tool I highly recommend is a microfiber dust mop with a telescoping handle. Unlike traditional brooms, a microfiber mop traps fine dust particles efficiently without scratching delicate surfaces like hardwood or polished tiles. Regular use prevents dirt buildup that can cause surface abrasions and dullness. Additionally, a steam mop equipped with adjustable steam settings is invaluable for deep cleaning sealed hardwood floors—it’s chemical-free and sanitizes thoroughly, minimizing wear caused by aggressive cleaning agents.
For maintaining grout and tile joints, I prefer a handheld grout brush with stiff bristles. Effective cleaning of these areas prevents mold growth and keeps your tile installation looking new. When using it, I recommend employing a solution of baking soda and water, combined with a mild acid like vinegar, to break down grime without damaging the grout.
Tools That Support Long-Term Results
Applying a high-quality hardwood floor polish every six months can restore shine and provide a protective layer against scratches. I opt for a product containing UV inhibitors, which protects the finish from sunlight-induced fading. Another helpful tool is a moisture meter—regular monitoring of humidity levels ensures optimal conditions for hardwood stability, preventing gaps and cupping.
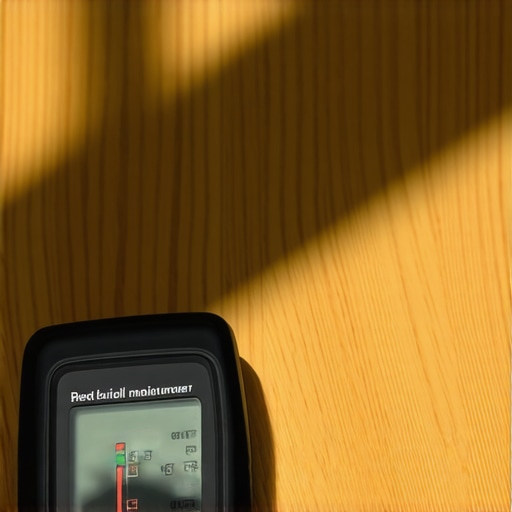
This image showcases a professional-grade moisture meter, which is critical for ongoing maintenance. Keeping an eye on moisture levels helps anticipate issues before they manifest, saving costly repairs later.
Prepare for Continuous Maintenance
Creating a maintenance schedule tailored to your flooring type guarantees longevity. For hardwood floors, I recommend inspecting for scratches and wear marks quarterly, touching up with a recommended repair kit. For tile, regular grout sealing, at least annually, prevents moisture infiltration and staining. In high-traffic areas, consider installing protective pads under furniture to reduce inevitable scratches and gouges.
How do I keep my floors looking pristine over time?
Consistent cleaning, prompt spill response, and periodic refinishing or resealing are keys to long-term beauty. For hardwood floors, periodic sanding and reapplication of finish can revitalize the surface. For tiles, maintaining proper grout sealing prevents staining and deterioration, especially in bathrooms and kitchens. Stay informed about innovative maintenance products and techniques; for example, advancements in UV-cured finishes promise longer-lasting protection—more info can be found in the comprehensive guide.
Take one tip from this advice—perhaps upgrading your routine with a moisture meter or switching to a microfiber mop—then observe how your floors respond over time. The right tools and consistent maintenance are the backbone of lasting beauty and performance in any flooring project.
What I Wish I Knew Before I Started
One of my biggest lightbulb moments was realizing that flawless flooring isn’t just about the right materials—it’s about mastering the subtle art of preparation. For example, I used to overlook the importance of checking subfloor flatness with a simple flashlight test, which led to unforeseen lippage after tile installation. Now, I understand that investing extra time in meticulous leveling techniques, like using a laser level, saves countless headaches later. This lesson taught me that patience and attention to detail are the real game changers in flooring projects.
Tools That Make or Break Your Floors
Over the years, I’ve learned that selecting the right tools isn’t optional—it’s essential. A precision moisture meter, for instance, isn’t just a fancy gadget; it’s your first line of defense against future issues like warping or tiles popping up. Similarly, a sealed, airtight mixing paddle can significantly reduce airborne dust, making your workspace safer and cleaner. Trust me, these tools are investments that pay off in results and peace of mind. For more tips on effective tools, check out this resource.
When Inspiration Meets Real-World Challenges
Often, I find that the biggest hurdles come from environmental factors we can’t see at first glance. High humidity, for instance, can sabotage hardwood installation if ignored. My breakthrough was realizing that simple monitoring with a hygrometer prevents gaps and cupping, saving me from costly refinishing. It’s a reminder that understanding your environment is just as important as knowing your techniques. Staying proactive means you can anticipate and prevent problems before they start, making your flooring last decades instead of years.
Want Your Floors to Speak Volumes
Every project has its unique story, but the common thread is a commitment to excellence. By embracing thorough preparation, investing in quality tools, and respecting environmental nuances, you’re setting yourself up for success. Remember, the difference between a good floor and a great one lies in the details—details that only become apparent through experience and reflection. So, dive into your next project with confidence, knowing that mastery is built one lesson at a time. Curious about specific techniques or tools? Explore this comprehensive guide for deeper insights.
How about you? What unexpected challenge taught you the most about flooring? Share your story below and let’s learn together!
m