
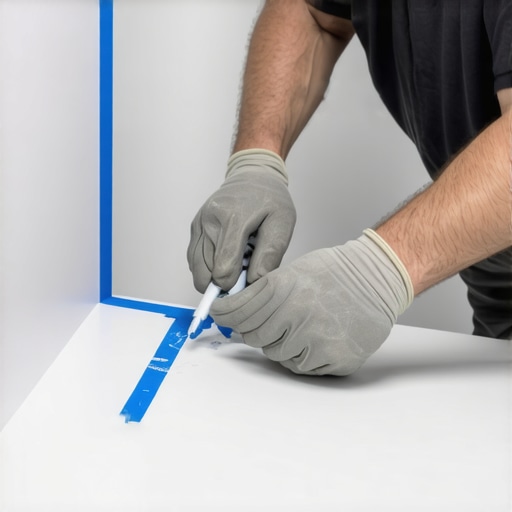
I vividly remember my first attempt at sealing kitchen backsplash edges. It was a mess—ragged, uneven, and far from the clean lines I imagined. That frustrating experience was a lightbulb moment: achieving flawless caulk lines is an art, and I was completely in the dark about the little tricks that make all the difference.
Why Precision Matters More Than You Think
Specializing in tile and flooring installations, I quickly learned that the devil is in the details. A crooked caulk line can ruin the look of an entire project, making a high-end space feel sloppy. But here’s the thing—I discovered a simple, underestimated tool that elevates your finish to professional levels: blue painter’s tape. This little trick is a game-changer, saving time and frustration while giving your caulk a crisp, clean edge.
Today, we’re diving into the Blue Tape Secret—how it works, when to use it, and the common pitfalls to avoid. If you’ve ever battled with smudged, uneven caulk, stick around. I promise this tip will change your entire approach, and your finishes will look like they came straight out of a pro’s playbook.
Is This Trick Overhyped?
There’s always skepticism around simple hacks that promise perfect results. Early on, I made the mistake of rushing the tape removal or applying it at the wrong time, which led to messy edges. The truth? When used correctly, this technique produces much cleaner, more consistent caulk lines, as supported by experienced installers who swear by it. Trust me—once you master this method, you’ll wonder how you ever did without it. Curious to learn how? Keep reading, and I’ll show you step-by-step how to make your caulk lines look professionally finished every time.
Preparing Your Surface Like a Pro
Before applying tape, ensure your surface is clean and dry. Use a damp cloth to remove dust, grease, or any debris that could interfere with adhesion. If you’re sealing around uneven tiles or rough edges, gently sand or smooth out the area for better results. I recall once rushing into a project without this step, leading to uneven tape adhesion and messy caulk edges — a mistake that taught me the importance of proper prep.
Applying Tape for a Clean Finish
Positioning the Tape Correctly
Lay the painter’s tape just outside the joint line, avoiding the grout or seam itself. Press down firmly to prevent any caulk from seeping underneath. When I first started, I made the mistake of placing the tape directly on the seam, which caused uneven edges once removed. Think of the tape as a stencil — it should hug the edge tightly without overstepping.
Using the Right Tape Technique
Run your finger over the tape to secure it fully, especially along corners and curves. This minimizes the risk of caulk bleeding underneath. During my initial attempts, I noticed small gaps where caulk managed to sneak in, resulting in jagged edges. Consistent pressure with your finger ensures the tape molds perfectly to the surface contours.
Applying the Caulk Bead Craftively
Choose a high-quality, low-expansion silicone or acrylic caulk suited for your material. Cut the nozzle at a 45-degree angle, aiming for a bead approximately the width of a pencil. Squeeze the caulk steadily along the seam, maintaining consistent pressure. I used to jerk the caulk gun, causing uneven lines and gaps. Practice smooth, continuous motion — it’s like pouring syrup onto pancakes; slow enough for control but steady enough to avoid drips.
Mastering the Finish with Tape Removal
Wait until the caulk becomes slightly firm but not fully cured—about 5 to 10 minutes—then carefully peel the tape away at a 45-degree angle. Doing this too early or too late results in ragged edges or pull-offs. I once removed the tape after hours, only to find the caulk had set and torn, creating more work. The key is to act at the right moment, pulling slowly and steadily for a sharp, professional-looking line.
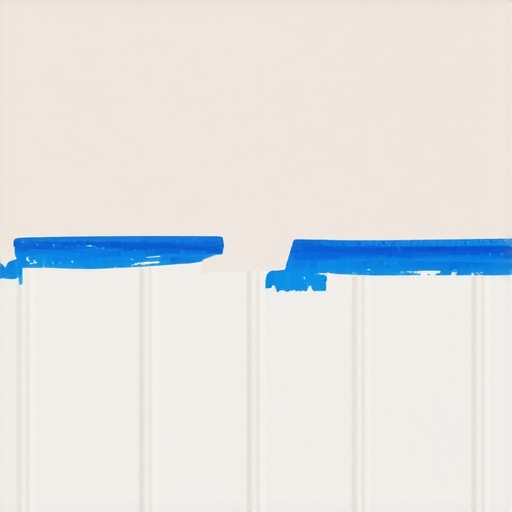
Visualize this technique with a detailed diagram showing tape placement and removal angles, helping you perfect your caulk edges every time.
Many contractors and DIY enthusiasts operate under misconceptions that can compromise the integrity and beauty of a flooring project. One prevalent myth is that leveling floors is a simple step of applying a basic self-leveling compound; in reality, flaws in surface preparation or an improper application can lead to lasting lippage and unevenness, which experts like those at [Mastering Floor Leveling](https://tiletrendshop.com/mastering-floor-leveling-pro-secrets-for-perfect-installations) emphasize as critical to a flawless finish. Advanced installers know that understanding the subtle differences between different subfloor materials and their behaviors is essential—they can cause significant issues if not addressed properly, especially with expansive materials like natural stone or engineered wood. The common mistake of neglecting moisture testing before installation is another trap; hidden moisture can lead to tile de-bonding or warping of wooden floors, a topic thoroughly covered in [The Moisture Barrier](https://tiletrendshop.com/why-your-subfloor-needs-more-screws-before-the-hardwood-goes-down). For those seeking an extra edge, mastering how to properly adapt methods for uneven joists or inconsistent substrates elevates a project from amateur to professional quality. When it comes to tile and hardwood floors, emphasizing precise leveling, correct material choices, and surface testing is vital—yet often overlooked. For instance, many overlook the importance of [proper surface preparation](https://tiletrendshop.com/precise-floor-leveling-techniques-to-achieve-flawless-surfaces), which can make or break the final look and durability. Curious about how subtle surface variations impact long-term performance? Dive into advanced [floor leveling techniques](https://tiletrendshop.com/the-ultimate-guide-to-floor-leveling-for-a-perfect-finish) that go beyond the basics, ensuring your finished surface remains smooth and reliable. Remember, overlooking these nuances is one of the biggest hidden pitfalls in flooring projects. Tender-loving attention to detail at every step not only preserves your investment but also elevates the aesthetic and functional success of your space. Have you ever fallen into this trap? Let me know in the comments.
Keeping Your Floors Functional for the Long Haul
Investing in quality flooring is just the beginning; maintaining its pristine condition over time requires the right tools and consistent care. Personal experience has shown me that the secret to longevity isn’t just in installation but in adopting a disciplined maintenance routine with specialized equipment tailored to your flooring type.
One of my go-to tools is a high-grade oscillating multi-tool. Its precision blades allow me to address minor damages, like scratches or loose tiles, without needing full replacement. For hardwood floors, I rely on a microfiber mop with a pH-balanced cleaner—regular cleaning prevents debris buildup that can cause scratches and dullness.
Why a Floor Buffer Becomes Your Best Friend
In the quest for long-term gloss and smoothness, a floor buffer equipped with a gentle buffing pad is indispensable. I personally use a variable-speed buffer with adjustable settings, enabling me to safely restore shine without risking damage. This is especially crucial when dealing with engineered wood, where aggressive polishing can cause gouges. Regular buffing extends intervals between deep refinishing and keeps floors looking fresh for years.
Monitoring Subfloor Health to Prevent Future Issues
Beyond surface cleaning, maintaining the structural foundation is vital. I recommend an infrared moisture meter—this device helps detect hidden moisture issues under the subfloor, which can lead to warping or mold if left unaddressed. Early detection allows for timely remediation, avoiding costly repairs later. For more insights, visit this expert guide on subfloor maintenance that emphasizes moisture control as a critical factor.
Scaling Your Equipment as Your Needs Grow
As your flooring project expands, so should your toolkit. A professional-grade power scraper can efficiently remove old coatings or adhesives, preparing surfaces for new layers. Additionally, investing in a high-powered, adjustable wet-dry vacuum enables you to clean up after messy jobs quickly, reducing downtime and ensuring a clean workspace for future work.
In the future, I predict smarter tools like AI-enhanced moisture meters and self-cleaning machines will become standard, making maintenance more efficient and less manual. Embracing these innovations now will set you ahead of the curve, ensuring your floors remain durable and visually appealing for years to come.
How do I maintain my flooring over time?
Establish a routine that includes regular cleaning with appropriate tools, periodic inspections for damage, and prompt repairs. Incorporate preventative measures such as protective pads under furniture and controlling humidity levels, especially in areas prone to moisture. For detailed strategies on surface upkeep, check out these hardwood floor care secrets that emphasize proactive maintenance.
Remember, the combination of the right tools, disciplined routine, and early troubleshooting is key to maintaining the beauty and integrity of your floors. Try integrating a floor buffer or investing in an infrared moisture meter this year—you’ll thank yourself when your floors retain their luster decade after decade.
Lessons I Wish I Never Overlooked About Flooring Crafts
One of the most impactful lessons I learned was the importance of surface prep—skipping this step can turn a beautiful floor into a disaster. I once rushed through leveling a subfloor, only to see lippage show up months later, making me realize perfection hinges on patience and attention. Additionally, I discovered that mastering caulk edges isn’t about talent but technique; the blue painter’s tape trick transformed my finishing game. Embracing small, deliberate steps—like testing moisture levels before installation—saved me from costly repairs. These insights came from mistakes, but now they serve as my guiding principles, making every project smoother and more professional.
Tools That Elevated My Flooring Game
Over time, I curated a toolkit that I trust wholeheartedly. The floor leveling secrets guide became my bible for dealing with tricky substrates, while a high-quality infrared moisture meter helped me catch hidden issues early. I swear by a precision trowel for thinset consistency; it ensures strength and longevity. For cleaning, I rely on a microfiber mop paired with pH-balanced cleaner—simple but effective. These tools aren’t just equipment; they’re extensions of my dedication to craftsmanship and quality.
Your Turn to Transform Spaces With Confidence
Remember, every expert was once a beginner, and mastery comes with deliberate practice and persistence. Whether you’re sealing a backsplash or leveling an uneven floor, embracing these detailed techniques will elevate your results. The world of flooring and tile is full of nuances waiting to be perfected—don’t shy away from experimenting and learning. Your home deserves the best, and with the right knowledge, you can achieve professional-grade results that inspire pride and satisfaction.