
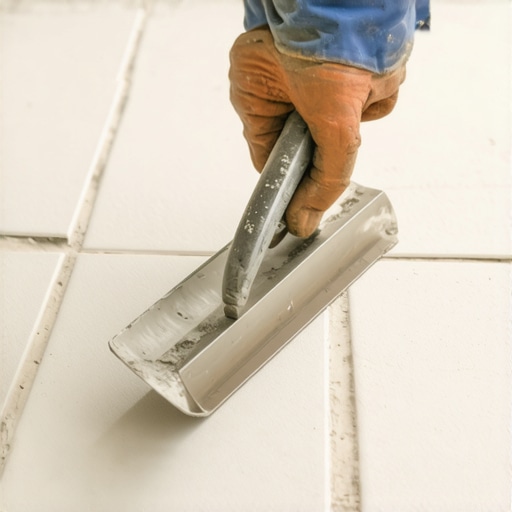
I’ll never forget the moment I stepped onto my newly tiled foyer—and immediately feared everything was about to come crashing down. The grout seemed loose, the tiles wobbled ever so slightly, and I wondered if all my effort was doomed from the start. Turns out, my mistake was at the very beginning—using the wrong trowel notch size. But through that frustration, I uncovered a simple secret that transformed my installation process: The Trowel Notch Secret for stronger floor tile bonds.
Why This Little Trick Can Save Your Floor
If you’ve ever experienced tiles that pop loose or grout lines that crack prematurely, you’re not alone. Many DIYers and even professionals overlook the importance of selecting the right trowel notch. The size and shape of the notch determine how much thinset adhesive is applied, directly impacting the stability and longevity of your tile installation. In fact, choosing the wrong notch can lead to issues that cost both time and money to fix later on.
Is the Trowel Notch Size Actually Worth the Hype?
When I first started experimenting, I thought all trowel notches served the same purpose—and honestly, I was skeptical about how much difference a tiny notch could make. But I made the mistake early on of using a too-small notch, which resulted in insufficient thinset, causing tiles to loosen over time. After switching to the correct size, I noticed an immediate difference in how well the tiles bonded and how much easier the installation became. For more detailed guidance, I recommend checking out this comprehensive guide to floor leveling.
Have you faced issues with tile bond strength? If so, you’re not alone—and the fix might be simpler than you think. The key is understanding that every tile and substrate requires a tailored approach, especially when it comes to applying the right amount of adhesive. Stay tuned, because in the next sections, I’ll walk you through the exact steps to choose the perfect trowel notch, how to apply it properly, and techniques to ensure your tiles stay put for decades to come—coming from my personal experience and trusted industry standards.
Choosing the Right Notch Size for Your Trowel
Start by identifying your tile type and substrate. For heavy porcelain or large format tiles, opt for a V-notch or U-notch trowel with a 1/4-inch or 3/8-inch notch. My personal experience shows that using a 1/4-inch notch on large, dense tiles ensures enough adhesive coverage without excess, preventing uneven bonding and future cracks.
How to Measure and Match Notch Size
Before applying thinset, measure the notch size directly on your trowel. Use a ruler or caliper to confirm whether the notch is 1/4 or 3/8 inch, depending on manufacturer specifications. I once mistakenly used a 1/8-inch notch for a large porcelain slab, which resulted in tiles that glided over the adhesive, leading to poor bond and lippage. Ensuring correct measurement here is critical.
Applying Thinset with Precision
Load your trowel with thinset and hold it at a consistent 45-degree angle. When applying, use firm, even pressure to spread the adhesive evenly in straight, overlapping strokes. Think of it like spreading butter on bread—don’t skimp on coverage, but avoid squeezing out excessive thinset that can create voids. During my first attempt, I used too much pressure, which caused the thinset to smear and resulted in bubbles under the tiles. A controlled, firm stroke works best.
Achieving Proper Adhesive Thickness
Hold the notched side of the trowel firmly against the substrate, and comb the thinset with the notches. The goal is to produce ridges that look like a series of consistent, parallel grooves. After spreading, lift the trowel to see if the ridges are intact; if they collapse, the adhesive isn’t thick enough. Conversely, if ridges are excessive and smushed down, you used too much. My experience teaches that perfect ridges are just enough to hold the tile securely without excess squeeze-out.
Estimating Adhesive Coverage Effectively
Press the tile into the applied thinset, giving a slight twist to ensure full contact. As I learned early on, pressing too hard can squeeze out all the adhesive, creating thin spots that weaken the bond. When done correctly, a uniform thin layer remains on both tile and substrate, promoting maximum adhesion. A common mistake is not checking the coverage under the tile—use a damp finger or a small level to verify contact points for even bonding.
Adjusting Technique for Different Tile Sizes
For smaller tiles, a smaller notch (1/8-inch) may suffice, while larger tiles demand bigger notches. I once used the same 1/4-inch notch for tiles ranging from 4×4 inches to 24×24 inches, which caused inconsistent adhesion. Always adapt your trowel notch to the tile dimensions for best results. For detailed tips on applying different types of tiles, visit this guide on professional tile installation.
Fine-Tuning the Process
After spreading, let the thinset sit for about 10 minutes; this allows it to Many homeowners and DIY enthusiasts believe that straightforward steps like leveling subfloors or choosing the right tile are sufficient for a durable floor. However, these assumptions often obscure nuanced pitfalls that can compromise longevity. One prevalent myth is that a perfectly flat subfloor isn’t essential for tile installations; in reality, minor irregularities don’t just affect appearance—they can lead to cracked tiles and failed bonding over time. Advanced practitioners emphasize that even small dips or humps, if unaddressed, act as stress concentrators, resulting in premature damage. To truly master flooring, understanding how to accurately assess and correct these nuances is critical. For example, employing techniques discussed in precise floor leveling can dramatically improve results and prevent costly repairs. You might think that regular leveling compounds suffice; yet, some products lack the structural strength needed for high-traffic areas, causing issues down the line. My experience has shown that investing in professional-grade solutions and rigorously checking flatness with tools like laser levels makes a huge difference. Moreover, many overlook the importance of proper substrate preparation—skipping steps like moisture barriers or failing to remove old adhesives can trap moisture or debris, undermining new installations. Advanced installers understand that small details, such as controlling humidity levels before laying hardwood, can prevent buckling or cupping years later. Interestingly, even choices of interlocking systems for hardwood floors require nuanced understanding; some locking mechanisms are prone to squeaks or gaps if not installed with precision. Consulting authoritative sources, like mastering floor leveling, can equip you with insider knowledge to avoid such pitfalls. Have you ever fallen into this trap? Let me know in the comments. Remember, taking the time to understand and execute these subtle yet critical steps can make the difference between a floor that lasts decades and one that needs frequent repairs.
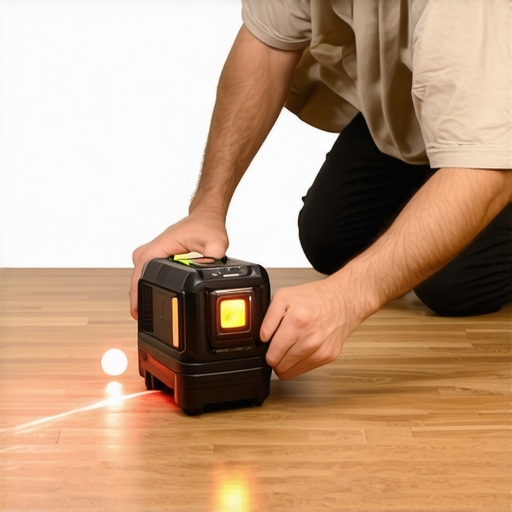
Maintaining your flooring setup is as crucial as the installation itself. Investing in high-quality tools not only makes your work easier but also ensures durability and longevity of your floors. For extensive projects, I rely heavily on a laser level, such as the Bosch Cross Line Laser GLL 55. Its precision helps me detect even the slightest unevenness in subfloors or walls, which is essential for seamless tile and hardwood installation. Regular calibration of this device can prevent future issues like lippage or uneven grout lines, saving you time and money in the long run.
Another indispensable tool is a floor scraper. I prefer the Vogel 11-Inch Floor Scraper because its sturdy handle and sharp blade make removing old adhesives or debris much quicker than manual scraping. Keep your blades sharp and replace them when dull to maintain efficiency. A well-maintained scraper reduces the risk of damaging underlying surfaces, which is vital when working on delicate materials like hardwood or tile substrates.
For dealing with uneven subfloors, a self-leveling underlayment can be a game-changer. I recommend this detailed guide on applying leveling compounds. Proper mixing and application techniques are crucial; I always use a Paddle Mixer attached to a drill for consistent blending. To prevent air bubbles and achieve a smooth surface, I also employ a spiked roller, which presses out trapped air and excess material.
Looking ahead, I predict that automation and smart tools will become standard in flooring maintenance. Devices equipped with sensors and Wi-Fi connectivity could monitor humidity, temperature, and structural shifts, alerting homeowners before small issues become major repairs. Keeping abreast of such technological innovations will empower you to maintain your floors proactively.
How do I keep my floors functioning well over time?
Regular cleaning is essential. For hardwood floors, I recommend using a microfiber mop and a pH-balanced cleaner, like this specialized cleaner. Avoid steam mops as they can cause the wood to swell or warp. For tile, a mixture of warm water and gentle detergent suffices—just ensure to prevent excess water from seeping into grout lines, which can lead to staining or mildew.
Inspections are equally important. Every six months, check for cracks, loose tiles, or gaps in grout. If you notice any irregularities, addressing them promptly with specific repair techniques prevents costly replacements later. For example, small grout cracks can be sealed with high-quality epoxy, which I prefer over cement-based options for durability.
Scaling your flooring projects requires the right tools and consistent upkeep. I suggest investing in a good digital moisture meter to monitor substrate moisture levels, especially before installing new hardwood or tile. This ensures optimal adhesion and prevents issues like warping or delamination. Remember, the key to long-term success lies in proactive maintenance and using the right equipment, like a precision laser level, quality scrapers, and reliable leveling compounds.
Try incorporating a professional-grade laser level into your next project. It might seem like a small investment, but its accuracy will significantly elevate your results and simplify troubleshooting down the line. Regular maintenance paired with these tools guarantees your floors stay beautiful and functional for years to come.
What I Wish I Knew Before My First Tile Bed
One of the most valuable lessons I learned is the importance of patience and meticulous prep work. Rushing through subfloor assessments or skipping the floor leveling step might save time initially but leads to headaches down the line. Precision in measuring and matching your trowel notch sizes can be the difference between a durable floor and one that cracks or tiles loosen prematurely. I now understand that every detail, no matter how small, contributes significantly to the longevity of your flooring project.
Tools That Turn Challenges into Wins
Investing in quality tools like a laser level or a professional-grade self-leveling compound changed how I approach flooring. These tools provide accuracy and confidence, eliminating guesswork and inconsistent results. For instance, a well-calibrated laser level helps me spot even the tiniest unevenness that could cause lippage or grout cracking. Trust me, the right tools empower you to achieve professional results without the hefty price tag of hiring experts.
Feelings That Drive Better Decisions
The emotional journey—from frustration when tiles pop loose to joy when everything aligns perfectly—taught me resilience and the importance of continuous learning. Each mistake became an opportunity to refine my technique. Embracing the process pushed me to explore authoritative resources, like the detailed guides on floor leveling and installation fundamentals. My dedication paid off not just in a strong floor but in newfound confidence that I can tackle future projects with competence.
My Secret Weapon for Lasting Floors
Consistency is key. Whether applying thinset or sealing grout, sticking to proven techniques ensures durability. For example, I always let the thinset sit for about 10 minutes before setting the tile, which improves adhesion—a tip I discovered from industry-standard practices. Regularly inspecting your progress and adjusting techniques can prevent issues like uneven grout lines or tile lippage. Remember, a beautiful floor is a testament to your patience and attention to detail, so don’t cut corners.
Your Next Step Into Flooring Mastery
Take the lessons I’ve shared to heart and view your project as an opportunity for growth. Start small, practice with quality tools, and don’t shy away from seeking expert advice—these are investments in your skills and your home’s future. Your motivation to improve creates floors that will stand the test of time, adding beauty and function to your space. Ready to transform your space with confidence? The journey begins with action. Share your experiences or ask questions below—your insights might inspire someone else to elevate their flooring game.