
Have you ever stepped onto a new click-lock floor and immediately felt like you’re walking on a trampoline? That unsettling sensation hits hard. I remember the first time I experienced this—my heart sank. I had poured my weekend into installing what I thought was a top-quality floor, only to be greeted by a springy feel with every step. It was a lightbulb moment for me: the secret culprit wasn’t the flooring itself but the underlayment beneath it.
The Hidden Danger of Skimping on Underlayment
After some digging, I discovered that the underlayment plays a crucial role in how your floor performs. Cheap underlayment often lacks the necessary density and stability, leading to a bouncy, unstable surface. This isn’t just a minor inconvenience; it can compromise the integrity of your entire flooring installation. The bouncing isn’t just annoying—it can cause your tiles to crack or your hardwood to squeak over time.
I’ve learned from personal experience and industry experts that investing in quality underlayment ensures your floors feel solid and durable. Alternatively, opting for cheap underlayment can turn your home into a mini trampoline every time you walk across it. Remember, the right underlayment isn’t the place to cut costs if you want a flawless finish.
Are You Falling for the Cheap Underlayment Trap?
Early in my DIY days, I made the mistake of choosing the cheapest underlayment available, thinking I was saving money. That was a costly lesson. Not only did I end up redoing sections, but I also learned just how much this small component impacts the overall feel and longevity of your floor. If you’re questioning whether your underlayment is worth the investment, you’re not alone. Many homeowners face this dilemma.
Research shows that proper underlayment can extend the lifespan of your flooring by years and improve comfort underfoot (source: Flooring Installation Mistakes). So, the next steps you’ll read aren’t just about avoiding a bounce—they’re about creating a floor that feels as good as it looks. Ready to dive into solutions? Let’s get started.
Start with a Thorough Inspection
Before laying any flooring, I recommend inspecting your subfloor meticulously. Use a long straightedge or a level to identify high and low spots. During my project last summer, I noticed a 1/4-inch slope in one corner, which could cause uneven tile placement or squeaks later. Mark these areas clearly so you can address them effectively.
Choose the Right Leveling Method
Self-Leveling Compound Applications
Applying a self-leveling compound is often the most efficient way to smooth out uneven surfaces. Mix the compound according to the manufacturer’s instructions, typically to a pancake batter consistency. Pour it onto the low spots starting from the center of the depression, allowing it to flow into the area naturally—think of it like a liquid fill for dips and valleys. Use a notched squeegee or a trowel to help spread the compound evenly, and avoid overworking it, which can introduce air bubbles or uneven thicknesses.
Subfloor Shimming Techniques
If the unevenness is minor or localized, shimming might suffice. Use plywood or wooden shims to build up low areas, especially around joists or subfloor panels. Secure shims with screws or construction adhesive to prevent movement. Remember, just like in floor leveling challenges, precision is key—don’t just stack shims loosely; ensure a flat, stable surface.
Level and Verify Frequently
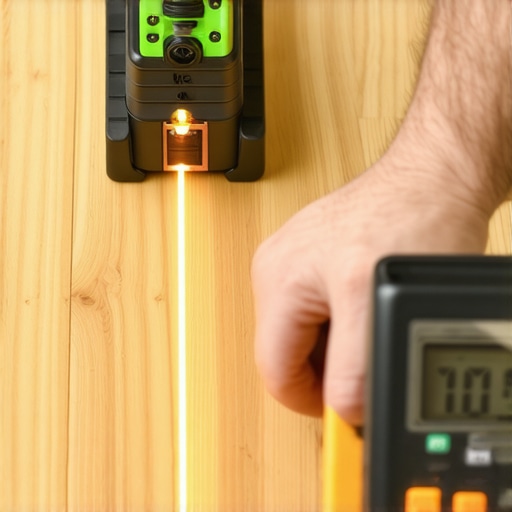
After applying these methods, double-check your work with a long spirit level or a laser level. Place the level across different points to confirm the surface is within 1/8-inch tolerance over 10 feet, the standard for most flooring installations. I once used a laser level during a project, which illuminated high and low spots with laser dots—this visual cue made correction much faster and more precise.
Prepare for Plywood or Underlayment Installation
Once your subfloor is flat, proceed with installing a plywood underlayment if necessary. Secure it with screws, ensuring they are flush to avoid creating uneven surfaces. For tile installations, adding a cement board or an additional layer of underlayment can further smooth irregularities. Reliable leveling upfront saves you from costly fixes once the final flooring is in place, much like floor leveling for a seamless look.
Final Surface Check
Before laying your chosen flooring material, do a final check across the entire surface. Walk on it with your shoes, or better yet, with a roller, to identify any bounce or uneven spots. If you find issues, address them now—adding more leveling compound or shimming as needed prevents future problems like cracking or squeaking, which I learned through firsthand experience.
Mastering these steps turns a bumpy, problematic subfloor into a solid, dependable foundation—critical for achieving professional-quality results and avoiding the trampoline effect that inspired this guide.
Many homeowners believe that choosing the right flooring material is all about aesthetics and durability, but the real mastery lies in understanding the nuances that can make or break your project. For instance, a widespread misconception is that leveling is a straightforward step—simply pouring some compound and walking away. In reality, improper mixing ratios and inconsistent application can lead to surface imperfections, causing tiles or hardwood to crack over time. You can learn more about these pitfalls and how to avoid them by visiting floor leveling challenges.
To keep your flooring project performing at its best over the long haul, the right tools are non-negotiable. Personally, I rely on a handful of specialized equipment and software that make precision and efficiency achievable. One must-have is a high-quality laser level, such as the Bosch GSL2. Its accuracy and ease of use help me verify flatness across large surfaces without tedious manual tests, ensuring that the foundation remains level through years of use. For measuring moisture content in concrete slabs, I prefer the Tramex Concrete Moisture Encounter due to its non-invasive operation and quick readings, which are crucial before applying leveling compounds or adhesives.
When it comes to preparing high-quality subfloors, I recommend a variable-speed electric paddle mixer, like the Porter-Cable PCE700. Its adjustable speed settings prevent overmixing, which can introduce air bubbles into leveling compounds, ultimately causing uneven surfaces. For precise application of self-leveling compounds, a notched squeegee with flexible rubber blades proves invaluable; it helps achieve consistent thickness and spread, reducing rework and ensuring longevity.
Beyond manual tools, I leverage software like floor leveling challenges guides to troubleshoot persistent uneven spots. This digital support allows me to plan interventions efficiently and avoid common mistakes that could compromise the installation’s integrity. Embracing advanced tools like these reflects a trend towards more precise, professional results in DIY and contractor work alike. In the future, I believe automation and smart diagnostics will further improve long-term flooring maintenance, detecting issues before they escalate.
How do I maintain flooring over time?
Regular inspections using a laser level and moisture meter can identify potential issues early. Keeping the surface clean of debris and avoiding excessive moisture prolongs the lifespan of your floors. When problems do arise, tools like a oscillating multi-tool equipped with a grout removal blade facilitate efficient repairs without disturbing large areas. Investing in quality equipment now pays off by preventing costly rework later. Remember, a well-maintained floor begins with the right tools, meticulous inspections, and proactive care. For advanced maintenance techniques, consider exploring our precision-leveling practices to keep your surfaces smooth and secure for years to come.
If you haven’t already, try using a laser level to double-check your floors after each major step. This simple step can catch minor imperfections before they turn into big problems. Call us at our contact page to get expert advice tailored to your project. Embrace these tools and tips—your future self will thank you for those trouble-free, flawless floors.
Lessons from My Flooring Journey That Changed Everything
One of the most impactful lessons I learned was that even a small misstep in floor leveling can snowball into major headaches down the line. I once overlooked the importance of thorough subfloor inspection, leading to unexpected unevenness after installation. That lightbulb moment taught me to always invest extra time in simple checks, like using a laser level—an underrated hero in flooring projects. Additionally, I discovered that patience in the preparation stage pays off immensely; rushing through leveling or shimming results in bounce and squeaks I wish I had avoided. Remember, it’s often the meticulous details that separate a professional-looking floor from a homeowner’s regret.
Tools and Resources That Made My Floors Flourish
Over the years, I’ve come to rely on certain tools that truly elevate the quality of my work. A high-quality laser level, such as the Mastering Floor Leveling Pro Secrets, gives me confidence that every section is within perfect tolerance. For mixing leveling compounds smoothly, I trust the Precise Floor Leveling Techniques guide, which offers unparalleled tips. My go-to moisture meter helps prevent problems caused by hidden dampness, and a reliable notched trowel ensures consistent application, reducing waste and rework. These resources have become my secret weapons for achieving flawless, lasting floors that stand the test of time.
Embrace the Challenge and Transform Your Space
Flooring installation is more than just a task; it’s an opportunity to elevate your entire home ambiance. With the right mindset and tools—like those discussed—you’re capable of creating surfaces that aren’t just visually stunning but also durable and comfortable. Remember, every expert was once a beginner who dared to start. Take that first step, use trusted resources, and don’t shy away from learning along the way. Your dream flooring is within reach, and I believe in your ability to make it happen. Ready to leave the trampoline behind and enjoy a solid, beautiful floor? Share your project goals or questions below, and let’s make those floors flawless together.