
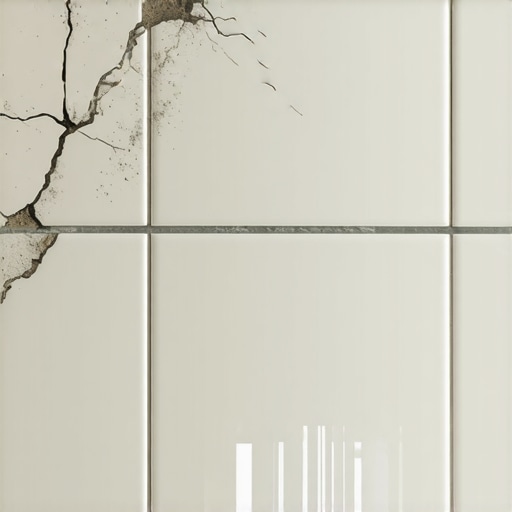
I remember the exact moment I realized my radiant heated floor was causing my beautiful ceramic tiles to crack. The warm glow of my living room suddenly turned into a frustrating sight—microfractures spreading like spider webs across my tiles. It was a lightbulb moment that changed everything I thought I knew about heating systems and flooring integrity. As a DIY enthusiast who loves homemaking, I was initially convinced that radiant heating was the perfect combination of comfort and efficiency. But soon enough, I faced an unexpected challenge: cracking tiles that threatened to ruin my aesthetic and my wallet.
How Radiant Heat Ends Up Cracking Your Tiles — And Why It’s a Big Deal
This isn’t just about an unlucky aesthetic choice. When radiant heating systems are installed without proper knowledge, they can cause significant problems. The primary culprit? Thermal expansion. Think of it like this: your ceramic tiles are rigid and don’t bend. When heated unevenly or without the right subfloor considerations, they expand and contract. Over time, this movement creates stress fractures. This isn’t just a cosmetic issue; cracks can compromise the durability of your tiles and lead to costly repairs.
In my case, I had overlooked a critical step—proper floor leveling and understanding the heat expansion limits of my materials. That mistake cost me a lot of time and money. Early on, I was naive—I thought installing radiant heat over any subfloor would work seamlessly. But I learned the hard way that proper pre-installation measures are essential. For example, ensuring your subfloor is perfectly level can prevent uneven temperature distribution, which exacerbates cracking problems. If you’re dealing with or concerned about this, I highly recommend checking out this guide on floor leveling. It can save you headaches down the line.
Solved Once and For All: Your Best Defense Against Cracking Tiles
Thankfully, understanding what to watch out for is the first step toward fixing or avoiding these issues altogether. I’m here to share what I wish someone told me from the start—ways to protect your investment and enjoy the cozy warmth radiant heat provides without cracking your tiles. But before we dive into practical solutions, I want to ask—have you faced this particular problem? Cracks after installing radiant heating, or worse, before you even turn it on? If so, stay with me. We’re about to uncover the secrets to a flawless, durable floor that handles heat like a champ.
Ensure the Subfloor Is Perfectly Level
Before installing radiant heating, inspect your subfloor, much like a builder checking a foundation before building upon it. During my recent project, I used a 4-foot level and a straightedge to identify uneven spots. I discovered a slight hump near the doorway that could cause uneven tile stress. To correct this, I applied a self-leveling compound, following the steps outlined in this guide on floor leveling. The result was a smooth, even surface that minimized the risk of tile cracking due to thermal movement.
Choose the Right Underlayment and Membranes
Think of underlayment as a buffer between your heated floor and tiles—it’s like a shock absorber for your tiles’ thermal expansion. I selected a high-quality anti-fracture membrane, which I applied according to manufacturer instructions. This additional layer distributes stress evenly and prevents cracks. If you’re unsure about compatible membranes, consult this resource on common installation mistakes to guide your choice and application method.
Control Heating Schedules and Temperatures
Rapid temperature changes are akin to sudden temperature swings in a car—stressful for the tiles. I programmed my thermostat to ramp up slowly over several hours and kept the maximum surface temperature below 81°F (27°C). This gradual warming prevents thermal shock. To fine-tune your system, consider implementing a temperature sensor that monitors surface heat and adjusts output accordingly, following strategies in this advanced heating control guide.
Allow Proper Curing Before Grouting and Use Expansion Joints
Patience plays a vital role—similar to letting concrete cure fully before walking on it. After installing heating and tiles, wait at least 24-48 hours before grouting. During my installation, I added expansion joints at spaced intervals, about every 8-10 feet, to accommodate movement. These joints act like joints in a wooden floor, preventing stress buildup. For detailed planning, refer to this comprehensive article on tile spacing and joint placement.
Use Compatible Materials Designed for Heat Expansion
Select tiles and adhesives rated for radiant heat use. In my project, I used porcelain tiles and a flexible, heat-resistant thinset mortar, which together minimized cracking risk. Ceramics with high thermal shock resistance are ideal. This choice is crucial, as incompatible materials expand differently when heated. For more insights, consult this guide on tile selection for heated floors.
Monitor and Adjust After Installation
Once your system is functional, monitor tile integrity over time. During my first winter with the new radiant system, I observed some minor hairline cracks, which prompted me to reduce the maximum heating temperature and increase the duration of warm-up cycles. Regular inspections help catch issues early and prevent extensive damage. Incorporate these practices by reviewing this resource on long-term flooring care.
Challenging the Popular Myths About Floor Installation
Many homeowners believe that flooring installation is straightforward: lay the material, level the surface, and enjoy. However, this oversimplification ignores critical nuances that can make or break your project’s durability. A common misconception is that subfloor leveling is just a preliminary step—yet, in reality, it’s the foundation of a seamless and crack-free finish. Skimping on meticulous leveling often leads to uneven surfaces, stress points, and eventual cracking, especially with delicate materials like ceramic or engineered hardwoods.
Contrary to popular belief, choosing the most aesthetically pleasing tiles or hardwood doesn’t guarantee longevity. The real secret lies in selecting materials with appropriate thermal expansion properties and compatible adhesives. For instance, many assume all tiles can handle radiant heating equally, but porcelain’s low thermal expansion makes it ideal for heated floors, as supported by industry expert insights from this guide on tile selection.
Common Trap: Misjudging Floor Leveling and Its Costly Consequences
Here’s a trap I see frequently—homeowners or even some installers underestimate the importance of precise floor leveling. In my DIY experience, rushing through leveling tasks led to uneven tile joints, visible lippage, and hairline cracks that appeared within months. The real mistake was neglecting to use proper testing methods, such as the >leveling techniques to ensure flatness before tile installation. These small oversights can morph into huge hassles, requiring costly repairs.
To avoid such pitfalls, I recommend thorough assessment with an accurate laser or water level, followed by correction using self-leveling compounds designed for your subfloor. Mastering these techniques, detailed in this resource, is essential for a flawless finish that lasts.
Advanced Tips for Pros and Enthusiasts
For the seasoned DIYer or professional, understanding the importance of expansion joints and material compatibility is crucial. Installing properly spaced expansion joints prevents stress accumulation that causes cracks—especially important in large open areas. Moreover, controlling ambient moisture and temperature during and after installation can significantly influence the outcome. Ignoring these conditions often results in warping, cupping, or cracking over time. According to expert research from this advanced guide, proactive measures during installation pay dividends in longevity.
Remember, your floor is more than just a surface—it’s a complex system affected by many subtle factors. Taking the time to master these nuances can save you from frustration and costly fixes later. Have you ever fallen into this trap? Let me know in the comments and share your experiences!
How do I maintain my flooring setup over time?
Keeping your hardwood or tile floors in top condition requires the right tools and a proactive maintenance routine. Personally, I rely heavily on a high-quality moisture meter, such as the Protimeter Surveymaster, to regularly check subfloor and surface humidity levels. This early detection helps prevent issues like warping or cracking before they become serious. I also keep a microfiber mop and soft-bristled brush handy for gentle cleaning, avoiding harsh chemicals that can damage finishes. Regularly inspecting expansion joints with a flashlight can reveal dust or debris buildup that might impede proper movement, which I then clean out with a soft brush or compressed air. As technology advances, ‘smart’ moisture sensors are becoming increasingly popular, allowing continuous monitoring—something I see trending for long-term flooring health. Predicting the future, I believe integrated sensor systems could become standard, providing real-time data and alerts via smartphone apps, simplifying maintenance and preventing costly repairs.
Recommendation of Essential Tools for Flooring upkeep
Having the right equipment makes all the difference. My go-to tool for floor leveling checks is a laser level, specifically the Bosch GLL 3-180, which I use to periodically ensure the entire surface remains flat over the years. It’s precise, easy to set up, and saves me from tedious manual checks. For cleaning, I prefer a steam mop with adjustable settings—like the Dupray Neat—since it sanitizes my tiles without risking damage to grout lines or delicate wood finishes. When dealing with uneven areas or repairs, I use a manual scraper and a quality self-leveling compound, such as Ardex K-15, which I apply carefully following guidelines from this comprehensive guide. I also recommend investing in a good-quality putty knife and small trowel for minor repairs, which helps maintain the seamless look of your surface over time.
The importance of documenting your flooring’s condition
One tool I find invaluable is a digital camera or smartphone with good macro capabilities to photograph your floor periodically. This allows me to track changes, like tiny cracks or grout deterioration, over months or years. Combining these visuals with maintenance logs ensures I spot potential issues early. Looking ahead, I anticipate that AI-powered photographic analysis could help homeowners automatically detect and predict when repairs are needed, making long-term maintenance even more straightforward.
What advanced tricks can prolong your floors’ beauty?
Try regularly refining the application of expansion joints or adding protective pads under furniture to reduce stress points. Also, using a floor-specific sealant or polish periodically can bolster finishes against wear and moisture infiltration. I personally apply a natural, wax-based polish biannually, which not only refreshes the appearance but also adds a protective layer. To ensure you’re covering all bases, check out this expert resource on hardwood refinishing. Taking these extra steps now can save you from extensive repairs later and keep your installation looking flawless for decades.
What I Wish I Knew About Tile Cracking Before Starting
The biggest lesson I learned was the importance of meticulous floor leveling. Rushing this step can lead to uneven stress distribution, causing cracks over time. Accepting that patience during leveling can save you from future headaches was a lightbulb moment for me, and I recommend it wholeheartedly. Additionally, selecting materials suited for radiant heat, like porcelain tiles with low thermal expansion, can make a huge difference.
Another insight is the significance of proper expansion joints and controlled heating schedules. These prevent the thermal movement that often causes cracking, especially in large areas. Lastly, understanding the compatibility of adhesives with heat-resistant tiles ensures your beautiful installation remains intact for years.
Tools and Resources That Changed My Approach to Flooring
My essential toolkit includes a laser level from Bosch for precise leveling, a high-quality moisture meter like the Protimeter Surveymaster for moisture checks, and a flexible, heat-resistant thinset mortar. These tools, combined with comprehensive guides like this floor leveling guide, provided me with the confidence to execute a professional-looking, durable floor.
For material selection, this tile selection resource helped me choose porcelain tiles optimized for radiant heating. Regular maintenance tools, such as microfiber mops and soft brushes, along with smart moisture sensors, can prolong your flooring’s life and keep it looking stunning.
Your Chance to Personalize Your Flooring Journey
Remember, your flooring is an investment that reflects your care and attention to detail. By applying these insights and utilizing proven tools, you can achieve a seamless, crack-free finish that lasts for decades. Don’t let common mistakes hold you back—embrace patience, proper planning, and quality materials. Your perfect floor awaits—are you ready to take the next step? Share your own experiences or questions below and join a community committed to flooring excellence!