
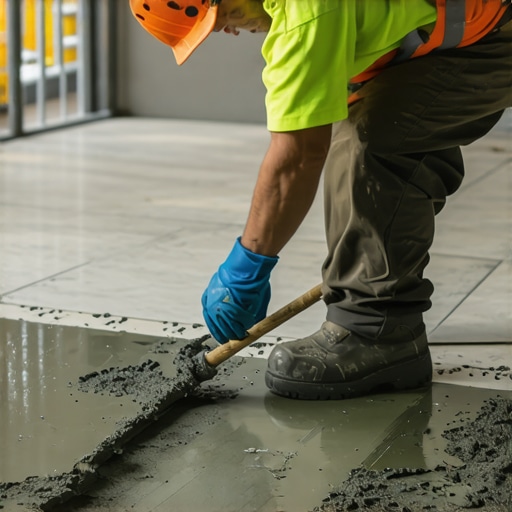
Ever stood in the middle of a freshly tiled floor, only to notice tiny lippage or unevenness that you just can’t ignore? I’ve been there myself, frustrated and scratching my head over why those big, beautiful tiles don’t sit perfectly even. It was a lightbulb moment for me: the secret isn’t just in the tile itself but in how it’s installed. Specifically, the thickness of the thinset bed plays a crucial role—especially with large format tiles.
The Hidden Challenge of Large Format Tile Installation
When I first started working with large tiles, I made the rookie mistake of sticking with the standard thinset depth I used for smaller tiles. Big mistake. I soon realized that a mere 1/4-inch layer just couldn’t provide the support these heavy, oversized pieces needed. Big format tiles are more prone to lippage—those pesky uneven edges—if not installed with a proper, deeper thinset bed. Trust me, this isn’t just about aesthetics; it’s about durability, safety, and long-term savings.
From my experience, going deeper with the thinset—about 3/8-inch to even 1/2-inch—can make a world of difference. This extra support prevents movement, reduces lippage, and ensures that your beautiful installation remains pristine for years. And no, it’s not an extra hassle; it’s a smart investment of effort for a flawless finish. Need help with prepping for such an installation? Our step-by-step guide can walk you through mastering your subfloor and leveling process.
Why Consistent Bedding Matters More Than You Think
Consistency is key when applying a deeper thinset layer. Uneven support leads to lippage, with tiles sitting unevenly across the surface. This was a realization I stubbornly resisted at first, thinking I’d get away with my usual technique. But without proper adjustment, the risk of cracked tiles or grout failure skyrockets. The good news? Using a notched trowel suitable for thicker layers ensures a uniform bed. Plus, taking the time to test your thinset—like performing the classic “slap test”—helps confirm you’re getting the right thickness before setting the tiles.
If you’ve faced similar issues or want to avoid costly mistakes, I highly recommend consulting professional tips and techniques. For instance, mastering the art of proper thinset application is fundamental. If you’re curious about other common pitfalls, check out these expert mistakes to avoid.
Is the Deeper Thinset Bed Technique Truly Necessary?
Early on, I doubted whether going thicker was really worth the extra effort. Would it make a difference? Well, I found out the hard way—the answer is a resounding yes. The performance and longevity of large-format tile installations depend heavily on proper bedding. Cutting corners here can lead to uneven floors, cracked tiles, and even safety hazards down the line. Remember, even the best tile designs won’t shine if the foundation isn’t solid.
So, have you faced issues with uneven tiles or worrying about long-term durability? If so, embracing a deeper thinset approach might be just the upgrade your project needs. And if you’re eager to learn more about flawless installation techniques, our comprehensive articles on installing tiles like a pro and floor leveling secrets can help you get there.
Prepare Your Subfloor Precisely
Start by thoroughly inspecting your subfloor for bounces, dips, or cracks. Use a long straightedge to identify uneven spots. If you find high or low areas, apply self-leveling compound according to the manufacturer’s instructions, ensuring a smooth, even surface. Once cured, test the levelness with a spirit level—aim for no more than 1/8 inch deviation over 10 feet. This step is crucial; a stable base prevents future lippage and cracks.
Prime the Surface and Set Your Guidance Lines
Apply a quality primer suitable for your subfloor material to ensure optimal adhesion. Mark your layout with chalk lines aligned with your principal gridlines—these act as guides during tiling. Use a laser level or a chalk line to establish the main reference points, ensuring symmetry and straightness. This forethought simplifies the process and minimizes misalignment as you lay tiles.
Mix Thinset with Precision and Use the Right Tools
Combine your thinset mortar with clean water, following the manufacturer’s recommended mixture, avoiding over-thinning or thickening. Use a paddle attached to a drill for consistent mixing—aim for a peanut butter consistency. Invest in a 1/2-inch notched trowel, perfect for thicker beds, and hold it at a 45-degree angle to comb the mortar evenly across the subfloor. This prepares a uniform bed that supports large tiles effectively.
Apply Thinset in Sections and Manipulate for Support
Start from your central reference point and spread thinset in manageable areas—about 3×3 feet—to prevent drying out. Back-butter each tile: apply a thin layer of mortar directly onto the tile’s back to ensure full contact. Gently place the tile onto the bed, pressing firmly and twisting slightly to seat it. Use a beating block or rubber mallet to tap the tile, leveling it with your chalk lines. During this phase, I once misapplied thinset, resulting in lippage. Reworking tiles immediately saved the project, underscoring the importance of careful application.
Maintain Consistent Thickness and Alignment
Regularly check the thickness of the thinset bed with a notched trowel edge or a gauge. Aim for 3/8 to 1/2 inch depth where support is crucial. Periodically, step back and visually inspect the alignment with a straightedge or level. Adjust tiles before the mortar sets; the longer you wait, the harder it becomes to correct unevenness. Implanting these practices during my first large-format install prevented countless issues later.
Use Spacers and Verify Gaps Often
Insert spacers between tiles to maintain uniform joint widths—typically 1/16 to 1/8 inch. Remove spacers only after the grout has cured sufficiently to avoid shifting. For large tiles, consider using wedge shims or leveling systems designed for large-format installations—these help reduce lippage caused by substrate movement. I utilized wedges in a complex layout, which significantly improved surface uniformity and eliminated the need for grinding or grinding accessories later.
Cut Tiles with Precision and Protect Edges
Measure and mark cut lines accurately, then operate a wet saw fitted with a diamond blade. Support the tile properly during cuts to prevent chipping—use a sturdy clamp or guide. When fitting pieces around corners or fixtures, dry-fit first to identify tight spots. In one instance, I used a diamond blade with a fine grit for delicate cuts on polished porcelain, achieving clean edges without chips. Taking time here avoids rework and maintains professional quality.
Allow Proper Curing and Final Checks
Let the thinset cure for at least 24 hours—longer for thicker beds or high-temperature environments. Avoid foot traffic during this period. Once set, remove all spacers and double-check tiles for flatness. Use a straightedge to identify minor lippage—correct by grinding if necessary. After grout application, monitor for any shifting or cracking, addressing issues promptly to uphold the installation’s integrity.
If you want to refine your skills further, exploring these expert floor leveling techniques can offer additional insights. Proper preparation, precise application, and attentive finishing are your keys to professional-looking, durable large-format tile floors.
Many homeowners and even seasoned DIYers fall prey to misconceptions about flooring installation that can compromise the final result. One pervasive myth is that achieving a perfectly flat floor is solely about sanding the subfloor thoroughly. In reality, subtle nuances like proper moisture testing and addressing tiny subfloor imperfections are crucial, as emphasized in expert guides on floor leveling. Overlooking these details can lead to lippage in tile or creaking hardwoods. A common mistake is relying solely on self-leveling compounds without verifying actual moisture content; high moisture levels can cause adhesion failures over time. Advanced installers use calcium chloride tests to detect hidden moisture issues, which are often neglected by amateurs. Moreover, many assume that thicker mortar beds automatically resolve unevenness. While a deeper bed can support large tiles better, the real secret lies in meticulously prepared substrates and consistent bedding techniques, as discussed in floor leveling secrets. Misjudging the curing time for thinset or ignoring expansion gaps can result in tiles cracking or shifting months after installation. Another frequently missed nuance is the influence of environmental factors like humidity and temperature on drying and adhesion. For example, installing hardwood floors without considering seasonal humidity fluctuations can cause boards to swell or shrink later, undermining your investment. According to industry experts, understanding these subtleties transforms a good installation into a long-lasting, professional finish. So, are you aware of the hidden pitfalls that can jeopardize your project? For more in-depth tips, our tips on innovative tile designs and expert insights can guide you. Remember, the devil is in the details—don’t let overlooked nuances undermine your hard work.
Equip Yourself for Success: Tools I Recommend
Investing in the right tools can make all the difference in achieving a professional-quality flooring installation and ensuring its longevity. I always rely on a high-quality vibration-assisted tile cutter for precise, clean cuts—especially on harder porcelain or large-format tiles. Its motorized blade reduces chipping and speeds up the process, which is crucial when working with expansive surfaces. For leveling and maintaining flatness, a digital floor scanner has become indispensable; it provides accurate readings over large areas, allowing me to identify subtle dips or high spots that could compromise the final look. When it comes to mixing thinset or self-leveling compounds, I swear by a paddle attachment with variable speed control—manual mixing can lead to inconsistencies, but this setup guarantees a uniform blend every time.
For surface preparation, I recommend a high-powered vacuum with HEPA filtration to remove dust and debris thoroughly. Clean surfaces are the foundation of durability, and a top-tier vacuum minimizes airborne particles that could interfere with adhesion. Additionally, a mortar joint trowel with a notched design tailored to thicker beds ensures you maintain consistent bedding thickness—this is vital when installing large tile formats. For ongoing maintenance, a soft buffer pad connected to a variable speed buffer helps in buffing out minor scratches on hardwood floors, restoring luster without damage. High-grade epoxy grout applicators also improve grout lines’ uniformity, preventing cracks and moisture intrusion over time.
Where Do I Keep My Equipment Maintained?
Proper maintenance extends the lifespan of your tools and keeps your flooring projects humming smoothly. Regular cleaning after each use prevents debris buildup that can dull blades or clog motors. Lubricate moving parts, such as blade bearings and trowel handle joints, following the manufacturer’s guidelines. For power tools, store batteries in a cool, dry place, and periodically check for signs of wear or damage. Calibration of measuring devices, like laser levels or digital scanners, should be performed annually to ensure accuracy. When using power mixers or saws, replace blades or bits at the first sign of dullness to avoid slipping and uneven cuts. Remember, well-maintained tools not only produce better results but also reduce safety risks.
Long-Term Results You Can Rely On
Creating durable floors depends heavily on consistent maintenance routines. Hardwood floors benefit from regular cleaning with gentle, pH-balanced products—avoiding harsh chemicals preserves their finish. Protective pads under furniture prevent scratches, and periodic re-coating with a polyurethane finish keeps the surface glossy and resistant to wear. For tile installations, sealing grout lines every few years helps prevent moisture intrusion and staining, preserving the original appearance. Self-leveling compounds may require periodic touch-ups if minor dips appear over time, especially in areas prone to substrate movement. Installing a dehumidifier during humid seasons can prevent excess moisture from compromising both hardwood and tile adhesion, especially in basements or crawl spaces.
Scaling Your Flooring Projects Effectively
As your skills and confidence grow, scaling becomes a natural next step. Investing in larger power tools, such as industrial tile saws or multi-head grinders, allows you to take on bigger or more complex projects efficiently. Automating parts of the process, like using a robotic tile layer, is a future trend I believe will revolutionize DIY flooring, making professional standards achievable at home. Efficient storage systems for your tools and materials ensure quick access and reduce downtime. Collaboration with specialists, like flooring inspectors or leveling experts, can also elevate your work quality and help you tackle larger projects with assurance. For an in-depth look at mastering floor leveling to support scale-up efforts, I recommend reviewing these expert leveling techniques.
Remember, consistent maintenance not only prolongs the life of your floors but also maintains their aesthetic appeal. For example, using a dedicated grout haze remover periodically can prevent unsightly residues. Regular inspections after installation help catch issues early before they become costly repairs—think cracks, uneven tiles, or loose boards. To stay ahead of the curve, I urge you to try deploying a digital moisture meter during subfloor prep to detect hidden moisture problems that could undermine your work, as explained in technical literature like the concrete moisture testing guidelines. Take charge today and make one of these advanced maintenance practices part of your routine—you’ll thank yourself long-term.
Lessons That Only Experience Can Teach
- One of my biggest surprises was realizing that even a slight miscalculation in thinset thickness could ripple through the entire project, causing lippage and crack issues later on. It taught me that attention to detail at every step is the difference between a good job and a professional finish.
- Initially, I believed that standard tools were sufficient for large-format tiles. However, investing in specialized cutting equipment and leveling systems significantly improved results and saved time, proving that quality tools are investments in your craft.
- Misjudging the curing time of thinset was a rookie mistake I made early on. The hard lesson? Patience isn’t just a virtue—it’s essential. Waiting the full cure ensures durability and prevents failures down the line.
- Learning to test substrate moisture with simple tools like calcium chloride tests revealed hidden issues that could sabotage your installation. This experience underscored the importance of thorough prep and not skipping crucial diagnostics.
- Finally, I discovered that environmental factors like humidity and temperature subtly influence curing and adhesion. Adjusting my work schedule and environment based on these factors proved vital for success, reinforcing that planning is key to long-lasting results.
Tools and Resources That Keep Me Ahead
- A high-quality wet saw with diamond blades: Precise cuts make all the difference, especially with delicate polished porcelain. I trust brands that deliver consistency every time.
- Digital floor scanner: It helps identify subtle dips or high spots, ensuring a perfectly flat surface before laying tiles. I’ve found this tool invaluable for large areas.
- Calcium chloride moisture test kits: Foremost in diagnosing subfloor issues, these simple tests prevent future cracking and adhesion failure.
- Mastering floor leveling techniques: Our comprehensive guide has been a game-changer, providing step-by-step methods to ensure a flawless foundation.
- Quality notched trowels and spacers: Using the right tools for the job guarantees even bedding and uniform grout lines, elevating your craft every time.
Seize the Opportunity to Shine
Every project is a chance to learn, refine, and elevate your flooring installation skills. Embrace the nuances—like proper thinset support and substrate preparation—and watch your results transform from amateur to professional quality. Remember, investing in the right tools, understanding the science behind curing, and paying attention to environmental factors are what truly make a difference. Your next large-format tile project doesn’t have to be intimidating; with these insights, it can be a rewarding journey towards mastery.
What’s the most unexpected lesson you’ve learned during your flooring projects? Share your story below and let’s grow together in this craft!
,