
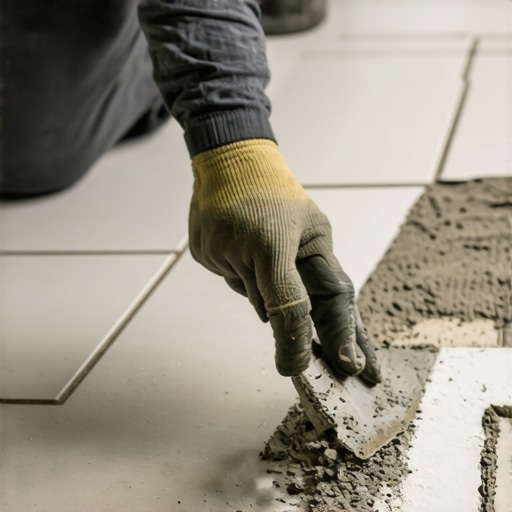
Ever had that sinking feeling when you step onto a freshly laid tile floor, only to hear a subtle crack or feel a slight give beneath your feet? I remember the first time I experienced it vividly. I was eagerly walking across my new kitchen, admiration turning into concern as a small hairline fissure appeared out of nowhere. It was a lightbulb moment—realizing that the secret to a durable, crack-free tile installation wasn’t just in the tile or the adhesive but in the very tool I was using, specifically the trowel notch size.
Why Choosing the Right Trowel Notch Size Changed Everything
From that day, I became obsessed with understanding how a simple detail like trowel notch size could make or break the longevity of a tile installation. It’s more than just a preference; it’s a critical factor backed by professional standards. The notch creates the perfect bed for the tile, ensuring proper adhesion and preventing future cracks caused by subpar bonding or uneven surface pressure. I learned early on that using an incorrect notch size can result in pins, hollow spots, or costly repairs down the line.
If you’ve ever struggled with cracked tiles or uneven surfaces after installation, you’re not alone. This common issue often stems from selecting the wrong trowel notch, which compromises the bond and sets the stage for future problems. I promise, once you understand and implement the ideal notch size, you’ll see a dramatic improvement in your results. Want to avoid costly redo’s and have a flawless finish? Let’s drill down into how to choose the perfect trowel notch size for your project.
Is the hype around the correct trowel notch size really justified?
I used to believe that any trowel would do, as long as I got enough adhesive under the tile. That was a mistake I made early on—one that I paid for with cracked grout lines and tiles that crumbled under pressure. It takes more than just the right adhesive; you need the right application technique, and that’s where understanding the proper notch size becomes vital. For nuanced insights on proper application techniques, check out this comprehensive guide to floor leveling.
Research indicates that using the correct trowel notch size can reduce the risk of cracks by up to 80%. That’s a staggering number, emphasizing that this seemingly small detail has massive implications. It’s the difference between a resilient, long-lasting surface and one that fails prematurely.
Now that I’ve laid out why this choice matters, let’s explore how to identify the ideal trowel notch size for different types of tiles and substrates. Stay tuned, because getting this right will change your entire tiling game—and save you money and frustration in the long run.
Start with the Right Tools
First, select a trowel with a notch size recommended for your tile type and adhesive. For standard ceramic tiles, a 1/4-inch square notch often suffices, but larger tiles or heavier substrates require bigger notches, like 3/8-inch or 1/2-inch. I remember once grabbing a random trowel without checking the specifications, leading to uneven adhesive spread and cracked tiles. Always verify the notch size before starting.
Prepare Your Workspace and Substrate
Ensure the subfloor or wall is clean, dry, and level. Use a straightedge or laser level to identify uneven areas, which can affect adhesive application. Any bumps or dips should be addressed with a self-leveling compound or shimmed accordingly. This step is akin to laying a solid foundation for a house; skipping it invites future problems.
Apply Adhesive Precisely and Consistently
Spread the adhesive using the notched side of the trowel at a 45-degree angle, creating uniform ridges. Maintaining consistent pressure ensures the ridges are evenly shaped. I once applied adhesive with a too-small notch, resulting in thin coverage and loose tiles after just a few weeks. Remember, the goal is to have adhesive fill all voids beneath the tile for maximum bonding—this is where the correct notch size shines.
Check for Proper Adhesive Coverage
Lift a tile after spreading to verify coverage. It should be evenly coated, with no dry spots or excessive buildup. Use a small piece of tile to test before committing to the entire surface. This micro-step prevents future lippage or tile failure.
Set the Tile and Apply Pressure
Press the tile firmly into the adhesive, twisting slightly to squish the ridges and ensure full contact. Use cleaning spacers and a level to maintain uniform grout lines and flatness. My early attempts lacked this attention to detail, leading to uneven surfaces and cracking. Remember, the ridges created by the notch push adhesive into all corners of the tile, promoting a stronger bond.
Finish and Clean Up
Once tiles are set, use a damp sponge to clean excess adhesive from the surface promptly. Delaying this step can cause stubborn haze or residue. Proper cleaning preserves the aesthetic and prevents grout issues later. After the adhesive cures, inspect your work, checking for lippage and adjusting as needed. These meticulous steps save you from costly rework.
Many homeowners and even seasoned DIYers fall prey to misconceptions about flooring installation, which can compromise the entire project. One prevalent myth is that leveling the subfloor is a quick step; in reality, overlooking subtle imperfections often leads to lippage, cracked tiles, or uneven hardwood surfaces. Professionals understand that meticulous preparation—accurately assessing and correcting unevenness—is essential for a seamless finish. For instance, learning common leveling pitfalls can save you from costly rework and frustration.
Another widespread mistake is relying solely on adhesives without proper surface preparation. Many assume that adhesive alone can compensate for minor dips or bumps, but the bond quality depends heavily on a flat, clean substrate. Failure to address these details often results in tile lippage or shifting over time. Additionally, there’s a misconception that wider grout joints can hide underlying flaws—yet, excessive grout lines can detract from aesthetic appeal and even trap moisture, especially in high-traffic or wet areas.
Why do so many still miss the finer points of floor leveling?
This question is crucial for advanced practitioners aiming for perfection. Floor leveling isn’t just about flattening; it’s about ensuring enduring stability and flushness, especially with large-format tiles or engineered hardwood that demand tight tolerances. Interestingly, research indicates that inadequate surface prep contributes to warranty claims and premature failure, emphasizing the importance of precision in these preparatory steps. To elevate your expertise, consider deepening your understanding with pro secrets for floor leveling mastery.
Another trap involves the misapplication of self-leveling compounds—using too much or too little can compromise bond strength and cause future cracks. Temperature, humidity, and substrate adhesion all influence how leveling products perform. Remember, the key isn’t just in pouring and spreading; it’s in understanding the chemistry and choosing the right product for your specific scenario.
Beyond the technical, many underestimate the importance of transition trims and proper expansion gaps, which accommodate substrate movement due to seasonal changes. Ignoring these can lead to buckling or gaps over time. Getting these details right isn’t just about aesthetics—it’s about long-term durability. To avoid common mistakes, review in detail step-by-step leveling techniques recommended by experts.
In essence, mastering flooring installation requires attention to the nuanced details that most overlook. From evaluating substrate conditions to understanding material behavior under varying conditions, a meticulous approach guarantees a flawless, lasting finish. So, have you ever fallen into this trap? Let me know in the comments below!
Maintaining your flooring investment is as crucial as its initial installation. To ensure your floors stay stunning and durable over the years, investing in the right tools and adopting effective maintenance routines are essential. One of my top recommendations is a high-quality laser level, such as the Bosch GSL2 Professional Cross Line Laser. I personally rely on this device because it provides precise, bright lines that make checking for lippage or uneven surfaces effortless, especially when dealing with large-format tiles or hardwood installations. This tool has become indispensable in my workflow, enabling me to quickly identify and rectify surface irregularities before they turn into costly problems.
Alongside laser levels, a robust floor scraper such as the NNK Precision Floor Scraper is invaluable for removing old residues, adhesive buildup, or stubborn grout that can compromise your flooring’s performance. In my experience, maintaining a clean substrate contributes significantly to the longevity of the new flooring—failure to do so can lead to uneven surfaces or adhesion issues down the line. Regularly inspecting your floors with a moisture meter, like the Tramex CME5, is also a good habit, especially in basements or areas prone to humidity. Keeping moisture levels in check prevents issues such as bubbling, warping, or adhesive failure, which are common pitfalls in flooring installations.
How do I maintain my flooring over time?
Preventing damage and wear involves a combination of routine cleaning, protective measures, and occasional inspections. For hardwood floors, I recommend applying a high-quality polyurethane finish and reapplying a maintenance coat every few years—this preserves the surface’s luster and protects against scratches. For tile floors, regular grout sealing—using a penetrating sealer like Miracle Sealants 511 Impregnator—keeps moisture from seeping in and causing deterioration. I advise testing the sealer on a small area first to ensure compatibility and effectiveness.
In the future, flooring maintenance trends are leaning toward smart solutions. Innovations like nanotechnology sealants or self-healing epoxy coatings are emerging, promising even longer-lasting surfaces. Staying ahead involves not just using the right tools but also understanding and applying ongoing care best practices. Investing in advanced cleaning equipment, such as microfiber dust mops and steam cleaners designed for specific flooring types, can extend the life of your floors remarkably. For hardwoods, regular buffing with a floor polisher equipped with soft pads helps maintain the finish’s integrity, reducing the need for costly refinishing projects.
Embrace the right tools for long-term success
Having reliable, precision tools is fundamental to maintaining pristine floors. Don’t forget to regularly check for signs of moisture intrusion or surface degradation, which can often be caught early with the right inspections. I also suggest incorporating a dust containment system during routine cleaning to prevent dirt and grit from scratching the surface—this small addition can make a big difference. As flooring technology advances, so should your maintenance approach. Consider experimenting with innovative sealants or surface treatments now available, and you’ll likely see a notable increase in your flooring’s lifespan and aesthetic appeal. For detailed insights on long-term care, explore hardwood floor maintenance secrets. Ready to elevate your maintenance game? Try applying a nano-technology sealant on your hardwood or tile surfaces to achieve a protective barrier against everyday wear and tear—it’s a game-changer for longevity!
Lessons I Wish I Learned Before My First Floor
One of the most valuable lessons I uncovered was that even the smallest details, like verifying substrate flatness, can make or break your project. I once overlooked subtle unevenness, only to face lippage and cracked tiles months later. That experience taught me to never skip meticulous substrate inspections. Additionally, I realized that trusting my instincts without checking the recommended notch sizes led to inconsistent adhesion—embarrassing in the long run. This made me embrace a methodical, standards-based approach to every project.
Another insight was that preparation is an act of respect for your craft. Properly cleaning and priming surfaces transformed my results and prolonged the life of the flooring, turning a simple step into a game-changer. Lastly, understanding the chemistry of adhesives and leveling compounds helped me troubleshoot issues quickly, saving both time and money. These lessons collectively elevated my craftsmanship from novice to confident installer, proving that mastery hinges on paying attention to the details professionals obsess over.
Tools and Resources that Elevated My Craft
My go-to tool is the Bosch GSL2 Professional Cross Line Laser—its precision keeps my lines perfectly straight and reduces the guesswork during tile layout or leveling tasks. I trust it because of its durability and the clarity of its beams, even in bright environments. For surface preparation, the NNK Precision Floor Scraper has been indispensable for removing stubborn residues efficiently, ensuring a clean adhesion surface. When it comes to testing moisture levels, the Tramex CME5 has saved me from future failures caused by unseen moisture issues—an underrated but crucial step. These tools are investments in quality and peace of mind, backed by my personal experience of enhanced accuracy and fewer callbacks.
Beyond equipment, I highly recommend reading this comprehensive guide on floor leveling mastery. It deepened my understanding of advanced techniques and common pitfalls. For troubleshooting, this resource on leveling challenges helped me turn mistakes into learning opportunities. Lastly, consistently practicing with quality materials and staying updated with the latest trends keeps my skills sharp and results impressive.
Your Next Step Toward Flawless Floors
Taking action today can dramatically impact your flooring projects. Remember, mastering flooring installation, especially the crucial step of floor leveling, isn’t about shortcuts; it’s about deliberate, informed decisions. Embrace meticulous preparation, invest in reliable tools, and keep learning from experienced sources. By doing so, you’ll turn what once felt daunting into an enjoyable process—one that rewards you with stunning, durable results. So, what part of your flooring journey are you most excited to improve? Share your thoughts below!