
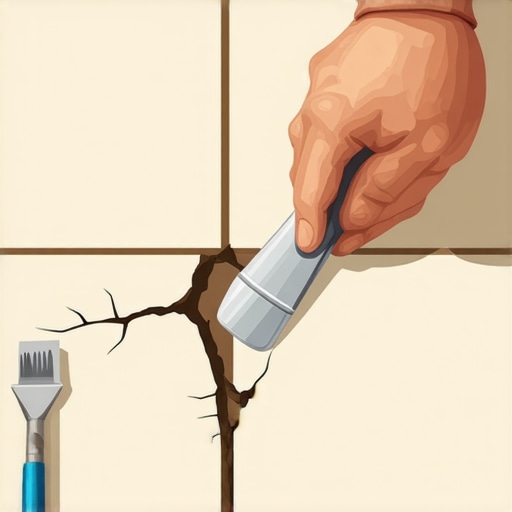
It was one of those mornings where everything seemed to go wrong—my toddler dropped her breakfast, I spilled coffee on my favorite rug, and to top it off, I noticed a sudden crack slicing across my kitchen tile. My stomach sank. I had just finished installing those tiles myself, feeling pretty proud, only to have this unfortunate break appear out of nowhere. That crack represented more than just a cosmetic issue; it felt like a tiny betrayal of my hard work.
Why Ignoring Cracked Tiles Isn’t an Option
Look, I get it. The idea of ripping out a tile just to fix a crack sounds like more trouble than it’s worth. But left unaddressed, a small crack can turn into a bigger problem. Moisture can seep in, leading to further damage, and sometimes, cracks can even affect the structural integrity of the floor over time. Plus, there’s the aesthetic aspect—no one wants to walk into a room and see a glaring flaw staring back at them.
Fortunately, I discovered that fixing a cracked tile without removing it is not only possible but surprisingly straightforward—once you know the right steps. Today, I want to share my experience and help you avoid the hassle of full replacements. We’ll walk through practical tips to repair your tile, restore your floor’s beauty, and avoid costly confrontations with your local contractor.
Is It Really Worth the Effort, or Just a Waste of Time?
When I first encountered my crack, I wondered if I should just ignore it or go for a complete overhaul. But that mistake early on would have cost me more in the long run. According to flooring experts, timely minor repairs can save you a lot of trouble—and money—down the line. The key is knowing how to do it right.
If you’re hesitant, you’re not alone. I deferred repair at first, thinking I needed professional help. But after some research and a bit of trial and error, I realized that many fixes could be DIYed. That said, it’s essential to avoid common pitfalls—like using the wrong adhesive or neglecting to clean the crack thoroughly—which can make the repair worse. For more about common mistakes to avoid during flooring projects, check out this guide.
This article will delve into the specific steps I took, along with tips from seasoned pros, to successfully mend my cracked tile without breaking the bank or my back. So, if you’ve faced a similar dilemma, stay tuned—your solution might be simpler than you think.
Prepare Your Workspace Carefully
Start by clearing the area around the cracked tile, removing any debris or loose pieces. Use a vacuum or compressed air to ensure the crack is free of dust and dirt, which can prevent proper adhesion. Wearing gloves, gently clean the crack with a soft brush and a damp cloth. Allow it to dry completely before proceeding. Think of this step as giving your repair a clean canvas—skipping it can cause the fix to fail or look uneven.
Select the Right Repair Materials
Choose a flexible epoxy or a high-quality tile adhesive designed for small repairs. These products are formulated to bond well with existing tiles and resist cracking over time. Avoid using general-purpose glues as they lack the durability needed for floor movement. I once used a cheap superglue, which cracked again within months—learning this lesson the hard way. To ensure a lasting fix, invest in recommended materials from trusted brands.
Apply the Adhesive Precisely
Using a fine-point applicator or a toothpick, carefully place the adhesive into the crack. Work slowly to avoid excess glue spilling onto the surface. Use a damp cloth or a plastic spatula to press the crack closed gently—think of it like sealing a tiny zipper. This controlled application prevents messes and ensures the repair is flush with the tile. When I repaired mine, I kept a damp sponge close by to wipe away excess adhesive immediately, keeping the surface neat.
Secure and Cure the Repair
Place a piece of painter’s tape over the repaired crack to hold it in place while the adhesive cures. Follow the manufacturer’s instructions for curing time, typically 24 hours. Avoid stepping on the tile or applying any weight during this period. This patience ensures the bond sets properly, much like letting glue dry before handling delicate crafts. I learned this when my tile didn’t hold because I walked on it too soon.
Finish with a Seamless Touch-Up
Once cured, lightly sand or buff the repaired area with fine-grit sandpaper to remove any excess adhesive and level the surface. If necessary, apply matching grout or sealant around the repair to blend it with the existing tile. For example, I used a small brush and matching grout to hide the tiny repair line, restoring the tile’s uniform look. Remember, attention to detail makes all the difference in achieving a professional finish.
Tip: Know When to Call the Pros
While small cracks can often be repaired DIY-style, larger or structural damage may require expert intervention. If the crack is deep or propagating, consult a flooring professional to assess and prevent future issues. You can reach out for professional advice here Contact Us. Sometimes, a quick repair isn’t enough to prevent bigger problems, and knowing your limits saves time and money in the long run.
When it comes to flooring, many homeowners and even DIY enthusiasts overlook the subtle complexities that determine a flawless result. While common advice focuses on choosing the right materials or following basic installation steps, there’s an often-missed nuance: understanding how floor substrates and environmental factors influence the final outcome. This oversight can lead to costly mistakes, like cracked tiles or warped hardwoods, which could have been avoided with deeper insight.
One prevalent myth is that all subfloors are equal, but in reality, every substrate—whether concrete, plywood, or OSB—has its quirks and requirements. For instance, concrete slabs with high moisture content demand proper moisture barriers and specific leveling techniques, as detailed in expert guides on floor leveling. Ignoring these nuances often results in adhesion failures or tile lippage that compromises both aesthetics and durability.
A common trap is assuming that a pre-existing substrate is suitable for your chosen flooring without assessment or modification. This is a mistake many make, leading to issues like uneven surfaces or future cracking. For example, hardwood installed over improperly leveled subfloors can develop gaps or squeaks over time. Advanced installers emphasize the importance of thorough inspection and proper preparation, utilizing techniques explained in flawless leveling methods.
What about environmental considerations? Extremes in humidity and temperature fluctuations significantly impact flooring longevity. Wood, especially, is highly sensitive; without acclimation, it can swell or shrink, leading to gaps or buckling. To avoid these pitfalls, professionals recommend checking environmental conditions and applying acclimation periods, as discussed in hardwood refinishing tips.
Uncovering these subtle yet crucial factors often sets apart a professional-looking, durable floor from one riddled with issues down the line. Ignoring them isn’t just a rookie mistake—it can cause long-term frustration and expense. Always remember, good flooring work hinges on a comprehensive understanding of all underlying elements, not just surface-level choices.
Have you ever fallen into this trap? Let me know in the comments!
For more insights into avoiding installation errors that doom your project, check out mistakes to avoid for lasting results. Deep dive into proper leveling techniques with precise leveling methods to ensure your floors are perfectly flat from the start.Maintaining your flooring’s integrity over the years requires the right tools and a proactive approach. One essential piece of equipment I swear by is a high-quality digital moisture meter, like the Protimeter Surveymaster, which allows me to monitor subfloor conditions before and after installation. Checking moisture levels consistently helps prevent issues such as cupping or buckling, especially in regions with fluctuating humidity. Regularly inspecting and maintaining your flooring isn’t just about immediate fixes; it’s about preserving value and safety long-term.
Another indispensable tool is a professional-grade floor scraper with a carbide blade. I use mine to remove stubborn adhesive residues or surface imperfections that can compromise new coatings or overlays. Investing in a sturdy scraper might seem minor, but it pays dividends in achieving a smooth, durable surface that stands the test of time.
For ongoing maintenance, I recommend a microfiber mop combined with pH-neutral cleaning solutions. This combination gently lifts dirt without damaging the finish, ensuring your floors retain their shine and protective layer. I personally avoid harsh chemical cleaners which can degrade sealants, leading to costly refinishing jobs.
Looking ahead, I predict that smart flooring sensors—capable of detecting moisture, temperature, and even structural shifts—will become standard. Incorporating technology into preventative maintenance will revolutionize how we care for floors, enabling early detection of problems before they escalate.
So, how do I maintain my floors over time? The key is regular inspections using reliable tools, combined with gentle cleaning routines. Don’t neglect the importance of monitoring moisture levels; it’s often the silent culprit behind many long-term issues. For more detailed insights into avoiding common pitfalls, explore this guide on flooring installation mistakes to avoid for lasting results.
I encourage you to try using a moisture meter during your next project—it’s a game changer for longevity. Proper tools, consistent checks, and informed maintenance will ensure your investment keeps looking great and performing well for decades.
What I Wish I Knew Before Repairing My First Cracked Tile
One of my biggest lessons was realizing that even seemingly minor cracks can hide deeper issues, like underlying substrate problems or moisture infiltration, which may require more than just surface fixes. I learned to always inspect the subfloor thoroughly and consider professional assessments for large or recurring cracks, as detailed in guides on floor leveling challenges. It’s tempting to fix a crack quickly, but patience and proper diagnostics save headaches later.
My Go-To Tools That Make a Difference in Tile and Floor Restoration
Investing in quality tools like a reliable digital moisture meter and a precision adhesive applicator changed my approach entirely. These tools give you confidence that your repairs will last, helping prevent future issues like warping or cracking. I swear by resources like floor leveling pro tips because they emphasize the importance of the right equipment in achieving flawless results. The right tools are an investment that pays off in durability and peace of mind.
The Courage to Redefine Your Flooring Journey
Taking that initial step to repair or upgrade your flooring can feel intimidating, but remember—every seasoned pro started with a single project. Your willingness to learn and apply proper techniques can transform your space and boost your confidence. Whether it’s mastering tile leveling or understanding moisture control, embracing continuous learning leads to breathtaking results. For ongoing inspiration, explore strategies at home transformation tips. Your next project isn’t just a repair; it’s a chance to create something truly exceptional.