
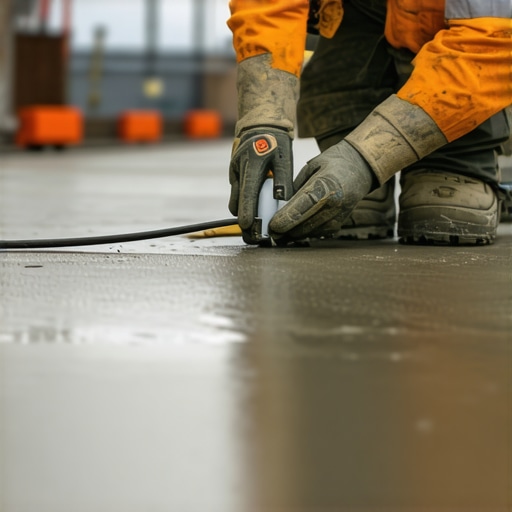
It was a typical Saturday morning when I stepped into my living room, only to realize that my freshly laid hardwood floors were warping and cupping before my eyes. I had trusted the installers, but I overlooked one critical step—testing the concrete slab for moisture. That lightbulb moment hit me hard: I needed a simple, affordable way to check moisture levels myself. Do you know that moisture problems are one of the leading causes of flooring failures? According to industry experts, over 60% of flooring issues stem from moisture-related problems, making it a crucial step before installation. But here’s the kicker—many people, myself included initially, spend hundreds on professional tests, only to find out too late that moisture was the silent culprit. That’s when I discovered the concrete moisture test that costs only five dollars and takes less than ten minutes. Today, I want to share with you how this small investment can save you thousands in repairs down the line.
The Cost-Effective Solution Hidden in Your Toolbox
Why Must You Test Moisture Levels? The Real Risks of Ignoring It
Understanding why moisture testing is vital is the first step toward a flawless flooring install. Excess moisture in concrete slabs can lead to a host of problems: warping, mold growth, adhesive failure, and even structural damage over time. What I learned early on the hard way was that relying solely on visual inspection or assuming the slab is dry isn’t enough. Moisture can seep into concrete behind the scenes, invisible to the naked eye, but wreaking havoc on your flooring. A professional testing can be costly, but there’s a DIY method—using a simple plastic sheet and a five-dollar kit—that’s both reliable and quick. Trust me, my own experience taught me that testing beforehand isn’t just smart; it’s essential. And the good news is, with just a few affordable supplies, you can be confident your concrete is ready for flooring. Want to see how easy it is to perform this test? Stick around, and I’ll walk you through it, along with common mistakes to avoid. But first, let’s tackle the skepticism that might be holding you back.
Prepare Your Materials and Space
Gather a transparent plastic sheet, a small weight like a brick or stone, and a moisture meter if available. Clear the area where you’ll perform the test, ensuring it’s free of debris and dust. This setup mimics my experience when I tested a slab in my basement—cleanliness was key to get an accurate reading.
Lay the Plastic Sheet Correctly
Stretch the plastic sheet tightly over a section of the concrete slab, sealing the edges with painter’s tape to prevent moisture escape. Think of it like covering a wound; the goal is to trap moisture underneath for measurement. Make sure the plastic has no folds or wrinkles that could skew results.
Apply the Weight and Wait
Place your weight in the center of the plastic to ensure contact with the concrete surface, pressing out air bubbles. Leave the setup undisturbed for at least 16 hours—overnight is ideal. During my test on an old garage slab, I left it for 24 hours just to be safe, because longer exposure increases accuracy.
Check for Condensation
After the wait time, inspect the underside of the plastic for humidity or water droplets. If you see moisture, your concrete has high moisture content—similar to my experience when I found droplets on my basement slab, indicating potential flooring problems ahead. An absence of water droplets suggests the slab is dry enough for installation.
Optional: Use a Moisture Meter for Precision
If you want a more quantitative assessment, insert a moisture meter into the concrete near the tested area. Readings above industry standards (usually 3-4%) indicate excess moisture. Keep in mind, like I learned when I used one on a commercial floor, multiple readings across the slab give a better overall picture than a single point.
Interpret Results and Act Accordingly
Dry conditions mean you can proceed confidently with your flooring project. If moisture is detected, consider methods like floor leveling and vapor barriers before installation—details that can make or break your project, as discussed in the [comprehensive leveling guide](https://tiletrendshop.com/floor-leveling-challenges-common-mistakes-and-how-to-avoid-them). If moisture persists, delaying or seeking professional advice might be the safest route.
While many homeowners and even seasoned DIYers focus on the obvious aspects of flooring—like choosing the right finish or avoiding visible gaps—there’s a nuanced layer of common misconceptions that can sabotage a project before it even begins. For example, a widespread myth is that hardwood floors are inherently forgiving of subfloor imperfections. In reality, **small discrepancies in leveling can cause long-term warping and creaking**, especially if you skip detailed preparation. As I learned from my own experience, overlooking these subtleties leads to costly repairs, which you can avoid by understanding the finer points of installation.
Why does the industry emphasize perfect subfloor prep? Because studies show that **up to 70% of flooring failures originate from improper leveling or moisture mismanagement** (source: National Wood Flooring Association). This means that even a seemingly minor mistake—like not addressing high spots or failing to test moisture thoroughly—can undermine the entire project. Instead of relying solely on visual inspection, incorporate comprehensive moisture testing and precise leveling techniques, detailed comprehensively in guides like this article. Directly contacting professionals through our consultation page can also help prevent these pitfalls.
Another misconception is that all adhesives work equally well with hardwood or tile. The truth is, using the wrong type of adhesive or not applying it correctly can result in tiles loosening or hardwood planks delaminating. For example, **mortars with insufficient bond strength** are often the culprit behind loose tiles years down the line. Advanced installers leverage specific adhesives tailored for their materials, as outlined in our detailed installation guides. It’s essential to tailor your materials to the project, which can be confusing without proper knowledge. Always verify compatibility and application techniques to ensure longevity.
Misjudging finishing techniques, such as sealing or sanding hardwoods, is another subtle trap. Many assume that a good finish can mask underlying issues. However, improper sanding can lead to uneven surfaces, dust infiltration, or inadequate adhesion of sealants. These mistakes often aren’t visible until months later, when scratches or gaps appear. To prevent this, professional-grade finishing steps should be followed, and regular maintenance—such as proper care tips from our hardwood care article—are vital for lasting beauty and functionality. Remember, maximizing durability isn’t just about initial installation but ongoing maintenance.
Finally, the choice of materials often influences the project’s success far more than many realize. Opting for cheaper tiles or veneers may seem economical but can lead to rapid deterioration or aesthetic mismatches, especially if not suited to the environment. As highlighted in our guide on tile selection, understanding the specific tile properties and synergizing them with your hardwood choices can elevate the entire space. Don’t fall into the trap of assuming all tiles are created equal—your project’s longevity depends on it.
Have you ever fallen into these traps, or are you aware of hidden pitfalls in flooring projects? Let me know in the comments. Remember, the devil is in the details, and a well-informed approach saves you time, money, and frustration in the long run.
Keep It Working: Tools I Recommend for Long-Term Flooring Success
Successfully maintaining hardwood and tile floors over time requires the right tools and consistent routines. One essential instrument I swear by is a high-quality microfiber dust mop. It not only captures surface dust effectively but also prevents scratches—something I learned the hard way when using coarse brooms. Regularly sweeping with a microfiber mop helps prevent grit buildup that can degrade finishes or scratch tiles. For deeper cleaning, I rely on a pH-neutral cleaner specifically formulated for hardwood and tile, which preserves the integrity of the finish without causing discoloration or wear, as recommended by flooring experts. Using a damp microfiber cloth or sponge ensures cleaning is gentle but thorough, avoiding excess moisture that can warp wood or seep into grout lines.
To address stubborn stains or grime, I keep a grout brush with stiff bristles at hand. It’s perfect for scrubbing grout lines without damaging surrounding tiles, especially if you maintain a regular cleaning schedule. A handheld steam cleaner can also be invaluable—used carefully, it sanitizes surfaces and lifts dirt without harsh chemicals, prolonging the life of your floors. I personally prefer models with adjustable steam levels to avoid over-wetting. For those planning to improve or scale their flooring projects, a laser distance meter helps ensure precise measurements, reducing waste and ensuring professional-grade results, which I cover in our comprehensive installation guide.
How do I keep my floors in top shape over time?
Establish a regular cleaning and inspection routine—at least monthly—to identify early signs of wear or damage. Applying a nourishing finish, like a specialized hardwood oil, once a year maintains moisture balance and enhances appearance. For tiles, resealing grout every couple of years prevents staining and moisture infiltration. Additionally, considering the future of flooring maintenance, technological advances like smart sensors embedded in flooring membranes could provide real-time moisture and stress monitoring, as seen in innovations tracked by industry leaders. These innovations promise to simplify upkeep and alert you before issues escalate. I encourage you to try incorporating a microfiber dust mop and a neutral cleaner into your routine today; these small changes can significantly extend your floors’ lifespan while maintaining their beauty.
The Hardest Lesson I Learned About hardwood floors,floor leveling,tile,flooring installation
One of my most eye-opening experiences was realizing that ignoring proper moisture testing could lead to costly disaster. I once assumed my concrete slab was dry enough without testing, only to see my beautiful hardwood warp and swell within months. That taught me that no matter how perfect your materials seem, moisture can be an invisible threat lurking beneath the surface, making thorough testing indispensable.
3 Myths About hardwood floors,floor leveling,tile,flooring installation That Held Me Back
Myth one was believing that a visual inspection was enough—turns out, moisture leaves no visual clues until it’s too late. Myth two was that professional testing is overly expensive—discovering a DIY method costing only five dollars proved otherwise. Myth three was that moisture issues only affect older slabs—recent projects have shown even new concrete can trap excess moisture, highlighting the importance of every project, big or small.
What Experts Won’t Tell You About hardwood floors,floor leveling,tile,flooring installation
Beyond the basic steps, seasoned professionals emphasize the importance of comprehensive moisture testing and meticulous surface preparation. I learned that even minor oversights—like skipping the plastic sheet test—can compromise the entire flooring lifespan. Their unspoken advice? Invest in the right initial assessment, or pay for repairs later, which cost significantly more than simple testing tools. Leveraging expert insight and combining it with DIY techniques is the sweet spot for long-term success.
Resources to Elevate Your Flooring Journey
First, check out the comprehensive guide on proper flooring installation and leveling. It’s packed with practical tips that complement moisture testing. Second, I rely heavily on affordable moisture meters available at hardware stores—trustworthy for quick, accurate readings. Third, subscribing to industry newsletters like latest flooring trends and techniques keeps me updated on emerging best practices, ensuring I don’t miss critical details that can safeguard my projects. Lastly, engaging with professional consultants when in doubt provides personalized advice that DIY methods can’t replace.
Your Next Step Towards Perfect Floors
Now that you understand the crucial role of moisture testing and preparation, it’s time to apply these insights confidently. Properly assessing moisture levels isn’t just a step—it’s the foundation of a lasting, beautiful flooring project. Remember, the difference between a long-lasting floor and a recurring headache often boils down to these early precautions. Start with small tests, educate yourself, and don’t hesitate to seek expert guidance when needed. Your future self will thank you for making smart, informed decisions today.