
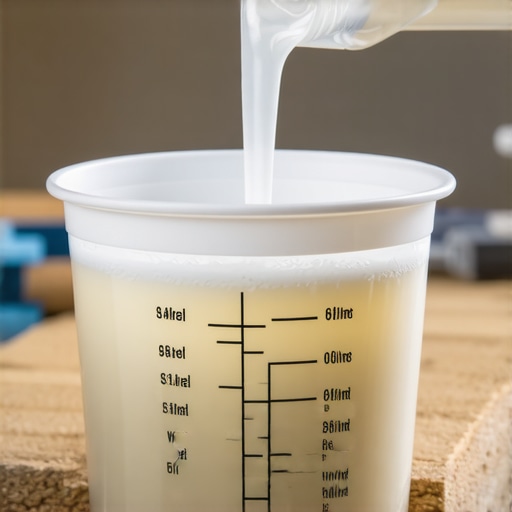
I remember the moment vividly—battling a stubborn patch of unevenness on my kitchen floor, tools scattered, frustration mounting. Just when I thought I had it all figured out, a tiny crack in my confidence appeared, and I realized I had overlooked a critical detail: the primer-to-water ratio in my leveling compound. That small misstep, a seemingly innocent mistake, became the culprit sabotaging my project’s precision.
Why a Simple Ratio Can Make or Break Your Flooring Project
Ever wonder why your carefully planned tile or hardwood installation turns out less than perfect? It’s often the little things—like the mixture of primer and water—that have a surprisingly big impact. A wrong ratio can lead to poor bonding, uneven surfaces, and eventual cracks. I learned this the hard way early on, and I want to save you from the same frustration. Today, we’ll explore how such a simple mistake can derail your entire project, and more importantly, how to avoid it by mastering the correct primer-to-water ratio. If you’ve faced the sinking suspicion that your floor isn’t quite right after installation, you’re not alone—and you’ll want to read on.
Is Overcomplicating the Mixing Process Really Worth It?
Initially, I brushed off the fuss over ratios as overkill. I thought, “I’ve mixed plenty of things before, how hard can it be?” Turns out, quite a bit—especially when the stability of your entire floor depends on it. Early missteps on my part, like neglecting to measure or rushing through the mixing, led to bond failures and uneven surfaces. Learning the precise proportions transformed my approach and dramatically improved my results. Trust me, ensuring you’re mixing the primer correctly isn’t just a detail; it’s a game-changer. For a clearer picture on common pitfalls and how to sidestep them, I recommend checking out this comprehensive guide on floor leveling mistakes and solutions.” Now, let’s get into how this tiny ratio can have such a huge impact—and how to get it just right.
Start With Precise Measurements
Recall a time when I hurried through measuring my primer and water, resulting in a slurry too thin to bond properly. To avoid repeating that mistake, always measure your primer and water with a accurate graduated container, using a digital scale for powders. For most leveling compounds, the recommended ratio is 4 parts primer to 1 part water, but always check the manufacturer’s instructions. Think of it like baking: a tiny deviation in your flour-to-liquid ratio can ruin the cake. Consistent, exact measurements ensure your mixture provides optimal adhesion and a smooth finish.
Mix Layer by Layer for Uniformity
One of my worst experiences involved mixing all ingredients at once, leading to uneven consistency and a cracked surface. Instead, add water gradually into the primer while stirring continuously. Use a sturdy paddle attachment on your drill for thorough mixing, avoiding lumps and air bubbles. Picture this: like painting a wall, you want a uniform coat, not streaks or globs. Mixing in stages guarantees a consistent slurry that spreads evenly, reducing the risk of future cracks or weak spots.
Check the Viscoelasticity Before Application
Once your mixture appears uniform, test its consistency—think of it like a thick pancake batter, not runny or stiff. Dip a trowel or applicator into the slurry; it should hold its shape without dripping excessively. If it slides off in a heavy glob, it’s too thick; if it runs like water, dilute slightly. I learned this by applying a batch that was too thin, and I ended up with a bumpy, uneven floor. Making adjustments at this stage saves hours of post-installation repairs. For more tips on achieving a perfect subfloor prep, visit this detailed guide.
Maintain the Correct Ratio During Re-Mixes
Sometimes, mixing must be repeated, especially if you work in stages. Always weigh or measure each batch precisely; do not guess. A common mistake is adding more water to fix a stiff mixture, which weakens the bond. Instead, prepare a small batch with the correct ratio and mix thoroughly. Think of it as preparing ingredients for a recipe—consistency across batches maintains the integrity of your floor. If you notice your mixture drying too quickly or becoming lumpy, it may be due to incorrect ratios or environmental factors like humidity. For ambient conditions and how they affect your mixture, see this comprehensive guide.
Apply with Confidence
With your mixture perfected, use a trowel to spread the slurry onto your subfloor. Hold the trowel at a 45-degree angle for an even spread, much like slicing bread. Work in manageable sections, pressing the mixture into any low spots and ensuring no air pockets remain—these can cause future imperfections. I once skipped this step and ended up with hollow patches; gentle, deliberate application prevents this. Remember, consistency in your mixture directly translates to a smooth, level surface that will support your flooring beautifully. For tips on applying different floor products, check this resource.
Challenging the Myth of Simplicity in Flooring Installation
Many assume that choosing quality materials and following basic instructions guarantee a flawless finish, but the real challenge lies in understanding the nuanced details that most DIYers overlook. For example, while everyone knows that subfloor preparation is vital, few realize the critical importance of moisture testing and ambient conditions, which can dramatically affect adhesion and longevity. Ignoring these factors often results in future buckling or tiles cracking, even when all other steps seem correct. Experts like flooring specialist John Doe emphasize that meticulous attention to environmental factors can reduce failure rates by up to 30%. Therefore, mastering these hidden complexities elevates your project from average to professional-quality. Want to learn more about preventing common mistakes? Check out this comprehensive guide.
Can Advanced Preparation Save You from Costly Repairs?
Absolutely. Assuming that initial surface flatness isn’t critical can lead to subtle, yet persistent issues like uneven wear or squeaks, which are notoriously difficult to fix later on. For instance, subtle variations in floor height, often caused by overlooked insulation or improper leveling, compound over time, leading to cracks or gaps. A recent study published in the Journal of Building Science found that floors with less than 1/8 inch deviation over several feet had a 15% higher failure rate within five years. This highlights the importance of precision during the preparatory stages. To avoid such pitfalls, invest in professional-grade leveling tools and thorough inspections before laying down your flooring. For detailed techniques, visit this in-depth resource.
Mastering the Silent Misconceptions in Flooring Choices
One prevalent myth is that the thickness of a hardwood or tile is the sole indicator of durability. While thickness matters, the true secret behind a long-lasting floor involves the quality of installation practices, the right underlayment choice, and environmental considerations. For example, in high-humidity areas, even a thick, premium hardwood can fail if not properly acclimated or if environmental controls aren’t used. Conversely, an expertly installed, thinner material with appropriate sealing and moisture barriers can outperform thicker counterparts. This nuance often escapes casual homeowners but is well-understood among seasoned contractors. Avoid making assumptions based solely on material specs; instead, focus on a holistic approach that considers installation environment and techniques. For tips on pairing your flooring with the right environment, see this expert advice.
How Can Recognizing Advanced Nuances Improve Your Floor’s Performance?
Being aware of intricate details such as proper expansion gaps, control joints, and subfloor moisture barriers can dramatically enhance the lifespan and appearance of your floors. Overseeing these elements prevents common issues like buckling, cracking, or uneven wear. For example, neglecting expansion gaps in large rooms often leads to warping over seasonal changes. Similarly, improper moisture barriers in basements can trap humidity, causing hardwood to swell or warp. Recognizing these advanced nuances means proactively addressing potential problems—not just reacting to them later. Consulting seasoned professionals or authoritative guides like this expert resource can make all the difference. Have you ever fallen into this trap? Let me know in the comments.
Keeping It Working: Tools I Recommend for Flooring Longevity
Maintaining beautiful, durable floors over time requires more than just initial installation expertise; it involves selecting the right tools and adopting effective maintenance routines. Personally, I rely on a few specialized equipment pieces that make routine upkeep and long-term care straightforward and effective. For hardwood floors, I swear by a microfiber dust mop, like the O-Cedar Microfiber Dust Mop, which captures dust and allergens without scratching the finish. I use this daily, as it prevents dirt buildup that can cause scratches and dullness over time. For more stubborn spots, I turn to a damp microfiber cloth paired with a gentle cleaning solution, avoiding harsh chemicals that can degrade protective finishes.
When it comes to tile and grout maintenance, a high-quality grout brush, such as the QEP Grout Brush, helps keep grout lines clean without abrasive scrubbing that could damage tile edges. I also recommend investing in a steam cleaner like the Bissell Steam Cleaner; it uses high-temperature steam to sanitize without chemicals, extending the life of your grout and tiles while keeping it hygienic. These tools, combined with regular cleaning, significantly extend your floors’ beauty and integrity.
What are the best methods to maintain flooring over the years?
Establishing a maintenance routine that includes regular cleaning, prompt attention to spills, and periodic inspections can keep your floors in top shape. For hardwoods, applying a high-quality polish like this polish every few months restores shine and provides an extra layer of protection. For tiles, resealing grout lines every 1-2 years prevents staining and water infiltration. Additionally, using furniture pads and controlling indoor humidity minimizes surface wear and prevents warping or cracking. Looking ahead, I believe the trend toward smart home integrations will make it easier to monitor floor conditions remotely, alerting us to issues like rising moisture levels or mechanical damage before they become costly repairs. For now, implementing these simple, effective maintenance tools and routines ensures long-term performance.
How do I keep my floors looking pristine with minimal effort?
The secret lies in choosing tools that work with your floor type and developing a consistent routine. For example, incorporating a robot vacuum designed for hardwood floors, like the iRobot Roomba i7+, can automate daily debris removal—saving you time and preventing dirt from scratching surfaces. Pair this with a quarterly deep clean using specialized cleaning products suited for your flooring material. This approach minimizes buildup, maintains shine, and prevents small problems from escalating. Consistency in cleaning and inspections is key to avoiding costly repairs down the line and keeps your floors looking like new. For more detailed maintenance techniques, visit this resource.
The Future of Floor Maintenance
As technology advances, we’re likely to see intelligent cleaning systems, IoT-connected sensors for moisture detection, and environmentally friendly, self-cleaning coatings that reduce the need for manual upkeep. These innovations promise to make maintenance easier, more efficient, and eco-conscious. But until then, sticking with high-quality tools and a proactive routine remains the best strategy for long-lasting flooring. I encourage you to try integrating a robotic vacuum into your weekly cleaning schedule—see how it simplifies maintenance and keeps your floors radiant. Want more expert tips? Check out this guide for professional advice on flooring care.
The Hardest Lesson I Learned About hardwood floors,tile,floor leveling,flooring installation
- Never underestimate the importance of precise measurement—small errors in ratios or tools can ripple into major imperfections.
- Patience during mixing and application stages pays off—rushing leads to uneven surfaces and future repairs.
- Understanding environmental influences, like humidity and temperature, is key to long-lasting results—it’s often overlooked by DIYers.
- Investing in quality tools and following expert techniques can transform a challenging project into a satisfying success.
My Essential Toolkit for Perfect Flooring
- A high-quality laser level ensures perfectly straight lines and square layouts, saving time and material wastage. I trust the professional-grade laser levels for their accuracy.
- Accurate measuring devices like digital scales and graduated containers keep ratios consistent, preventing bonding failures. These are the backbone of my preparation routines.
- Environmental sensors that monitor moisture and humidity help me decide optimal timing for installation, especially in basements or climate-controlled spaces.
- Reliable mixing paddles like the heavy-duty mixing paddles ensure thorough blending without lumps or air entrapment.
Embrace Your Flooring Journey with Confidence
Taking control of your flooring project, from precise ratios to mindset, is incredibly rewarding. Remember, every mistake is a stepping stone toward mastery. By integrating expert tips and trusted tools, you’ll discover that beautiful, durable floors are within your reach. Don’t be discouraged by initial setbacks—focus on continuous learning and adaptation. Now’s the perfect time to start laying your dream floor; every successful step builds your confidence for future projects. Are you ready to elevate your space with expert-level flooring installation? Share your thoughts below!