
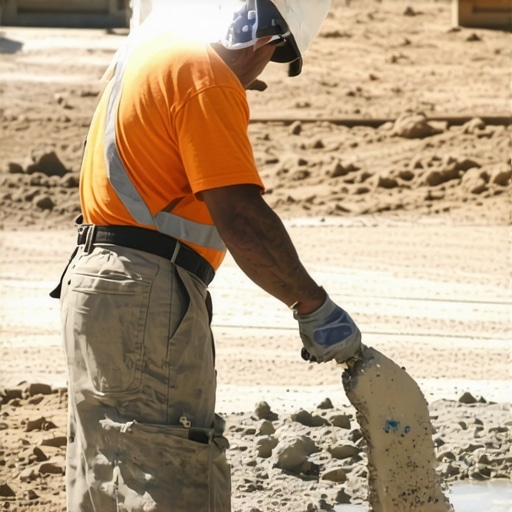
Ever stood in a sweltering room, pouring thinset for a tile installation, only to watch it dry within minutes? I’ve been there, and let me tell you, it’s a moment of frustration and realization. I thought I was doing everything right—mixing carefully, working steadily—but the heat had other plans. That lightbulb moment made me realize I needed to understand the environmental factors that can sabotage my project.
When Heat Turns Your Tile Job into a Race Against the Clock
In hot weather, the drying process of thinset accelerates dramatically, sometimes so fast that it doesn’t have time to properly bond. I learned this the hard way when my recent patio tile project started to show cracks and loose tiles after just a few days. That’s when I discovered the importance of controlling temperature and humidity during installation. If you’ve ever experienced your thinset drying out before you even get to set your last tile, you’re not alone—and the good news is, there are practical solutions. Today, we’ll explore why this happens and how you can prevent it from ruining your work.
Is Rapid Drying a Miracle or a Mistake?
Early in my DIY journey, I made the mistake of ignoring the weather forecast. I thought, “It’s just a bit warm; I’ll be fine.” Instead, I found myself racing against time, struggling to complete each section before the mortar turned to dust. This oversight not only slowed my progress but compromised the durability of my installation. Learning from that, I realized that understanding the environment is just as crucial as knowing the right product. According to industry experts, extreme heat can cause thinset to lose its workability and adhesion properties, which can lead to long-term issues like cracking or delamination (source). That understanding shifted my approach and, ultimately, my results.
Prep the Workspace to Fight Rapid Drying
Start by choosing a shaded area or temporarily installing shade cloths if working outdoors. Use portable fans—not heaters—to maintain a steady, moderate temperature around 65-75°F. I once rigged up a makeshift canopy over my patio, and it kept the heat in check, preventing my thinset from drying prematurely. This simple step can buy you invaluable working time.
Manage Humidity for Better Adhesion
Use a dehumidifier or a misting spray to control moisture levels, especially on hot, dry days. During my busiest summer project, I kept a portable humidifier nearby to prevent the air from sucking moisture from the mortar. Maintaining consistent humidity helps the thinset or adhesive cure evenly, boosting long-term durability.
Adjust Your Mixing and Working Speed
Alter your mixing ratio by slightly reducing powder-to-water ratio to slow down initial setting. Time your work sessions in the cooler parts of the day—early mornings or late afternoons. I learned this firsthand when I started my tile layout at dawn, giving me ample time before the mortar set too fast under direct sunlight. Moving swiftly without sacrificing accuracy is vital when conditions threaten your workability.
Protect Freshly Laid Material from Insulation and Wind
Use plastic sheeting or temporary walls to shield your work from gusts or sudden temperature shifts. I wrapped a large piece of construction plastic around my recent patio project and secured it with weights. This kept dust away and slowed the drying process just enough for proper bonding, especially in windy conditions.
Utilize Cold or Cool Water in Mixing
Use cooler water when wetting the mix to slow down the chemical reaction. During a particularly hot week, I chilled the water in the fridge before mixing. It extended working time by a few critical minutes, making a significant difference in the quality of the installation. Precise control over your mix temperature can be a game-changer on hot days.
Monitor and Adjust During Implementation
Keep a digital thermometer and hygrometer nearby, checking every hour. If you notice rising temperatures or dropping humidity, take immediate steps: add fans, spray water, or pause work temporarily. In one instance, I paused tiling when the temperature spiked, allowing the environment to stabilize, which resulted in a flawless finish.
Consider Using Cold-Weather Products or Accelerators
For extreme conditions, select thinset formulas designed for hot climates or incorporate retarders that slow drying time. consulting with product datasheets or suppliers can point you toward the best options. Learning the right product for the environment prevents premature drying and ensures proper curing and bonding, as explained in our detailed floor leveling guide.
When it comes to flooring, many DIY enthusiasts and even seasoned pros often fall prey to misconceptions that lead to costly mistakes. One widespread myth is that leveling the subfloor is always a straightforward process, but in reality, neglecting the importance of detailed surface preparation can cause long-term issues like uneven tiles or squeaky hardwood floors. Incorporating precise floor leveling techniques, as discussed in our comprehensive guide, can make the difference between a durable installation and an expensive redo.
Another common mistake involves the assumption that all adhesives are created equal. Many underestimate the impact of environmental factors such as humidity and temperature on adhesive performance, especially with specialty products designed for specific conditions. Using the wrong type or applying it under unsuitable conditions can result in adhesive failure, causing tiles to loosen over time. Professionals recommend consulting product datasheets and considering site-specific challenges, which is thoroughly covered in our installation pointers for optimal results.
Drying and curing times also trip up many installers. A misconception is that rushing the curing process by applying additional coats or skipping essential steps doesn’t matter. However, this rush can trap moisture and lead to issues like grout cracking or tile delamination. Advanced installers emphasize patience and adherence to manufacturer instructions for curing schedules, as highlighted in expert tips. This nuance ensures the longevity and appearance of your floor.
The big question for experienced readers is: How do you ensure consistent quality when working on large or complex surfaces? The secret lies in meticulous layout planning and using tools like laser levels and precise measuring techniques. Mistakes in these areas often result in uneven grout lines or final aesthetics that don’t meet expectations. For a deep dive into these techniques, check out our masterclass for pros.
To sum up, the flooring installation process is anything but simple, and minor overlooked details can snowball into major problems. Recognizing these misconceptions and applying advanced strategies can significantly improve your outcomes. Have you ever fallen into this trap? Let me know in the comments or reach out for personalized advice. Remember, thorough preparation and understanding the nuances are what separate a basic installation from a professional-grade finish.
Invest in Quality Tools for Lasting Results
When it comes to maintaining and scaling your flooring projects, having the right tools makes all the difference. I personally swear by a high-precision laser level, such as the Bosch GLL 550. Its laser accuracy ensures your tiles and hardwoods are perfectly aligned, saving you hours on corrections and rework. For floor leveling, I recommend the Marshalltown Float; its sturdy build and ergonomic design help achieve smooth, flawless surfaces that stand the test of time. I also always keep a reliable digital moisture meter handy to monitor subfloor conditions. Moisture imbalances can cause future issues like cracking or warping, so early detection with tools like the Tramex Moisture Meters helps ensure your installation remains durable.
How do I maintain my tools over time?
Proper maintenance extends the lifespan of your equipment. Regularly cleaning your laser levels with a soft cloth prevents dust buildup, which can affect accuracy. Lubricate moving parts of hand tools like trowels and floats with light machine oil to avoid rust and ensure smooth operation. Calibrating digital moisture meters annually, as recommended by the manufacturer, guarantees consistent readings and reliable diagnostics. These small steps preserve the precision and longevity of your investments, reducing long-term costs and frustration.
Trending Tech in Flooring Projects
Looking ahead, automation and smart tools are set to revolutionize flooring installation. Imagine laser-guided self-leveling systems that adapt in real-time, or apps that integrate project planning with environmental monitoring. Embracing these innovations now positions you as a leader in the industry, streamlining workflows and improving quality. Learning from industry leaders through resources like this comprehensive guide can accelerate your mastery of these tools and techniques.
Achieve Flawless Floors Every Time
To truly excel, incorporate advanced methods like meticulous surface preparation and environmental controls—like sealing the subfloor before and after leveling—to prevent future issues. My personal tip? Always double-check your subfloor’s moisture content using a reliable moisture meter before proceeding with leveling or tile installation. This proactive step can save you from costly repairs down the line. Try investing in a quality laser level and calibrate it regularly. It’s an investment that guarantees your projects stand the test of time, reflecting true craftsmanship and professionalism.
Lessons That Changed My Flooring Game
One of the most surprising insights I gained was realizing how environmental factors, especially temperature and humidity, can make or break a flooring project. I used to think patience and skill alone were enough, but managing the workspace environment turned out to be just as crucial.
I also learned the importance of pre-emptive environment checks—using tools like moisture meters—to catch issues before they escalate. That proactive approach saved me countless hours and prevented costly mistakes.
Another lightbulb moment was understanding that quick-drying materials aren’t necessarily better—they require careful timing and conditions to cure properly. Controlling environment conditions became a non-negotiable part of my process.
Finally, I discovered that investing in quality tools, from laser levels to moisture meters, isn’t just about convenience—it’s about ensuring each project stands the test of time, reflecting craftsmanship and professionalism.
My Arsenal of Flooring Success
For those looking to elevate their skills, I recommend exploring essential tools like the Bosch GLL 550 laser level, which guarantees precise alignment, and the Tramex Moisture Meter for pre-installation assessments. These trusted tools have changed how I approach each project, making outcomes more predictable and durable.
Additionally, reading authoritative guides such as this step-by-step flooring guide and these common challenges have sharpened my techniques. They’ve provided the knowledge foundation that turns a good installation into a great one.
Remember, maintaining your tools with regular calibration and proper cleaning preserves their accuracy and lifespan. It’s an investment that pays dividends in project quality and long-term satisfaction.
Embrace the Future to Elevate Your Floors
Looking ahead, integrating smart technology like automatic levelers and environmental sensors can streamline workflows and elevate your craftsmanship. Platforms like this resource showcase innovations that make professional results more accessible to serious DIYers and pros alike. Exploring these advancements now ensures you stay ahead in quality and efficiency, transforming the way you approach flooring projects.
At the end of the day, the key to flawless floors isn’t just about technique; it’s about creating a controlled environment that supports your precision and patience. Every nail, tile, and layer benefits when you master the subtle art of environmental management. Keep learning, keep adapting, and your floors will tell stories of craftsmanship that last a lifetime.
What’s Your Next Step?
Have you ever experienced a flooring setback caused by environmental issues? Or maybe you have a go-to trick for managing workspace conditions? Share your experiences or questions below—I’d love to hear how you’re mastering your flooring environment for perfect results!