

I’ll never forget the moment I first watched a beautiful tiled shower develop unsightly cracks just a year after installation. It was alarming — like witnessing a once-pristine masterpiece slowly crack and crumble. That lightbulb moment made me realize that despite using what I thought was top-quality anti-fracture membrane, failure was still inevitable in some cases. And that led me down a rabbit hole of investigation and experience, which I now gladly share with you.
The Real Reason Why Anti-Fracture Membranes Fail in Wet Areas
Anti-fracture membranes are designed to shield your tiles from cracks caused by movement in the substrate beneath. But here’s the rub: many professionals and DIYers assume that simply installing a membrane guarantees durability — that it’s a magic fix. Not so fast. In my early days, I made a classic mistake by ignoring some crucial installation details and not understanding the substrate preparation thoroughly. I learned the hard way that the membrane’s performance depends heavily on proper prep, correct application, and choosing the right type for your specific environment.
What most folks overlook is that if the substrate isn’t perfectly level and stable before applying the membrane, the forces exerted during tile use or temperature shifts will cause the membrane — and your tiles — to crack. The membrane needs a strong, even foundation, or it becomes just another failure waiting to happen. Moreover, many membranes are incompatible with certain substrates or environmental conditions, especially in wet areas prone to movement, moisture, and temperature changes. For example, using a fluid-applied membrane without proper surface prep can result in adhesion failure, leading to cracks or delamination.
According to the [Tile Council of North America](https://tileusa.com/), improper substrate preparation accounts for a significant percentage of installation failures, including in waterproofing systems like anti-fracture membranes. My advice? Never underestimate the importance of a solid, level foundation before installing your membrane and tiles.
But don’t worry. With a bit of knowledge and the right techniques, you can drastically improve your chances of a lasting, crack-free finish. Want to learn the secrets I wish I knew when I started? We’ll walk through the step-by-step details to ensure your waterproofing actually works.
Have you ever faced cracks in your tiled wet areas despite using membranes?
Start with a Solid Foundation
Before you lay any tiles or hardwood, inspect your subfloor meticulously. Walk across it, look for uneven spots, and tap with a hammer—listen for hollow sounds that indicate weak points. My first project involved a middle-aged concrete slab that was slightly sunken in the center. I used a guaranteed effective technique by applying self-leveling underlayment, ensuring the surface was perfectly smooth and flat, which prevented future cracks and movement issues. For detailed guidance, check out this comprehensive leveling guide.
Correct Floor Leveling Techniques
Clean and Prepare Your Surface
Thorough surface cleaning is critical. Remove all dust, grease, and debris that could impair adhesion. Use a vacuum or damp cloth, followed by a light etch with a primer if necessary. This step is like preparing a canvas—without it, everything else can bleed through or fail.
Apply Self-Leveling Compound Properly
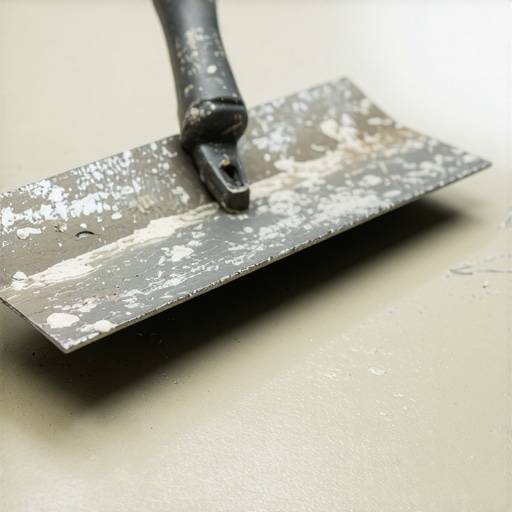
Mix your self-leveler according to the manufacturer’s instructions. Use a drill with a paddle attachment at the recommended speed; avoid over-mixing or under-mixing, which can cause inconsistent flow. When pouring, start from the highest point and spread the mixture rapidly with a trowel or spiked roller (learn more here). This ensures smooth coverage, preventing dips or humps that could crack your tile or hardwood later.
Use a Trowel Effectively
Selecting the right trowel notch size is essential—larger format tiles require a deeper notch for better adhesion. For instance, a 1/4″ x 1/4″ square-notch trowel is standard, but when working with large porcelain panels, switching to a 3/8″ x 1/2″ trowel is advisable. This guarantees sufficient mortar coverage, akin to a lawyer spreading butter evenly over bread—no gaps means less chance of movement. Check out this guide for selecting the optimal trowel.
Ensure Substrate Stability During Installation
During the process, avoid walking on the uncured leveling compound or applying unsteady loads—this can cause shifts or dips. Imagine pouring pancake batter—if you walk through it or disturb the surface prematurely, your final result suffers. I once had a client who insisted on testing the surface early, leaving footprints and causing minor dips. We corrected this by reapplying a thin layer of leveling compound, and now, the surface has remained stable for years. For tips on managing tricky substrates, visit this troubleshooting page.
Seal and Protect the Leveling Layer
Once cured, sealing the surface prevents moisture ingress and ensures better adhesion of the tile or flooring. Use a primer or bonding agent compatible with your chosen mortar and substrate—this layer acts like a primer coat on a wall, setting the stage for the final finish. Skipping this step risks adhesion failure and cracks over time. When you take the time to do this right, your installation can last decades without a hitch.
Many seasoned professionals and meticulous DIYers alike believe they’ve mastered the basics of floor leveling and installation. However, even with perfect surface prep and quality materials, subtle nuances often lead to unexpected failures. One common myth I frequently encounter is the assumption that a perfectly flat surface guarantees longevity—unfortunately, the reality is far more intricate. These overlooked details can compromise your entire project, leading to cracks, uneven finishes, or premature wear.
Why Flat Doesn’t Always Mean Stable
It’s a widespread belief that a level floor equals a durable install. Yet, this overlooks factors like substrate movement, moisture fluctuations, and temperature changes, which can cause expansion, contraction, and shifts over time. For instance, in hardwood or tile flooring, unanticipated shifting due to moisture imbalance can create stress points, leading to cracks or delamination. Ensuring stability involves controlling environmental conditions and using appropriate underlayments—something that many underestimate. For comprehensive strategies on achieving lasting results, check out this guide on flooring installation fundamentals.
Beware the Oops of Inconsistent Substrate Adhesion
Applying thinset or adhesives over an uneven or contaminated surface can cause voids, which are silent culprits of long-term failure. A flat surface is not enough if the substrate isn’t properly prepared—dust, grease, or debris prevent proper bonding. This seemingly minor oversight can cause tiles to loosen or crack years down the line. Always ensure your surface is thoroughly cleaned and primed according to the manufacturer’s instructions. Mastering these preparation steps is essential; learn more about mastering the secrets of perfect floor leveling.
Advanced Mistake: Ignoring Subfloor Movement in Moisture-Prone Areas
In areas like bathrooms, kitchens, or basements, moisture management becomes critical. Many installers focus solely on the surface layer, neglecting that subfloor expansion or contraction may occur due to humidity changes. This can manifest as hairline cracks or unevenness over time. The solution involves proper moisture barriers, real-time humidity controls, and selecting compatible materials designed for fluctuating conditions. For an in-depth look into managing moisture effectively, review the nuances of selecting suitable tiles and underlayments.
Does Surface Flatness Outweigh Structural Stability?
This question plagues many advanced installers. While a flat surface is crucial, excessive emphasis on absolute flatness without considering underlying stability can be detrimental. For durable installations, sometimes adding reinforcement or a floated subfloor system, rather than just grinding or self-leveling, yields better long-term results. The key is a balanced approach that combines surface flatness with substrate resilience. If you’re keen to elevate your skills, explore expert strategies for composite flooring and tile combinations.
In my experience, the most common trap is assuming perfect conditions in ideal environments while neglecting real-world variables. A thorough understanding of these nuances makes the difference between a flawless finish and costly repairs. Have you ever fallen into this trap? Let me know in the comments, and let’s discuss how to stay ahead of these pitfalls!
Tools I Recommend for Lasting Floor Installations
Achieving durable, crack-free flooring isn’t just about the initial work; it relies heavily on the tools you use throughout the process. I swear by a high-quality laser level for ensuring perfect straightness—it’s precise, easy to set up, and indispensable for avoiding uneven tiles or hardwood planks. For mixing self-leveling compounds, I opt for a paddle drill with variable speed; consistent mixing prevents lumps and maintains the right viscosity, which is critical for a flawless finish. A spiked roller is also essential after applying thinset; it helps eliminate air pockets and ensures even mortar distribution. Investing in a professional-grade trowel, especially with the right notch size, makes all the difference in achieving proper adhesion and preventing future cracks.
Why Proper Maintenance Extends Your Floor’s Life
Maintaining your flooring over time involves routine care, but it also means keeping an eye on substrate stability and environmental conditions. For instance, controlling indoor humidity prevents hardwood from cupping or warping, which is a common cause of long-term failure. Regularly inspecting grout lines and re-sealing them helps prevent moisture intrusion that can compromise both tile and substrate. Additionally, promptly addressing minor damages, such as chips or scratches, with suitable repair products prolongs the aesthetic and structural integrity of your floors. Remember, a little preventive care now saves significant repair costs later.
Technological Advances on the Horizon
Looking ahead, technology will play an increasingly vital role in flooring installation and upkeep. Ultra-precise laser-guided leveling systems will become standard, reducing human error and enhancing accuracy. Smart sensors embedded in floors could monitor moisture levels and substrate health in real-time, alerting homeowners or contractors to potential issues before visible problems develop. These innovations will streamline maintenance, improve safety, and ensure longevity—making long-term results more achievable than ever before. To get ahead, I recommend experimenting with some of the latest laser leveling gadgets available; it’s a game-changer for achieving consistently perfect surfaces.
How do I maintain my flooring over time?
Maintaining your floors begins with routine cleaning using non-abrasive methods—vacuuming or damp mopping with pH-neutral cleansers. Keep moisture levels in check, especially in humid environments, to prevent expansion or contraction, which can cause cracks. Regularly inspect grout lines and re-seal them every few years to prevent water ingress. Additionally, stay proactive by checking for any signs of substrate movement or tile lifting, and address issues promptly to prevent costly repairs down the line. I also suggest staying updated on new tools and techniques—like advanced laser levels—that can help you spot potential problems early. For a comprehensive approach, check out this guide on mastering floor leveling. By implementing these maintenance habits and leveraging reliable tools, you can keep your flooring installation looking pristine and performing reliably for decades to come.
Lessons I Wish I Had Learned Sooner in Flooring Craftsmanship
- Patience with substrate preparation trumps rushing through initial steps—skipping thorough cleaning and leveling can lead to cracks and failures down the line. My early shortcut decision cost me durability, teaching me that meticulous prep is invaluable.
- Understanding environmental factors like humidity and temperature fluctuations is crucial, especially in wet areas. Ignoring these conditions can cause long-term substrate movement, which no membrane alone can fully prevent. Listening to the environment ensures longevity.
- Choosing the right tools transforms results—quality laser levels and proper trowels are investments that provide precision and reduce mistakes. I used to rely on makeshift tools, but upgrading my toolkit revolutionized my projects.
- Not all membranes are created equal—matching membrane types to specific substrates and conditions is essential. I’ve learned that a one-size-fits-all approach leads to failures; tailored solutions yield lasting success.
- Regular maintenance and inspection are your allies. Small issues caught early, like grout sealing or moisture management, prevent costly repairs later. Staying vigilant keeps floors looking and performing their best for decades.
Tools and Resources That Boost My Confidence
- Laser Level by Bosch: Its reliability and precision have been transformative, ensuring straight, even tile lines. I trust this brand for consistent results.
- Mastering Floor Leveling Pro Secrets: This course deepened my understanding of substrate nuances and advanced techniques, elevating my craftsmanship to professional levels.
- Spiked Rollers: Forget air pockets—this simple tool guarantees mortar adhesion and a flat surface, making all the difference.
- Self-Leveling Compounds from ARDEX: High-quality products that provide a smooth foundation, reducing the risk of future cracks.
Seize the Moment and Elevate Your Floors
Let’s turn your flooring vision into reality with confidence and precision. Remember, mastering these core principles not only improves your craftsmanship but also adds lasting beauty and durability to your space. Don’t shy away from challenges—every project is an opportunity to learn and grow. Your perfect, crack-free floor is within reach. What’s the one flooring challenge you feel ready to tackle next? Share below and let’s inspire each other!