
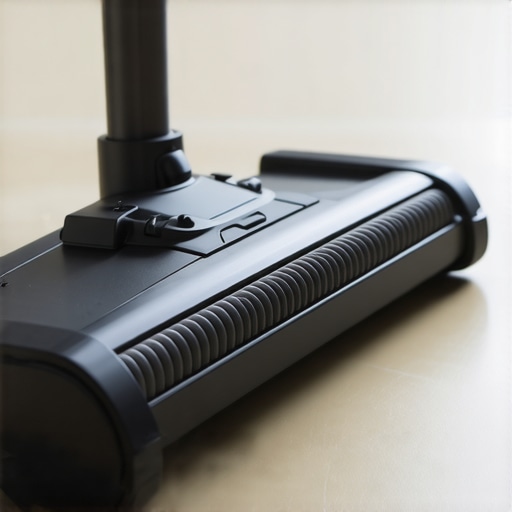
It happened last week in a flash. I was vacuuming my living room, trusting my trusty machine to keep things tidy. Suddenly, I saw a faint sheen vanish from my vinyl floor, replaced by dullness and tiny scratches. My heart sank. That’s when I had my lightbulb moment: my vacuum’s beater bar was silently wreaking havoc on my vinyl finish. If you’ve ever noticed your vinyl struggling to stay shiny, or worse, developing unsightly scuffs, you’re not alone. Today, we’re going to uncover the simple reasons why your vacuum might be damaging your precious vinyl and—more importantly—how to fix it.
How Your Vacuum Is Unintentionally Sabotaging Your Vinyl Floors
Is the Beater Bar Really the Villain?
Many folks overlook the importance of the tools we use daily. I used to think a vacuum was a vacuum—just a device for quick cleanups. But after some research and my own mishaps, I discovered that the beater bar, especially when it’s stiff or too aggressive, can scratch and dull the protective topcoat of vinyl flooring. Think of it like using a steel brush where a soft cloth would do. What surprised me early on was how a simple component change made a world of difference. If you’re curious about the technical side, check out [this guide on mastering floor refinishing](https://tiletrendshop.com/mastering-floor-leveling-pro-secrets-for-perfect-installations), which explains how proper tools extend the life of your floors.
Beyond the mechanic aspect, I realized I made another mistake—ignoring the vacuum settings. Most vacuums have height adjustments. If it’s set too low, the beater bar drags across the floor, causing wear over time. Setting it right, or even turning it off when cleaning delicate floors, can prevent this damage.
Now, you might be wondering: is all this fuss worth it? Absolutely! Protecting your vinyl isn’t just about maintaining aesthetics; it preserves your investment. And honestly, a bit of care can save you from costly refinishing jobs down the line.
Thinking this might be you? If you’ve faced issues with dull or scratched floors after vacuuming, you’re in good company. Keep reading, because we’re about to explore the practical steps to keep your vinyl floors looking flawless, without sacrificing cleanliness.
Adjust Your Vacuum Settings Correctly
Remember the day I nearly ruined my vinyl when I kept the vacuum’s beater bar on high. To prevent such mishaps, always set the vacuum height to its highest setting before cleaning delicate floors. For added safety, turn off the beater bar when vacuuming vinyl to avoid scratches. Make it a habit to double-check your settings each time you start cleaning, especially if you’re switching floors frequently.
Choose the Right Attachments and Tools
Switch to a soft brush or upholstery tool when cleaning vinyl. Unlike stiff brush heads, these are gentle and reduce the risk of scratches. I once used a piece of an old, stiff bristle brush by mistake—resulting in multiple tiny scuffs that took weeks to diminish. Keep a dedicated gentle attachment for vinyl, and store it somewhere accessible so you don’t confuse it with more aggressive tools.
Implement Proper Cleaning Techniques
Use smooth, overlapping strokes rather than aggressive scrubbing. Think of it like painting—gentle, consistent pressure yields better results. During my last session, I revealed a stubborn pet hair build-up on my vinyl, and by gently sweeping it in a single direction, I avoided lifting or damaging the surface. Regularly clean your vacuum filters and brushes to maintain optimal performance and prevent dirt from scratching your floors while vacuuming.
Maintain and Inspect Your Equipment Frequently
Inspect the vacuum’s beater bar for debris or stiff bristles that may cause damage. When I noticed my vacuum’s beater bar had accumulated hair and grit, I paused to clean it thoroughly—saving my floors from unsightly scratches. Schedule regular maintenance to keep the beater bar and suction elements in top condition, ensuring they perform gently on sensitive surfaces.
Test Before Full-Scale Cleaning
If you’re trying a new vacuum or attachment, test it on a small, inconspicuous area first. Once, I forgot to do this and accidentally caused a dull patch on a corner of my vinyl floor. A quick test saved me from more extensive damage. This cautionary step helps you gauge the tool’s gentleness and avoid costly mistakes on visible areas.
Protective Mats and Area Rugs
Place rugs or mats in high-traffic zones or under furniture to reduce the need for frequent vacuuming of vulnerable areas. During a move, I temporarily laid down a rug before vacuuming, which prevented new scratches and kept my floor looking pristine. These simple additions can significantly extend the lifespan of your vinyl by minimizing wear from cleaning procedures.
Many homeowners and even seasoned contractors often fall prey to misconceptions when it comes to floor leveling and installation processes. One prevalent myth is that a subfloor’s flatness isn’t critical as long as it’s within building codes. However, subtle imperfections as small as 3/16 inch over 10 feet can cause noticeable issues in high-end flooring projects, leading to squeaks, cracked tiles, or uneven surfaces, which are hard to correct after installation. For advanced techniques on achieving flawless surfaces, consult [this guide on precise floor leveling](https://tiletrendshop.com/precise-floor-leveling-techniques-to-achieve-flawless-surfaces).
Another common mistake involves underestimating the importance of proper substrate preparation. Many believe that applying extra primer or using thicker mortar can compensate for uneven substrates, but this often exacerbates problems, resulting in tiles that crack or floors that develop valleys over time. It’s essential to understand the nuances of substrate preparation; for instance, a mechanical bond is crucial for self-leveling compounds on old concrete, as detailed in [this article on leveling challenges](https://tiletrendshop.com/floor-leveling-challenges-common-mistakes-and-how-to-avoid-them).
Misconception about hardwood floor acclimation is also widespread. Some assume that simply opening the boxes for a day suffices, but experts know that proper acclimation entails maintaining consistent humidity and temperature for at least 72 hours, particularly for reclaimed or exotic species, which can be more sensitive. Incorrect acclimation leads to expansion or contraction, causing gaps or buckling. For deeper insights, see [this resource on hardwood acclimation](https://tiletrendshop.com/elevate-your-space-choosing-the-right-hardwood-floors-for-your-home).
Lastly, many installers overlook the significance of strategic layout planning, particularly how subfloor irregularities might influence tile layout. Using layout lines and understanding the subfloor’s condition can prevent awkward cuts and aesthetic issues. For example, a failure to account for uneven subfloors can result in large tiles cracking at the edges, a mistake that’s costly and time-consuming to fix. For expert tips, explore [this article on tile installation pointers](https://tiletrendshop.com/tile-installation-pointers-that-save-time-and-money).
Understanding these finer details can elevate your flooring project from merely functional to flawless. Remember, every detail matters in creating a durable and visually pleasing floor. Don’t let common myths sabotage your efforts—educate yourself, plan meticulously, and execute with precision. Have you ever fallen into this trap? Let me know in the comments.
Keep Your Floors Working Smoothly with the Right Tools and Regular Maintenance
Investing in high-quality, purpose-built tools is essential for maintaining the integrity of your flooring over time. For example, I personally recommend using a cordless oscillating multi-tool with a soft attachment when performing routine touch-ups or delicate repairs. Its precision allows you to gently remove scratches or debris without risking additional damage. I’ve found that having a dedicated combination of specialty tools tailored for floor maintenance significantly extends the lifespan of hardwood and tile surfaces.
Regular inspections are also crucial. Check for signs of wear, loose tiles, or gaps that could lead to future problems. For hardwood floors, a microfiber dust mop combined with a high-quality, VOC-free hardwood floor cleaner helps maintain shine and prevents the buildup of abrasive dirt that can undermine long-term beauty and durability. Maintaining your equipment, like cleaning filters and blades after every use, ensures that your tools perform optimally and reduce the risk of damage during cleaning sessions.
Anticipate Future Trends by Modernizing Your Approach
The trend in flooring care leans toward eco-friendly, smart, and multi-functional tools. In the coming years, expect to see more AI-powered vacuum cleaners equipped with sensors that detect dirt buildup and adjust their cleaning patterns accordingly, minimizing floor stress. Embracing these innovations early on, such as integrating robotic vacuum systems that include gentle brushrolls designed for delicate surfaces, will give you a competitive edge in preserving your investment.
How do I maintain my flooring tools over time
Proper care means cleaning, adjusting, and storing your tools in controlled environments. For instance, storing vacuum attachments in a dry, cool closet prevents mold and keeps brushes from stiffening. Regularly lubricate moving parts as specified in manufacturers’ manuals. This preventative upkeep not only preserves your tools but also ensures your floors are cleaned uniformly and gently, preventing uneven wear or scratches over years of use.
Take the time to invest in these maintenance routines and tools. For dedicated enthusiasts, mastering advanced techniques—like using specialized leveling tools—can elevate the quality of your flooring projects exponentially.
If you haven’t already, try integrating a smart tool into your maintenance regimen, such as a sensor-enabled mop that monitors humidity and residual dirt levels. Incorporating such innovative solutions can keep your floors in pristine condition for decades, saving you money and effort in the long run.
Throughout my journey with flooring, I’ve realized that the small details—like vacuum settings—can have a monumental impact on the longevity of vinyl surfaces. One eye-opening lesson was understanding that a stiff beater bar isn’t just a minor inconvenience; it can cause lasting scratches that dull the shine and ruin the finish of your floors. By switching to gentler attachments and adjusting my vacuum height, I learned that preserving the beauty of your vinyl is within reach with mindful maintenance.
Lessons That Changed My Approach to Floor Preservation
- Gentle tools matter more than I thought: Using soft brushes instead of stiff heads protects the surface without sacrificing cleanliness.
- Settings are your friends: Always set your vacuum to the highest height and turn off the beater bar on delicate floors.
- Regular inspection prevents damage: Checking and cleaning the vacuum’s beater bar can save your floors from tiny but cumulative scratches.
- Test first, proceed later: A quick spot test before vacuuming the entire floor can avert costly mistakes.
- Preventive measures extend life: Placing area rugs and mats reduces debris buildup and minimizes cleaning stress on vinyl.
Tools That Make a Difference in Floor Care
- Microfiber dust mops—gentle yet effective, keeping dirt away that causes scratches.
- Soft-bristle vacuum attachments—designed for delicate surfaces, ensuring safe cleaning.
- Adjustable vacuum cleaners—easy height and beater bar management for versatile use.
- Routine maintenance kits—including brushes and filters to keep your equipment performing optimally.
Embrace Your Floor’s Aging Grace
Understanding the nuances of vacuuming and tool selection has empowered me to care for my vinyl floors better. The effort is worthwhile; a little mindfulness now saves you from costly refinishing later. Protecting your floors isn’t solely about aesthetics—it’s about honoring the investment you’ve made and ensuring they stand the test of time. With the right tools and habits, you can maintain their shine and smoothness for years to come. So, are you ready to revisit your cleaning routine and give your floors the gentle touch they deserve? If you’ve faced issues with dullness or scratches, share your experiences below—let’s learn and grow together in floor care mastery.