
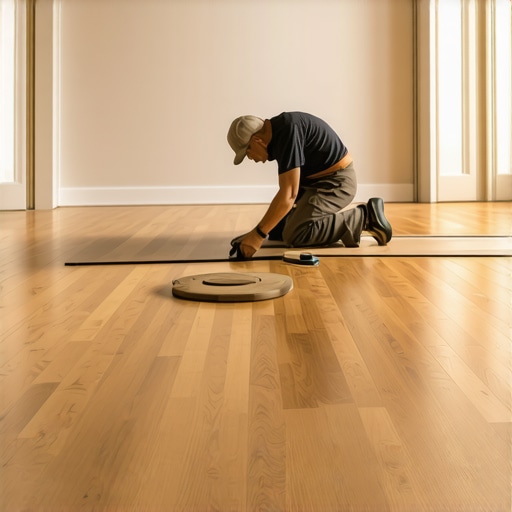
Ever tried to lay down a stunning wide plank hardwood floor, only to realize that it creaks, shifts, or gaps almost immediately? I had that lightbulb moment during my last flooring project. I was all excited about the beauty of wide planks—those rustic, natural boards that instantly add warmth and character—but within a week, I faced a series of issues. The boards started to wiggle, and the overall look was far from the seamless finish I envisioned. It was frustrating, and honestly, I wondered what I’d overlooked.
The Hidden Challenge with Wide Plank Hardwood
After digging through forums, consulting experts, and sharing my experience, I discovered that the key lies in the installation method. Wide planks, unlike their narrow counterparts, are more prone to movement because of their size and the way they respond to environmental changes. Without proper adhesive support, they tend to float or settle unevenly, leading to squeaks and gaps that can ruin the aesthetic and durability of your floor.
Are Wide Plank Floors Really That Difficult to Install?
You might be skeptical—I’ve been there. The idea of a “simple” wide plank installation can seem straightforward until you see the warping, buckling, or uneven surfaces appear. My early mistake was assuming that a basic floating install would suffice. I was convinced that simply nailing the planks down would work—big mistake. This common misconception can lead to costly fixes and disappointment in the end.
Research confirms that, especially with wide planks, glue-assist installation is often necessary for a stable, long-lasting result. The adhesive provides a bonding layer that minimizes movement caused by humidity swings and temperature fluctuations. It also enhances soundproofing and overall stability, which are critical considering the size and weight of the planks.
If you’ve faced similar issues or are contemplating a wide plank hardwood project, understanding the importance of glue-assist can make all the difference. I’ll walk you through the benefits and practical steps so you can avoid my mistakes and achieve a flawless finish.
Now, let’s dive into why this method is a game-changer—starting with the common skepticism many DIYers have: is it really worth the extra effort and cost? Spoiler: Yes, it is. And I’ll share some pro tips to get you started confidently.
Prepare Your Subfloor for a Solid Foundation
Start by inspecting your subfloor for any uneven spots, squeaks, or loose boards. Use a long level or straightedge across your entire surface; any deviations over 1/8 inch must be addressed. If you find high or low spots, apply self-leveling compound or sand down the highs until flat. For loose or squeaky areas, tighten or replace those sections. This step is crucial because a uneven subfloor is like trying to level a wobbling table—your entire floor’s stability depends on it. For more detailed leveling techniques, check out this comprehensive guide.
Acclimate Your Hardwood Planks Correctly
Before installation, store your wide planks in the room where they’ll be laid for at least 72 hours. Keep the environment at a steady temperature and humidity—ideally 65°F and 45-60% humidity—to allow the wood to adjust naturally. This reduces the risk of expansion or contraction after installation. I once neglected this step in my basement workshop and ended up with gaps and buckling after a cold snap. It’s like letting fabric relax before sewing—necessary for a perfect fit. For detailed acclimation tips, visit this resource.
Plan Your Layout for a Natural Flow
Measure your room carefully and sketch a layout. Decide whether you want the planks to run parallel or perpendicular to the main light source. For wider rooms, staggering the joints by at least 6 inches creates a more natural and sturdy look. Use a chalk line to mark the starting wall, ensuring the first row is straight. Remember, the first row sets the tone—if it’s crooked, everything else will follow. I use a string line and a laser level to ensure perfect alignment; it’s like laying bricks—precision matters. Find more layout strategies in this guide.
Secure the Subfloor Properly
The success of your installation hinges on a well-secured subfloor. Use screws rather than nails to attach subfloor panels, spacing them every 6-8 inches along joists. For even better stability, install a layer of underlayment designed for hardwoods, which acts as a moisture barrier and sound absorber. If your subfloor isn’t solid, you might feel every step on your new floor—like walking on uneven pavement. I once discovered a squeaky spot that revealed a loose subfloor panel, which I fixed immediately before proceeding. For detailed fastening methods, consult this article.
Apply Adhesive Strategically for Stability
This is the critical step where many DIYers falter. Spread a high-quality hardwood flooring adhesive evenly onto the subfloor using a notched trowel—size depending on plank width. Think of it as spreading peanut butter evenly on bread; the goal is a consistent layer without gaps or lumps. Place the planks, pressing firmly and using a rubber mallet for snug fitting. For large planks, employing a pull bar helps draw them tight against the previous row, ensuring a seamless joint. Remember, glue assist minimizes movement caused by seasonal humidity swings, which is especially vital for wide planks. For best practices, review this step-by-step tutorial.
Secure and Finish the Edges
As you near the walls, leave an expansion gap of at least 1/4 inch—think of it as a margin for your floor to breathe. Install a T-mold or quarter-round trim to hide these gaps and create a clean transition. Use spacers and a tapping block to maintain uniform gaps and tight joints. I once forgot to leave expansion space and ended up with buckling when the humidity rose; lessons learned. For detailed finishing techniques, see this guide.
Test Your Work and Make Adjustments
Before removing spacers, walk across the entire surface to check for squeaks or loose planks. If you notice movement, reapply adhesive or reinforce with nails. Use a straightedge or laser level to ensure the surface is flat; minor dips can be sanded down or filled with leveling compound. This meticulous check prevents costly corrections later. When I finished my first wide plank floor, I used a spirit level and found a few areas that needed minor sanding—saving me headaches down the line. For mastering levelness, see this expert advice.
Many assume that installing hardwood, tile, or leveling floors is straightforward enough for DIY enthusiasts to tackle successfully. However, beneath the surface of common practices lie subtle pitfalls and misconceptions that can sabotage even seasoned homeowners. Let’s dig deeper into some of these overlooked nuances that can make or break your flooring project.
Why Your Installation Might Be Falling Short Despite Following the Rules
One widespread myth is that as long as you prepare the subfloor properly and follow the basic steps, your floor will turn out perfect. But in reality, small details—like the type of adhesive used, the environmental conditions during installation, or the sequence of steps—can significantly impact long-term durability. For instance, many underestimate the importance of installing a proper vapor barrier beneath the subfloor, which can lead to moisture accumulation and warping over time. Expert advice suggests that paying attention to these finer points is essential for a lasting finish, as highlighted in this article.
Another common mistake involves overlooking environmental factors. Many believe that climate control is only necessary during storage, but fluctuations in temperature and humidity during installation can cause wood to expand or contract, creating gaps or buckling later. Advanced installers always measure and maintain consistent conditions—ideally 65°F and 45-60% humidity—throughout the process, as emphasized in this guide.
Can Floor Leveling Be Misjudged Even with the Right Tools?
Absolutely. Many DIYers rely solely on visual cues to judge flatness, but this is deceptive. Small dips of less than 1/16 inch can be visually undetectable yet cause uneven wear and squeaking. Professional levelers often use laser levels or long straightedges, combined with the tapping of a rubber mallet to detect hollow spots, which reveals hidden subfloor weaknesses. According to research from industry experts, misjudged leveling leads to increased repair costs and compromised aesthetics. For comprehensive strategies, check out this resource.
Always remember, mastering these nuances—like understanding environmental impacts and precise leveling—is what differentiates a good installation from a professional-quality finish. Don’t underestimate the power of small details! Have you ever fallen into this trap? Let me know in the comments and share your experiences.
Maintaining Your Hardwood Floors for Longevity
Keeping your hardwood floors in pristine condition requires regular upkeep and knowledge of specific maintenance practices. One of the key aspects is controlling environmental factors such as humidity and temperature, which directly impact the wood’s stability and appearance. Installing a high-quality humidifier or dehumidifier can help stabilize indoor conditions, preventing expansion and contraction that lead to gaps or buckling. Additionally, periodically inspecting for loose boards or creaking sounds allows early intervention before more extensive repairs are needed. Using furniture pads reduces scratches and dents, ensuring your floors retain their beauty over the years.
Tools I Recommend for Flooring Maintenance and Repairs
I personally favor a set of precise tools that streamline both maintenance and minor repair work. A digital moisture meter, for example, helps monitor the wood’s moisture content, enabling you to detect issues before visible damage occurs. I rely on the Mallet & Chisel Set for delicate re-seating of loose planks—it’s versatile and offers controlled force, minimizing further damage. For cleaning, a microfiber mop paired with a pH-balanced wood flooring cleaner effectively removes dirt without risking the finish. When it’s time to perform spot repairs or refinishing, a fine-grit sanding block and a quality wood stain or finish pen are invaluable for blending repairs seamlessly.
Long-term results depend heavily on consistent upkeep. Scheduling seasonal inspections ensures that environmental controls are functioning correctly, and addressing minor issues promptly prevents costly overhauls. Moreover, investing in the right tools ensures that maintenance is efficient and effective, saving you time and money down the line. Regularly checking for signs of wear, like scratches or dullness, allows for timely refinishing, which can significantly extend your floor’s lifespan.
Looking Ahead: Future of Flooring Maintenance Technology
Advancements in smart home technology are promising to revolutionize flooring maintenance. Imagine floors integrated with sensors that monitor moisture levels, humidity, and even structural integrity, alerting you via your smartphone when action is needed. As IoT devices become more affordable and sophisticated, I predict that proactive floor management will become the norm, making it easier than ever to keep your hardwood floors looking their best.
How do I Sustain My Floors’ Beauty Without Constant Hassle? Explore Strategic Upkeep
One effective approach is using protective finishes and rugs in high-traffic areas, which significantly reduce wear and tear. Additionally, implementing a maintenance routine—such as monthly cleaning with appropriate products and seasonal environmental checks—can prevent deterioration and maintain a consistent appearance. For more detailed expert strategies, check out this comprehensive guide. I encourage you to try applying a high-quality polyurethane topcoat in a small, inconspicuous area to test how it can enhance durability and shine. This small step can make a remarkable difference in preserving your investment over the years.
The Hardest Lesson I Learned About wide plank hardwood floors, flooring installation, tile, floor leveling
My journey into installing wide plank hardwood floors taught me more than just the technical steps; it revealed the importance of patience, attention to detail, and understanding the subtle behaviors of wood and materials. One of my biggest lightbulb moments was realizing that even minor environmental fluctuations could dramatically affect large planks, making thorough acclimation and environmental control non-negotiable. Additionally, I learned that investing in quality tools and adhesives isn’t just about convenience—it’s about longevity and beauty. These lessons transformed my approach and saved me from costly mistakes in future projects.
Tools and Insights That Transformed My Approach
Over time, I discovered that certain tools and resources are game-changers. A high-quality moisture meter helped me monitor wood conditions before and after installation, preventing future issues. My trusted notched trowel and pull bar assured tight seams, and reading dedicated blogs like this design guide provided insights that bridged the gap between DIY and professional work. These curated tools and knowledge sources are essentials in my toolkit, ensuring that each project stands the test of time.
Your Move: Elevate Your Flooring Skills Today
The future of hardwood flooring and tile installation is bright with innovation and informed craftsmanship. Don’t let early setbacks discourage you—embrace continuous learning and careful preparation. Whether you’re planning your first project or refining your technique, remember that mastery comes from attention to detail and a willingness to learn from mistakes. Your floors will thank you for it, reflecting your dedication and the care you put into your home. Ready to start your next flooring adventure? Share your thoughts below and let’s grow together in this craft!
Have you ever faced unexpected challenges with wide plank hardwood floor installation? Let me know below.
,