
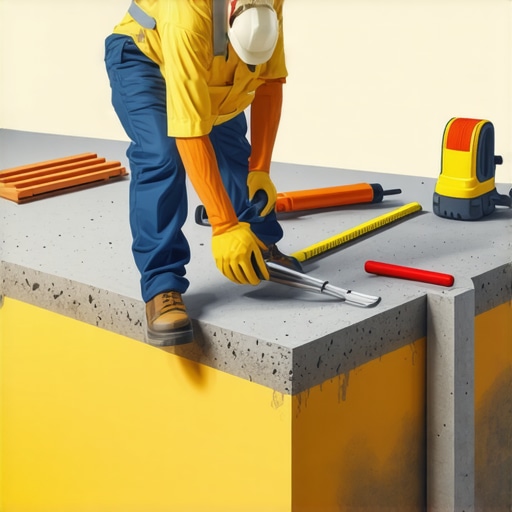
I’ll never forget the morning I stepped onto my damp basement floor, expecting a quick tile install only to realize the surface was wavy and uneven, causing my frustration to spike. That moment was a lightbulb for me — I had overlooked one crucial step: testing my concrete slab for moisture and settlement. It was a mistake I paid dearly for, and I don’t want you to face the same costly surprises.
Don’t Let a Wavy Floor Sabotage Your Renovation Dreams
As someone who’s been through the ordeal, I can tell you that skipping essential tests like the calcium chloride moisture test can lead to uneven tiles, cracked grout, and even failed hardwood installations. It’s not just about aesthetics; it’s about saving yourself from ongoing headaches and costly repairs down the line. Today, I promise to show you why this simple test is a game-changer and how it can help ensure your flooring projects turn out perfectly.
Is the Calcium Chloride Test Really Worth All the Hype?
Initially, I dismissed the idea of a moisture test, thinking I would just level the floor and proceed. But I learned the hard way that concrete slabs can contain hidden moisture even when they appear dry, leading to adhesive failure and mildew growth. According to the Concrete Network, moisture issues are among the leading causes of flooring failure, emphasizing the importance of proactive testing (source: concretenetwork.com). My early mistake was believing that all slabs are the same — a misconception that nearly ruined my project.
Now, I make testing a mandatory part of my process. If you’ve ever faced unexpected flooring problems, you know how frustrating and expensive it can be. This is why understanding the significance of a calcium chloride test isn’t just for contractors; it’s for every homeowner aiming for a flawless finish. Want to know how this test can save your renovation? Stay tuned, because we’re about to dive into the essential steps you need to take before laying down a single tile or hardwood plank, with expert tips and resources along the way.
Start With Surface Preparation
Before laying tiles or hardwood, nearly everything hinges on a solid base. Recall the mess I faced when installing a new tile floor, only to discover a significant dip in the middle of the slab. To prevent that, I first cleared the area of debris, dust, and loose particles. Use a broom and vacuum to ensure a clean surface, then inspect for cracks or spalling that might indicate deeper issues. This initial step lays the groundwork for accurate testing and leveling.
Test for Moisture Using Calcium Chloride Method
Gather Your Materials and Set Up
For the calcium chloride test, you’ll need a specialized testing kit available at most hardware stores. Place the sealed test device on the slab, following the manufacturer’s instructions, usually pressing it firmly into the concrete and sealing with a plastic cover. Secure it with tape if necessary. Think of this like a blood pressure cuff—creating an airtight environment to monitor moisture from inside the slab.
Wait and Read Results
Set a timer for 60-72 hours, avoiding disturbance. During this period, the device absorbs moisture from the concrete. When time’s up, peel back the plastic cover and compare the indicator to the color chart provided. A reading above andus’ defines high moisture levels that could jeopardize flooring adhesion. Throw a quick glance at the moisture content, much like a mechanic checking engine diagnostics, before proceeding.
Assess Concrete Settlement and Flatness
Use a Long Level or Straightedge
Place a 6-foot level or straightedge across the slab to spot dips or humps. When laying out the straightedge, I recommend starting from the most irregular sections, like the corners near doorways. As I did during my project, mark any high or low spots with chalk or stakes. This helps visualize the extent of unevenness, which can sometimes be a few inches deep or just minor undulations.
Implement a Laser Level or String Line
For more precise measurements, set up a laser level across the entire surface, ensuring it’s secure and level itself. This will project a straight line over the slab, revealing inconsistencies in flatness. Imagine it as shining a bright flashlight over a wrinkled sheet—you instantly see where dips and humps are. This data guides whether additional subfloor work or self-levelers are necessary.
Decide on Correction Methods
If moisture levels are acceptable and the surface is uneven, prepare to level the floor. Use a high-quality self-leveling compound or adjust the subfloor framing, depending on severity. During my own experience, I poured a layer of self-leveler over problematic sections, carefully following manufacturer instructions to avoid trapped air or lippage. Mimic this by slowly pouring and spreading the mixture, akin to icing a cake for a smooth finish.
Schedule Final Testing and Inspection
After corrections cure, repeat moisture testing to ensure no residual issues. Also, recheck the flatness with your straightedge or laser. Only once these tests meet industry standards should you proceed with the actual flooring installation. Think of it as giving your foundation a final health check before construction—premature work leads to failures down the line.
Handling these foundational steps with care and precision significantly increases your chances for a pristine, durable floor. For a detailed walkthrough, I recommend reviewing techniques at this step-by-step guide. Remember, meticulous testing and correction are your best allies against future headaches in flooring projects.
Many homeowners and even seasoned professionals often get blindsided by overlooked details that can compromise the durability and aesthetic of their flooring. One prevalent misconception is that a perfectly flat subfloor isn’t essential, but the truth is, subtle imperfections can lead to significant long-term issues, such as cracked tiles or uneven hardwood planks. While basic leveling might suffice on the surface, true mastery involves understanding the hidden nuances, like substrate moisture content and the specific behavior of adhesives over different surfaces. For instance, some installers overlook how temperature and humidity influence self-leveling compounds, leading to delaminations or surface cracks—an advanced mistake detailed in industry research (source: Floor Leveling Challenges).
Another myth is that once the surface appears smooth, it’s ready for tile or hardwood. However, the underlying substrate’s composition, such as the presence of gypsum or Portland cement, dramatically affects adhesion and movement over time. A common trap is using standard adhesives without considering environmental conditions, which can cause tiles to crack or delaminated planks to swell. Advanced installers verify substrate compatibility and employ tailored primers or bonding agents, as emphasized by experts in Mastering Floor Leveling.
Let’s discuss a frequent oversight relevant for those aiming for a seamless finish—ignoring the significance of perimeter expansion gaps. Many focus solely on achieving perfect flatness but forget that subtle expansion and contraction movements can cause buckling if gaps are too tight or misplaced. An advanced mistake I’ve observed is sealing these gaps prematurely, under the false assumption that they are unnecessary. Properly accommodating movement by installing trim and setting appropriate gaps is critical, as outlined in Flooring Installation Fundamentals.
Making these nuanced considerations can make or break your project’s success. For example, moisture not only influences the initial adhesion but also continues to affect the flooring over years, leading to gaps or warping. This underscores the importance of advanced moisture testing techniques beyond the basic calcium chloride method—considering in-situ probes and hygrometers for more accurate readings, as recommended by industry leaders.
Are you aware of how micro-movements and environmental factors subtly shape the longevity of your flooring? Recognizing these hidden details is essential for pro-level results. If this resonates with you, dive into this comprehensive guide to elevate your expertise. And if you’ve fallen for common myths or overlooked critical nuances, share your experience in the comments below. Let’s learn from each other’s mistakes and master the art of flawless flooring together.
Keeping It Working: Tools I Recommend for Flooring Maintenance
When it comes to maintaining your floors—whether tile, hardwood, or laminate—the right tools can make all the difference in ensuring longevity and appearance. I personally rely on a few specialized pieces of equipment to detect issues early and perform regular upkeep efficiently. For example, a качественный moisture meter, like the Tramex Concrete Moisture Encounter Plus, allows me to monitor moisture levels in the slab over time, catching potential problems before they escalate. This proactive approach aligns with industry recommendations, as persistent moisture is a leading cause of flooring failure (source: Mastering Floor Leveling Secrets).
Another indispensable item is a high-quality vacuum equipped with HEPA filtration, which I use weekly to prevent dust accumulation that can damage delicate finishes on hardwood or tile surfaces. Regular cleaning with such tools preserves the integrity of your flooring and prevents dirt-related wear. Additionally, a microfiber mop paired with pH-neutral cleaner ensures gentle yet effective cleaning, prolonging the life of surface coatings.
For more intensive maintenance, especially for hardwood floors, I recommend a floor buffer with soft pads. This helps remove tiny scratches and restores shine without abrasive chemicals. In my experience, pairing this with professional-grade UV protectants can significantly enhance the durability of finishes, making scheduled maintenance easier and more effective. For best results, don’t forget to seal grout lines on tiled surfaces periodically, which prevents stains and water ingress, thereby preserving your investment in the long term.
Looking ahead, I predict that smart technology will play an increasingly prominent role in flooring maintenance. Sensors embedded in floors could provide real-time data on moisture and wear, notifying homeowners via smartphone apps before small issues become major repairs. This trend is already emerging in high-end smart home systems, and it’s exciting to think how accessible such tech will be in the near future.
How do I keep my floors in top shape over time?
The key is consistency. Regular inspections using a moisture meter, routine cleaning with recommended tools, and early intervention upon detecting minor damages can prevent costly repairs down the line. Implementing scheduled maintenance routines, like sealing grout annually or refinishing hardwood every few years, extends the lifespan of your flooring and keeps it looking stunning. I strongly encourage you to try integrating a moisture monitoring device into your maintenance plan; it’s a game-changer in preventing issues that can compromise your surface’s integrity. For expert guidance on maintaining your specific flooring type, check out these hardwood floor care secrets.
The Unexpected Truths That Shaped My Flooring Journey
One of the most profound lessons I learned was that even the most meticulous plans can be thrown off by unseen factors like moisture or subtle settlement in the concrete. Recognizing these hidden issues early not only saved me time and money but also reinforced the importance of trusting thorough testing over assumptions. Each mistake became a stepping stone toward more confident, informed decision-making in my subsequent projects.
Your Ultimate Guide to Elevated Flooring Confidence
To deepen your expertise, I highly recommend the comprehensive resources available at this detailed guide. It covers advanced techniques for moisture testing and proper surface preparation that I wish I had access to when starting out. Investing in the right tools, like a high-quality moisture meter or laser level, has transformed my approach and made challenging projects more manageable and successful.
Fuel Your Flooring Ambitions Today
Your journey toward flawless flooring starts now. By applying these lessons, embracing proper testing, and leveraging expert resources, you can turn what once seemed complex into a rewarding DIY experience. Remember, every perfectly leveled floor or well-adhered tile adds to your craftsmanship pride. Don’t be afraid to take that first step—your future self will thank you for the effort and care you invest today.
What was the most surprising mistake you encountered in flooring installation, and how did it change your approach? Share your story in the comments below—I’d love to hear your experiences and tips!
,