
Ever poured a new layer of industrial epoxy over a freshly applied concrete slab only to find it peeling or bubbling within a few months? I remember that frustrating moment vividly—thinking I’d nailed the prep work, only to see my effort wasted. That lightbulb moment hit me hard: not all concrete is created equal, and without proper etching, epoxy just won’t stick. If you’ve ever faced that disappointment, you’re not alone. Many professionals and DIYers make the mistake of skipping the critical step of concrete preparation, leading to costly failures down the line.
The Secret to Long-Lasting Epoxy: Proper Surface Preparation
In this post, I promise to share what I’ve learned from years of trial and error about why epoxy coatings fail on un-etched concrete—and, more importantly, how to make sure your surface is primed for success. From choosing the right etching techniques to understanding the chemistry involved, I’ll walk you through the steps to significantly boost your coating’s adhesion and durability. After all, there’s nothing more disheartening than watching your hard work peel off just because of a simple prep mistake.
Is Etching Really Necessary for Epoxy? The Skeptic’s Question
You might be thinking, “Is all this fuss about etching really worth the effort?” Early in my career, I hesitated on this point. I thought, “A good cleaning should suffice,” but I learned the hard way that surface contamination and smooth concrete are like oil and water when it comes to epoxy adhesion. Research supports this—studies show that proper etching increases bond strength significantly, reducing long-term failure risks (source). That mistake of skipping or rushing the etching process cost me more money and time than I care to admit. Now, I emphasize the importance of following proven surface prep protocols, and I want the same for you.
Next, we’ll explore the step-by-step process to prepare your concrete surface to ensure your epoxy bonds solidly and lasts for years to come. Whether you’re tackling a basement floor, garage, or industrial space, these tips will save you frustration and money. Ready to transform your space with confidence? Let’s dive in!
.
Sand and Clean with Precision
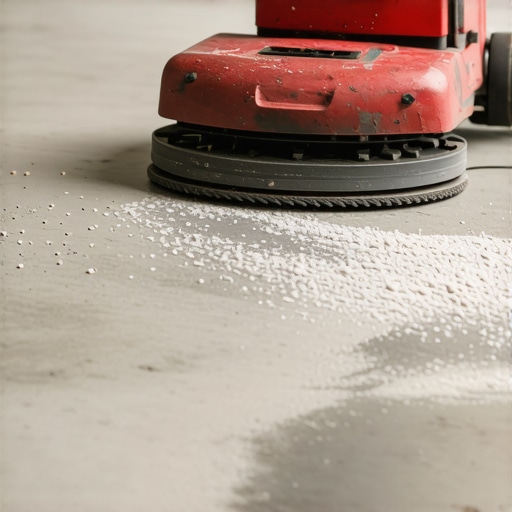
Start by thoroughly sweeping and removing all loose debris from your concrete surface. Then, use a concrete grinder or a heavy-duty sander with a rough-grit pad to create a uniform texture—think of it as giving your floor a gentle rough patch, much like scuffing a mirror before applying a new coat of paint. I once neglected to roughen the surface for my garage epoxy, resulting in peeling within months. After that, I made it a point to vigorously sand and clean, which dramatically improved adhesion results.
Choose the Right Etching Technique
For smooth or sealed concrete, chemical etching with muriatic acid or a commercial concrete etcher is essential. Mix the acid according to manufacturer instructions, then apply evenly with a brush or sprayer, ensuring you wear proper protective gear. Think of this step as baking yeast into dough—it’s about creating the perfect environment for bonding. I remember carefully pouring acid, then rinsing with water until the pH was neutral, which significantly enhanced epoxy sticking power. Once acid-etched, allow the surface to dry completely before proceeding.
Address Floor Level Variations
Uneven surfaces can cause epoxy failures or trip hazards. Use self-leveling concrete to fill low spots, and grind down high patches. Picture pouring a thin layer of self-leveler like spreading a thin layer of frosting over uneven cake layers—smooth and even. When I encountered a wavy basement floor, I applied a self-leveler, then troweled it carefully, checking with a level to ensure a flat finish. Always follow the manufacturer’s curing times, which can range from 12 to 48 hours, depending on conditions.
Verify Surface Cleanliness and Moisture
Before coating, remove all dust, dirt, and residual moisture, which can undermine adhesion. Use a vacuum and a tack cloth to wipe the surface, then perform a moisture test—press a plastic sheet for 24 hours to see if water accumulates underneath. I once skipped this step, and bubbles formed from trapped moisture later. A dry, clean, and moisture-free surface is non-negotiable for epoxy success.
Implement Final Checks and Corrections
Inspect the entire surface with a flashlight held at a low angle, revealing imperfections or lingering dust. Fix minor issues with additional sanding or cleaning. Remember, a flawless preparation guarantees a durable finish—skipping this leads to costly rework. My best results happened when I took time at this stage, meticulously ensuring the surface was pristine before applying epoxy coating. Spilling some primer or activating agent before coating can help tests and bond strengthening.
Many DIYers and even seasoned professionals often misunderstand the critical importance of precise floor leveling, assuming that a slightly uneven subfloor won’t cause issues down the line. However, this oversight can lead to costly repairs, uneven surfaces, or even tile cracking over time. Contrary to popular belief, achieving a perfectly level base isn’t merely about visual flatness; it directly impacts the longevity and durability of your flooring. One common misconception is that using a self-leveling compound alone solves all levelness problems. While essential, the technique’s effectiveness depends heavily on proper substrate preparation and understanding the underlying floor structure. Ignoring these nuances can trap you into a cycle of repeated corrections, increasing labor and material costs. To truly master flooring installation, focus on comprehending the floor’s dynamic nature, especially in older buildings where settling might have occurred. I recommend consulting detailed resources like https://tiletrendshop.com/precise-floor-leveling-techniques-to-achieve-flawless-surfaces to avoid pitfalls and ensure a seamless finish. Remember, setbacks often stem from neglecting the subtle details that differentiate a professional job from a novice attempt. Have you ever fallen into this trap? Let me know in the comments. Properly addressing these nuances not only prevents future issues but also elevates your craftsmanship, making every project a source of pride.
Keeping Your Floors in Top Shape with Proper Tools
To ensure your flooring projects stand the test of time, investing in the right equipment is crucial. I personally swear by a high-quality laser level for floor leveling—I use the Stabila LASER LEVEL 350 because it provides precise, consistent readings over large areas, reducing costly errors. For sanding and surface preparation, a Planet Bellsander 6226 with variable speed settings allows me to control dust and finish, ensuring a smooth surface before sealing or coating. When applying epoxy or self-leveling compounds, a WACKER Neuson vibratory screed helps achieve even spreads and prevents voids, especially in large areas. Modern tools like cordless pneumatic tampers make compact space work easier, particularly when installing underlayment or leveling patching compounds.
Using the correct tools not only saves time but also significantly enhances the quality and durability of your flooring, especially when paired with meticulous maintenance routines. Regularly cleaning your equipment per the manufacturer’s instructions extends their lifespan and maintains their effectiveness. For detailed upkeep tips, visit this resource.
Predicting Future Trends Gear Upgrades
Looking ahead, the integration of smart technology will revolutionize flooring maintenance. Automated sensors embedded in underlayment can monitor moisture levels, pressure, and even detect early signs of wear, alerting homeowners or contractors via smartphone apps. Embracing such innovations today prepares you for seamless upgrades to more intelligent, long-lasting flooring systems.
How do I maintain my flooring tools over time?
Proper maintenance starts with regular cleaning after each use—removing dust, debris, and residual adhesives helps prevent equipment corrosion and buildup that could compromise accuracy. Lubricate moving parts according to supplier guidelines, and store tools in controlled environments to prevent rust or warping. Also, calibrating laser levels periodically ensures measurement accuracy, which is essential for achieving flawless installations. For more comprehensive tips, check this detailed guide. Taking these steps prolongs your tools’ lifespan and sustains their precision, ultimately safeguarding your investment and project quality. I recommend trying out a maintenance routine focused on calibration and cleaning to see immediate improvements in your workflow. Properly maintained equipment will serve you reliably, giving you confidence in every project.
How I Nearly Got Stuck on a Leveling Fumble That Changed Everything
One of the most enduring lessons I learned was from a project where I trusted a quick self-leveling pour without double-checking the substrate condition. The result? A noticeable dip that haunted the space for years. That experience taught me the importance of meticulous surface prep prior to even thinking about leveling — a step that might seem tedious but is truly the secret to flawless flooring. Now, I always measure, test, and verify before moving forward, saving myself time and costly fixes in the long run.
Tools That Transformed My Approach to Flooring Perfection
Investing in the right tools has been a game-changer. A laser level like the Stabila LASER LEVEL 350 ensures precise readings and helps me identify subtle deviations that could undermine durability. My trusty hardwood floor care kit keeps my surfaces pristine, and employing proper mixing paddles guarantees a consistent self-leveling pour. These tools aren’t just gadgets; they’re investments in quality that pays off with every project.
Why Failing to Prepare Correctly Can Cost a Fortune (And How to Avoid It)
Skipping or rushing surface preparation, especially in high-traffic or commercial settings, might save time initially but leads to peeling, cracking, and uneven wear later. I learned this the hard way when I underestimated the importance of thorough cleaning and moisture barrier testing. Through my experience, I now advocate for a comprehensive check—think vacuuming, moisture testing with plastic sheets, and even a simple water drip test—to ensure your base is solid. These steps are minor in effort but substantial in payoff, helping your floors last for decades rather than months.
How to Turn Floor Leveling Into Your Artistic Signature
Every project is an opportunity to showcase precision. A perfectly leveled surface isn’t just functional; it transforms the entire aesthetic. I pay close attention to subtle gradients and employ strategic techniques like the string-lining test and careful using of self-leveling compounds. These methods turn what could be a mundane step into a craft—one that elevates your entire space and your reputation as a builder or DIY enthusiast. Remember, the devil’s in the details, and your attention to them can be your unique hallmark.
Actionable Tips to Elevate Your Flooring Process Right Now
Start by reviewing your current tools and ensuring calibration—don’t trust aging equipment to deliver accuracy. Next, create a detailed surface prep checklist tailored to your project, emphasizing cleaning, leveling, and moisture testing. Finally, invest time in studying proven resources like this comprehensive guide for in-depth techniques. Making these small but consistent adjustments transforms average flooring into enduring masterpieces. Ready to elevate your craftsmanship? Let’s make every project a testament to excellence.
What’s the most unexpected lesson you’ve learned during a flooring project? Share your story below—I’d love to hear how it changed your approach!
,