
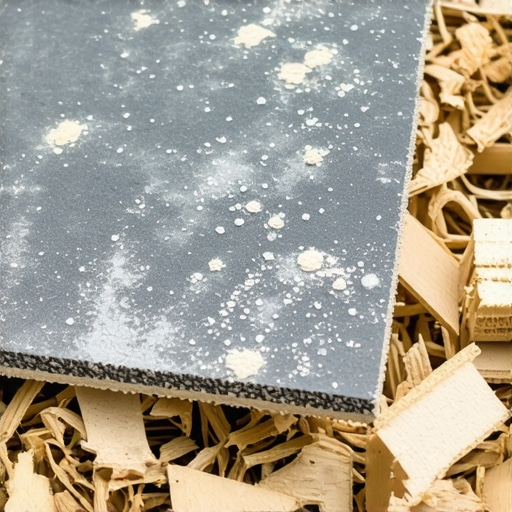
There I was, elbow-deep in a hardwood floor renovation, thinking I knew everything about sanding and finishing. But then, my sanding paper suddenly clogged up with a thick, gritty gunk. It slowed me down, made the process frustrating, and I realized I’d overlooked a simple yet crucial detail.
The Frustrating Mystery of Loading Sanding Papers
That disgusting buildup on my sanding paper was more than just annoying; it was a sign that I was missing something vital. Every time I switched to a fresh sheet, it would quickly load up with dust, wood particles, and that stubborn gunk that seems to cling to the paper like glue. I knew this wasn’t the way it’s supposed to work, and it hampered my progress much more than I expected.
What exactly causes this gunk buildup? More importantly, how can I keep my sanding papers cleaner longer and get a smooth, professional finish? That’s the question I’ll help you answer today because, trust me, dealing with clogged sandpaper is an issue anyone working on floor refinishing or tile installations has faced — and it’s totally fixable.
Is Sanding Gunk Really a Big Deal?
At first, it might seem like a minor inconvenience, but gunk-infested sanding paper can severely impact your finish. It causes uneven sanding, deep scratches, and even prolongs your project unnecessarily. Early in my DIY journey, I made the mistake of ignoring this issue, thinking it was just part of the process. That mistake cost me extra time and effort. Since then, I’ve learned that proper sanding paper maintenance can save you big headaches, especially when aiming for that flawless result you see in professional finishes. If you want to avoid the pitfalls I’ve experienced, check out this guide on installation mistakes for tips on getting it right from the start.
So, if you’ve ever faced the annoyance of sanding paper loading up with gunk before finishing your floor or tile project, you’re in good company. The good news? There are simple techniques to keep that gunk at bay and ensure your sanding progresses smoothly. Ready to learn how? Let’s dive into the root causes and effective solutions that will change how you work with power tools forever.
Keep Your Sanding Papers Clean and Effective
During my recent hardwood floor refinishing, I discovered that maintaining clean sanding papers dramatically improved my results. To do this effectively, I first remove dust and debris from your workspace before starting, which prevents dust from clogging the paper prematurely. Use a vacuum or compressed air to clear the surface and the sandpaper itself—this simple step ensures you start with a fresh abrasive surface.
Choose the Right Grit and Change Frequently
For my project, I started with coarse grit to remove old finish, then moved to finer grits for smoothing. I learned that selecting the correct grit and changing it often prevents gunk buildup. Never reuse a dirty or clogged piece, as it diminishes sanding efficiency and can leave scratches. I replaced my sandpaper every couple of passes, which kept dust from accumulating and maintained consistent contact with the wood surface.
Use a Sanding Block or Pad for Flat Surfaces
My mistake was relying solely on handheld sanding disks without support. I found that using a sanding block or pad helps distribute pressure evenly — think of it as using a level surface to keep your work uniform. This prevents creating dips or uneven spots, especially on larger surfaces. When I sanded my floor’s edges, I wrapped sandpaper around a foam pad, which provided better control and minimized clogging because dust was more evenly brushed away.
Employ Proper Sanding Technique to Minimize Gunk
My method involved keeping the sander moving constantly in overlapping passes—this prevents localized heat and dust buildup. Also, I avoided pressing down hard, which causes the abrasive to heat up and gum up faster. Think of it like brushing your teeth: gentle strokes do a better job and keep the tools cleaner. I also periodically cleaned the sander’s vent and replaced the paper when resistance increased, ensuring full efficiency.
Prolonging Sandpaper Life with Cooling Methods
To prevent gunk from mineralizing quickly, I used a damp cloth to occasionally cool the surface and reduce dust adhesion. Although it sounds counterintuitive, lightly misting the surface with water—done carefully—can suppress dust particles and extend the life of your sanding paper. Remember, avoid excessive moisture that can damage your wood or epoxy finishes. Implementing cooling intervals helped me maintain a steady workflow without frequent paper changes.
Final Tips for Gunk-Free Sanding
Before moving to the finish coat, I always vacuum and wipe the surface thoroughly. This removes residual dust that could bind with the gunk and develop into rough patches or mottling. For best results, check your sandpaper regularly—if it’s loading with grit, replace it immediately to keep your project moving smoothly. Effective sanding is about consistency, care, and attention to detail, which ultimately results in professional-grade finishes.
 When it comes to flooring, many DIY enthusiasts and even some professionals fall for misconceptions that can lead to costly mistakes. One widespread myth is that a perfectly leveled subfloor guarantees flawless tile adhesion. While proper leveling is crucial, recent studies highlight that substrate preparation involving moisture mitigation and substrate compatibility plays an equally vital role in longevity and appearance. Rushing through surface prep without understanding the unique properties of your subfloor can cause tiles to crack or lift over time, contradicting popular belief that simple leveling suffices for a durable install. To deepen your knowledge, I recommend reviewing this comprehensive guide on floor leveling for expert insights. Another misconception is assuming that matching grout color with the tile creates a seamless look; however, seasoned installers often choose contrasting grout for visual definition, which could be overlooked by beginners aiming for uniformity. Moreover, many assume that larger tiles require special adhesives, but advanced techniques demonstrate that with proper trowel notch selection and substrate support, standard thinset can work effectively, reducing project costs and complexity. The trap here is neglecting the importance of substrate stability and understanding the nuances of tile size and adhesive compatibility. An advanced question I commonly encounter: “At what thickness should I apply the thinset when installing large-format porcelain tiles to prevent lippage?” Experts suggest that using a pre-troweled adhesive and compensating with a thicker bed—up to 1/4 inch—ensures a flat surface, aligning with this detailed resource on level flooring techniques. Finally, don’t forget that the details matter: sealants, proper joint spacing, and environmental controls during installation can dramatically affect the lifespan of your floor. Breaking free from these common myths and understanding the nuanced practices leads to professional results. Have you ever fallen into this trap? Let me know in the comments.
Prioritize Precision with Quality Tools
Investing in high-quality equipment is paramount to ensuring your flooring projects stand the test of time. I swear by a variable speed random orbital sander because it offers fine control over the sanding process, reducing the risk of gouges and uneven surfaces. Additionally, a professional-grade moisture meter helps me gauge substrate moisture levels accurately, preventing issues like tile lifting or hardwood warping. These tools, though seemingly simple, make a significant difference in achieving a polished, durable finish and save me countless hours troubleshooting problems down the line.
Mastering Floor Leveling for Perfection
One of the critical steps I focus on is meticulous floor leveling. Using a laser-guided leveling system, I ensure every inch of the substrate meets the required specifications. This consistent approach minimizes lippage in large-format tiles and reduces future maintenance needs. Regularly calibrating my equipment and following expert-recommended techniques from the ultimate guide to floor leveling has been a game-changer. Remember, addressing potential unevenness at this stage significantly cuts down on long-term repair costs and guarantees a flawless surface.
Keeping Tools in Top Shape
Proper maintenance of your tools extends their lifespan and keeps your work consistent. I clean my power sander filters after each project, check for worn abrasive pads, and replace them promptly. For hand tools, a good oiling routine prevents rust and ensures smooth operation. Maintaining sharp blades on knives or tile cutters enhances precision and reduces waste. Investing a few minutes daily on maintenance might seem tedious, but it ensures your equipment performs at its best project after project.
Preparing Your Workspace for Longevity
Dust and debris management goes hand-in-hand with tool maintenance. I always cover nearby furniture and seal off vents to prevent dust migration. Using vacuums equipped with HEPA filters keeps my workspace cleaner and protects my equipment from airborne particles that can impair performance. These practices not only preserve the integrity of my tools but also create a safer, more efficient environment, especially in lengthy projects where small details matter.
Anticipating Future Trends in Flooring
Looking ahead, I believe automation and smarter dust extraction systems will revolutionize flooring installation and maintenance. Innovations like robotic sanders with built-in dust control are already on the horizon, promising ever-greater precision and cleanliness. Staying updated on these advances by following industry leaders and technical documentation, such as cutting-edge leveling techniques, will help you remain competitive and deliver top-tier results.
How do I maintain my tools over time?
Consistent care is essential. Regularly cleaning dust from power tools, lubricating moving parts, and inspecting blades or abrasive pads ensures optimal performance. Store tools in a dry, organized space to prevent rust and damage. Scheduling routine checks and replacements based on usage frequency keeps your equipment reliable, minimizing downtime and costly repairs. Plus, always follow manufacturer guidelines for maintenance; doing so ensures your tools remain efficient and safe to operate. With proper care, your tools will serve you well through countless projects, making each longer-lasting and more precise. Remember, leveraging the right maintenance routines and investing in quality equipment can significantly reduce long-term costs and improve your overall craftsmanship. For detailed techniques on achieving flawless floors, check out mastering floor leveling.
What I Wish I Knew Before My First Hardwood Sanding
One of the most profound lessons I’ve learned is that patience beats speed. Rushing to complete sanding often leads to clogged papers, uneven surfaces, and a need for rework. Taking the time to clean my workspace, change grit frequently, and use the right pressure has saved me countless headaches. This approach might seem time-consuming initially, but it pays dividends in the quality of the final finish.
Why Every Detail in Preparation Counts
From selecting the appropriate grit to properly cooling the surface, I realized that the devil is in the details. Small steps like vacuuming dust or employing a damp cloth can extend the life of your sandpaper and improve your results. Overlooking these can cause gunk buildup, which hampers performance and wastes resources. Thoughtful preparation is your best ally for a flawless, professional look.
When to Switch Tools and Materials
Knowing when to replace your sandpaper or switch to a support pad has been a game-changer. I learned that maintaining sharp, clean abrasives prevents gouges and ensures even sanding. Regularly inspecting your tools and replacing worn-out parts keeps the workflow smooth and prevents unintentional damage. It’s a simple practice that adds up to a significant difference in outcomes.
Insider Wisdom: Lessons from My Floor Restoration Journey
- The Surprise of Gunk: I never anticipated how quickly dust and debris load up, reducing sanding efficiency. Now, I keep a routine of cleaning tools and workspace, which keeps my projects moving faster and smoother.
- The Power of Proper Technique: Using a sanding block and maintaining constant motion prevents uneven surfaces and hot spots that cause gunk. Small adjustments in technique elevate the finish quality.
- Cooling vs. Moisture: A few light misting intervals help control dust and prolong sandpaper life, but overdoing it can damage the substrate. Finding that balance makes all the difference.
- Tool Maintenance Is Key: A well-maintained sander with fresh pads and clean filters performs better, saving time and money in the long run.
- Beyond Sanding: Subfloor prep, moisture management, and understanding material compatibility are vital for lasting results—more than just the sanding process itself.
My Essential Toolkit for Flooring Success
- Variable Speed Orbital Sander — Offers fine control, reducing gouges and unevenness, and helps adapt to various surface conditions. I trust brands that provide reliable power and ergonomic design.
- Moisture Meter — Essential for assessing substrate readiness, preventing future issues like tile cracking or hardwood warping. Knowing your materials’ moisture content is invaluable.
- High-Quality Dust Extractor — Keeps your workspace clean and extends tool lifespan. I prefer units with HEPA filters for maximum dust control.
- Support Pads and Replacement Grits — Having a variety ensures you match the right abrasive to each stage of your project, maintaining efficiency and quality.
Don’t Let My Hard Lessons Be Your Hardest
Taking your flooring project seriously from the start with meticulous preparation and care can turn a daunting task into a rewarding craft. Remember, the difference between good and exceptional results often lies in the details others overlook. Ready to elevate your flooring game? Trust your tools, stay patient, and enjoy the process of transforming your space into something truly stunning.
Have you ever faced unexpected gunk buildup or struggled with maintaining your sandpaper? Share your experiences below — I’d love to hear how you overcame those hurdles!
/>**