
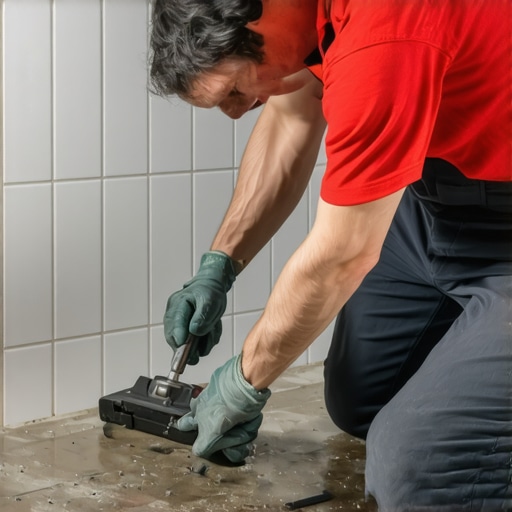
It was a Saturday morning, and I vividly remember my frustration bubbling over as I tried to pry out stubborn grout from my bathroom tiles. I had underestimated the challenge, and soon, I was battling chipped tiles and sore fingers. That lightbulb moment made me realize how critical the right technique and tools are when it comes to removing old grout safely. If you’ve ever faced the fear of damaging your beautiful tiles or making a small job turn into a costly fix, you’re not alone. Today, I’m here to share my personal experience and tips on the Painter’s Tool Move, a method that transformed my approach and saved my tiles.
The Secret Sauce for Removing Old Grout Without a Repair Overload
Removing old grout sounds simple—just scrape and go, right? Wrong. Without proper technique, it can lead to scratched tiles, broken edges, or even worse. When I first started, I made the mistake of using a generic scraper, thinking more force equals faster results. That was a costly lesson in patience and repair work. Over time, I discovered the Painter’s Tool Move, a gentle yet effective technique that allows you to remove grout without damaging your tiles. It involves carefully selecting the right tools, such as a multi-tool with a grout removal attachment, and applying slow, controlled pressure. Honestly, it’s a bit of an art—think of it as a neighborly dance where finesse wins over brute force.
One thing I found helpful was to work in small sections, keeping the grout moist with a little water to loosen it up. Not only does this make removal easier, but it also prevents the dust and debris from overwhelming your space. Plus, wearing protective glasses and a mask is a must when working with grout residue flying around. Trust me, I learned this the hard way!
If you’re ready to get down to business, you’ll find that mastering the Painter’s Tool Move can make your tile removal projects cleaner and safer. And, if you’re tackling a larger job, I recommend checking out my detailed post on floor leveling to ensure your surface is ready for the next steps.
### Is Removing Grout Actually Worth the Hype?
I get it—many think it’s just a tedious chore. But here’s the truth: improper grout removal can ruin the visual appeal of your entire tiling project. I once tried to rush through it with a chisel, and I ended up cracking a tile. That mistake set me back weeks and cost money I hadn’t planned on. Early on, I underestimated how vital gentle techniques are—something I’d recommend everyone avoid. It isn’t just about getting rid of old grout; it’s about doing it right the first time.
Now that we’ve covered the why and shared some pitfalls I’ve encountered, in the next section, I’ll walk you through the exact steps to perform the Painter’s Tool Move confidently. So, whether you’re updating a backsplash or restoring a vintage floor, you’ll be equipped with the knowledge to do it safely and effectively.
Preparing for the Job: Tools and Safety First
Before diving into grout removal, gather the right tools: a oscillating multi-tool with a grout removal attachment or a carbide-grit grout saw works best. I remember a time when I used a dull chisel, which led to cracked tiles—so invest in quality equipment. Safety gear is essential: wear goggles and a dust mask to protect against debris and dust particles. Set up your workspace properly, ensuring good lighting and ventilation, especially if working in enclosed areas.
Sectioning the Area: Break It Down for Precision
Divide the space into manageable sections. Using painter’s tape around tiles not only labels your work zones but also helps prevent accidental scratches on adjacent tile surfaces. I once tackled a 10-foot bathroom wall all at once and ended up fatigued and sloppy; working in smaller segments restores control. Mark your sections clearly to stay organized and maintain a steady workflow.
Loosening the Grout: Keeping Tiles Intact
Apply a gentle technique to loosen the grout. Dampen the grout with water to minimize dust and soften it, making removal easier. During my project, I used a spray bottle to keep grout moist, which drastically reduced dust and prevented the tiles from chipping. Use the grout saw or multi-tool to carefully scrape along the grout lines, applying controlled pressure—think of it as a delicate dance rather than a punch. Move slowly along the joint, maintaining consistent contact without forcing the tool into the tile surface. For stubborn areas, alternate between gentle scraping and a brief moistening cycle to ease removal.
Addressing Common Challenges
If the grout is particularly hard or old, consider applying a specialized grout softener. This chemical penetrates and weakens the grout, saving both your tiles and time. Always test a small area first to check for any adverse reaction. After softening, resume the gentle scraping to lift out the loosened material.
Cleaning the Surface: Ensuring a Smooth Foundation
Once the grout is removed, thoroughly clean the surface to remove residual dust and debris. Use a vacuum with a soft brush attachment followed by a damp cloth to wipe down the tiles. This step is crucial; residual dust could compromise the adhesion of new grout or tiles, leading to future problems. Pay particular attention to corners and tight joints, where debris tends to hide, potentially causing unevenness or bonding issues.
Avoiding Damage: Treat Tiles Like Glass
Remember, tiles are fragile—think of them as glass. Excessive force or dull tools can cause cracks or chips. During one project, I accidentally pressed too hard with a flat chisel, resulting in a small corner chip. Once you notice any cracking, pause and reassess your technique. Using a multi-tool with a fine-groove attachment provides better control and reduces risk. Always keep the blade moving smoothly along the grout line without applying excessive pressure.
Additional Tips for Success
Protect surrounding surfaces with painter’s tape and drop cloths to catch falling debris. Maintain a consistent pace; rushing increases the risk of damage. If grout removal is part of a larger renovation, consider reviewing professional flooring tips to ensure your base is primed for the next steps. Patience and precision are your best allies in this process, turning what seems like a difficult chore into a manageable task with results you’ll be proud of.
While many DIY enthusiasts and even professionals often follow standard procedures for flooring installation, there are subtle nuances that can make or break your project. A prevalent misconception is that all subfloors are suitable for hardwood or tile without additional preparation. In reality, overlooking the importance of proper *floor leveling* can lead to costly issues down the line. For instance, uneven surfaces might seem like minor flaws, but they can cause tiles to crack or hardwood floors to creak, drastically reducing longevity. For comprehensive guidance on achieving the perfect base, check out this detailed guide. Plus, many assume that installing on existing surfaces saves time, but this often introduces hidden problems. If the subfloor isn’t properly inspected and leveled, the entire installation is compromised. I’ve personally seen projects where neglecting this step resulted in uneven grout lines and unstable flooring, which could have been avoided with proper assessment. Keep in mind, different materials require different preparation techniques. For example, engineered wood is more sensitive to moisture and temperature changes, demanding meticulous subfloor conditions. A common trap is using generic leveling compounds without considering their compatibility with moisture barriers, leading to bond failures. Experts recommend selecting appropriate leveling products and following manufacturers’ instructions closely. Want to ensure your flooring fiber remains flawless? Consider learning about precise floor leveling methods. Additionally, misunderstandings about tile grouting can also cause issues; many believe that merely applying grout seals the deal, but improper cleaning and sealing afterward can result in staining and cracking. Applying high-quality sealers after installation and proper curing is essential for lasting results. Now, address your advanced questions:
What are the best practices for integrating different flooring materials to prevent temperature and expansion issues?
Advanced techniques involve installing expansion joints and using compatible underlayments to accommodate moisture and thermal shifts, preventing warping or buckling. For in-depth strategies, visit this expert resource. Don’t forget, addressing these nuances not only extends the life of your floors but also saves you money in repairs and replacements. Remember, the devil is in the details, especially when it comes to high-quality flooring projects. Are you aware of the hidden pitfalls in your current approach? Share your experiences or questions in the comments, and let’s ensure your next flooring project is truly professional-grade.When it comes to maintaining your floors, having the right tools and a solid routine can make all the difference in their longevity and appearance. I personally swear by a quality moisture meter, such as the Tramex MM-4, which allows me to regularly monitor subfloor moisture levels—crucial for preventing hardwood and tile from warping or buckling over time. Accurate moisture readings help you catch issues early before they escalate, saving you time and money. Equipment like an oscillating multi-tool with a rubberized, grout-specific blade is indispensable for periodic cleaning of grout lines, making future repairs or deep cleans much simpler. I prefer a multi-tool over traditional brushes because its precision reduces the risk of damaging surrounding tiles, especially as grout accumulates grime over the years.
For measuring floor flatness and ensuring proper leveling, I rely on a laser level combined with a long straightedge. This combo helps me spot high and low spots across large areas swiftly, enabling targeted fixes rather than broad, unnecessary work. To maintain hardwood floors, I recommend a microfiber mop paired with an eco-friendly pH-neutral cleaner—this combo preserves the finish and prevents dulling. Regular buffing with a soft cloth occasionally restores shine without aggressive waxing or polishing, which can build up over time and require stripping.
In terms of software, I utilize digital planning tools like RoomScan Pro for measuring rooms and Floorplanner for visualizing layouts before installing new flooring. These digital aids help anticipate issues related to expansion gaps, transitions, or material fit, particularly when scaling projects or revamping larger spaces. Looking ahead, I believe that automation and smart sensors will become more integrated into flooring maintenance—think moisture-sensing mats or app-controlled polishers that can notify you when attention is needed, greatly simplifying long-term care.
How do I keep my floors in top shape over time?
Consistent maintenance involves less than you might think—regular vacuuming to prevent grit buildup, prompt cleaning of spills, and periodic inspections for signs of moisture intrusion or surface wear. Additionally, addressing minor issues swiftly, like reapplying sealers or tightening loose tiles, prevents small problems from snowballing. For example, I recently used a dedicated grout pen to fill in small cracks before they expanded, which preserved the visual appeal and avoided costly replacements. The key is adopting a proactive mindset: think of your flooring as a living part of your home that needs periodic attention to remain beautiful and functional. To ensure your efforts are effective, I recommend reviewing precise floor leveling techniques periodically so you can address issues at the root instead of just covering them up.
Remember, the right tools combined with a consistent routine can greatly extend the life of your floors. I highly encourage you to try calibrating your moisture meter monthly or after significant weather changes to catch potential problems early. Proper maintenance not only keeps your floors looking pristine but also boosts their resale value and your peace of mind in the long run.
The Hardest Lesson I Learned About flooring installation,tile,floor leveling,hardwood floors
One pivotal realization was that rushing through prep—like neglecting proper subfloor assessment—can sabotage your project from the start. Taking the time to meticulously level and evaluate your base saved me headaches and repairs down the line.
3 Myths About flooring installation,tile,floor leveling,hardwood floors That Held Me Back
Early on, I believed that more adhesive meant better attachment, but in reality, too much can cause uneven tiles and long-term cracking. Also, I thought all subfloors were equal—when in truth, each needs tailored treatment to ensure durability.
What Experts Won’t Tell You About flooring installation,tile,floor leveling,hardwood floors
Few share the importance of controlling environmental conditions during installation; temperature and humidity play critical roles in adhesion and expansion. Ignoring these can lead to warping or grout failures, which I learned the hard way.
Curated Recommendations for Lasting Flooring Success
My essential toolkit includes a reliable laser level—like the Leica Disto, which helps achieve flawless flatness—and a moisture meter such as the Tramex MM-4, vital for preventing adhesion issues. For quality primers and leveling compounds, I trust products from LATICRETE and Mapei due to their proven performance and compatibility, ensuring my installations stand the test of time. Additionally, referring to comprehensive guides like this resource helps avoid pitfalls and guarantees professional results.
Your Turn to Elevate Your Flooring Game
Think beyond just laying tiles or hardwood—consider how thorough preparation and attention to detail can transform your space into a flawless, durable masterpiece. Every project is an opportunity to learn, refine your skills, and achieve something truly impressive. Don’t hesitate—start your next flooring adventure with confidence and let quality craftsmanship be your guide.