
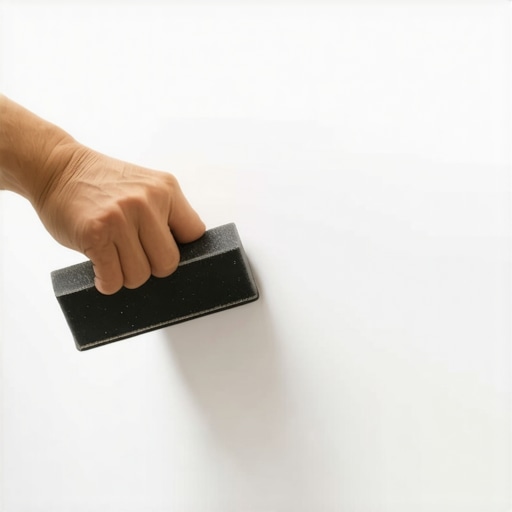
I vividly remember a project where I spent hours trying to get those pesky, uneven baseboard corners to look seamless. No matter how carefully I cut or how precisely I measured, there was always that one joint—the dreaded gap or bump—that refused to smooth out. It was frustrating, and I realized I was missing a crucial step in my finishing process. That lightbulb moment led me to discover a simple yet powerful technique that transformed my corner work: the Sanding Block Move.
Why Flawless Baseboard Corners Matter More Than You Think
When it comes to finishing a room, the devil is truly in the details. Crooked or uneven baseboard corners not only look unprofessional, but they can also diminish the overall aesthetic of your space. Whether you’re renovating a single room or doing a full home upgrade, polished corners can make or break the visual cohesion. And let’s be honest—nothing kills a beautiful floor or wall more than a mismatch at the edges.
This is where mastering the Sanding Block Move becomes a game-changer. It’s not just about aesthetics; it’s about confidence. Knowing that I can seamlessly blend those corners without hours of patching or repainting gave me a sense of pride in my craftsmanship. Plus, the technique is surprisingly easy once you understand the mechanics behind it.
Are You Still Struggling with Corner Imperfections?
If you’re nodding along, thinking about your last project filled with tiny imperfections that you couldn’t quite fix, you’re not alone. Many DIY enthusiasts and even seasoned pros overlook this small step, unintentionally compounding their frustration. Early on, I made the mistake of skipping a proper sanding technique, which resulted in rough edges and visible seams that only worsened over time. Trust me, I’ve been there, and I learned the hard way that mastering this move saves time and rework down the line.
Once I implemented the Sanding Block Move, my corners looked flawless—smooth, clean, and almost professional-grade. That’s why I’m excited to guide you through this simple process, so you can achieve the same impeccable results.
In the following sections, we’ll dive into the step-by-step technique to perfect your corners, making sure your finished project exudes quality and attention to detail. Ready to take your baseboard installation to the next level? Let’s get started!
How to Execute the Perfect Sanding Block Move
In my first attempt at perfecting baseboard corners, I approached the task like a sculptor chiseling marble—carefully and with precision. I took a small sanding block, roughly the size of a deck of cards, and gently worked it over the joint, moving in small circular motions. My goal was to blend the seams seamlessly, much like how a painter blends colors for a smooth gradient. The key is to apply consistent pressure—too hard and you’ll flatten the joint; too light and it won’t make a difference. I focused on keeping the sanding motion flat across the corner, maintaining even contact everywhere, like running a rolling pin over dough. This approach helps level out uneven edges and buff away any excess filler or misaligned drywall compound, revealing a smooth transition.
Use the Right Grit for Smooth Results
Initially, I started with a coarse grit (around 80) to knock down high spots, but it often left scratches that needed more work. Remember, coarse grit is like using a hammer—fast but rough. I switched to a finer grit (around 220) for the final pass, which polished the joint without damaging the surrounding paint or drywall. Think of it as polishing a gemstone—start rough, then steadily refine with finer abrasives. Always keep the sanding block moving, avoiding staying in one spot too long to prevent gouges or uneven surfaces.
Apply Consistent, Gentle Pressure
One mistake many DIYers make is pressing too hard, which can push filler into the joint or create dips. Instead, I used gentle, consistent pressure, like softly petting a cat—firm enough to feel the motion but not aggressive. This technique ensures I sand down imperfections evenly and avoid creating new flaws. As I worked, I periodically checked the joint by stepping back or running my finger lightly over the area—feeling for smoothness, much like testing a surface for levelness before painting.
Practice on Scrap Before Your Actual Corner
Before tackling my living room corners, I practiced on a scrap piece of drywall. This micro-story helped me refine the motion and pressure, much like seasoning a new recipe. I discovered that gentle, circular buffing with a fine grit yielded the best results. When I finally applied this technique to my actual project, the corners looked almost untouched—an achievement I attributed to that initial practice session. If you’re unsure, repeatedly practicing ensures you get a sense of how much pressure and motion yield the desired smoothness.
Seal and Finish for Lasting Perfection
After sanding, I wiped away any dust with a damp cloth, ensuring a clean surface for primer or paint. A smooth joint not only looks better but also adheres more effectively to finishes, preventing future cracks or chips. This step is critical to maintaining the quality of your work—think of it as the final polish on a handcrafted piece of furniture. For added durability, consider applying a primer that can fill minor imperfections before painting or installing your baseboards.
Remember, the goal isn’t to sand everything away but to achieve a seamless transition—much like blending two paint colors into one. When done correctly, your corners merge effortlessly, elevating the entire finish of your space. The more you practice this technique, the more instinctive it becomes, transforming what once seemed an intricate task into a straightforward, satisfying step in your DIY arsenal.
Many homeowners and installers believe that laying hardwood floors or tiles is straightforward—simply measure, cut, and install. However, beneath this simplicity lie misconceptions that can compromise your project’s integrity. A prevalent myth is that “more adhesive always makes for a better bond,” but in reality, using excessive adhesive can lead to uneven surfaces and future de-lamination issues. Proper surface preparation and understanding the specific bonding requirements are crucial; for instance, the type of subfloor and moisture levels significantly influence adhesion quality.
How Do Subfloor Conditions Trick Even Experts?
Recognizing the nuances of subfloor conditions is vital. Often, installers underestimate the impact of minor irregularities or moisture variations. For example, a slight slope or high moisture content can cause uneven flooring or tile cracks over time, something that advanced installers prevent by using precise floor leveling techniques instead of relying solely on quick fixes. According to professional flooring specialists, neglecting these subtleties can lead to costly repairs down the line. It’s essential to consult comprehensive guides like Mastering Floor Leveling Secrets to understand the nuances involved. Additionally, a common misconception is that ceramic or porcelain tiles can be installed directly over uneven surfaces. This is false; proper floor leveling is critical for durability and aesthetic appeal. Skipping this step often results in cracked tiles and uneven grout lines, which detract from the overall look—and the longevity—of your floor. When choosing your tile or hardwood, consider complementary styles; for example, pairing large-format tiles with hardwood can create a modern, seamless transition—see this guide for inspiration. Don’t forget, natural materials also require proper care and maintenance to maintain their appearance and structural integrity. A well-leveled, properly adhered floor not only looks great but also prevents common issues like squeaks, cracks, or warping. Remember, the devil is in the details, and understanding these hidden nuances sets apart a professional installation from a rookie mishap. Now, have you ever fallen into this trap? Let me know in the comments.
Maintaining Your Flooring Investment with the Right Tools
To ensure your hardwood floors, tiles, and installed surfaces remain pristine over time, investing in quality tools is paramount. I personally rely on a professional-grade floor sander with variable grit pads, which allows me to perform periodic refinishing without the need for full replacement. A detailed orbital sander equipped with dust collection is a game-changer, preventing debris buildup and maintaining a cleaner workspace—crucial for delicate tile grouts or hardwood finishes. For cleaning, a microfiber mop paired with pH-neutral cleaner preserves the finish without abrasion, extending the longevity of your flooring. When it comes to leveling and fixing imperfections, a laser level becomes indispensable; it helps identify high or low spots, guiding you to achieve flawlessly even surfaces as highlighted in Mastering Floor Leveling Secrets. Additionally, a quality putty knife and small hand sander aid in patching minor cracks or imperfections, ensuring your flooring maintains its integrity and visual appeal.
How do I maintain hardwood flooring over time?
Regular maintenance is key to preserving your investment. I recommend establishing a routine of gentle cleaning with a soft microfiber mop and avoiding harsh chemicals that can dull the finish. Periodic refinishing, using fine-grit sandpaper, can restore a lustrous sheen and remove superficial scratches, as advised by Hardwood Floor Care Secrets. It’s also wise to control indoor humidity levels, preventing wood from expanding or contracting excessively, which can cause gaps or buckling. Installing protective pads on furniture legs and using area rugs in high-traffic zones minimizes wear and tear, extending the lifespan of your floors and tiles alike. For tile surfaces, sealing grout lines periodically prevents staining and cracking, maintaining a fresh, clean look for years to come. Upgrading your cleaning regimen to include a steam mop designed for sealed surfaces can also help remove deep-seated dirt, keeping your tiles looking their best without damaging the grout or surface materials.
Thinking about scaling your flooring projects?
Scaling up your flooring or tile installations necessitates reliable equipment. A professional slab honer and advanced leveling compounds ensure large commercial spaces are perfectly uniform, reducing the risk of cracking or uneven wear. As you plan larger projects, integrating software like FloorPlanExpert can assist in precise measurements and material estimation, helping you avoid waste and budget overruns. Remember, the quality of your tools directly impacts the durability and beauty of your finished project, so investing in reputable brands and maintaining them properly pays off in the long run. For a comprehensive guide on achieving seamless, long-lasting results in larger projects, consider reviewing Precise Floor Leveling Techniques. Don’t hesitate—try out a high-quality orbital sander today and see how it can revolutionize your maintenance routine, making future refinishing effortless and more effective.
Lessons Only the Pros Learn About Perfect Flooring Joints
One of the most surprising insights I gained was how crucial patience is during the sanding process. Rushing through the Sanding Block Move often leads to uneven surfaces, undoing all the previous meticulous work. Taking my time and applying consistent, gentle pressure allowed me to seamlessly blend joints, making me realize that slow, deliberate movements yield professional results. Additionally, I discovered that every subtle imperfection tells a story—whether it’s a slight dip or a tiny gap—each has a solution if you approach it with an open mind and the right tools. These lessons have taught me that mastery in flooring isn’t about perfection on the first try but about refining each detail patiently.
My Go-To Resources for Elevating Flooring Skills
Over the years, I’ve relied on a handful of trusted guides and tools that have truly transformed my approach. The guide Mastering Floor Leveling Secrets is my top resource, offering detailed techniques for ensuring surfaces are flawless before installation—something I wish I knew earlier. I also swear by a high-quality orbital sander with dust collection; it makes quick work of finishing and dust management, essential for a pristine look. For expert advice, this resource on tile and hardwood combinations has helped me craft cohesive, stylish spaces. Lastly, regular maintenance tips from Hardwood Floor Care Secrets keep my floors looking stunning over time.
Embrace the Journey: Your Next Floor Awaits
The world of hardwood and tile flooring holds endless possibilities, and every project is a chance to learn and grow. Remember, each carefully sanded corner and perfectly leveled surface adds not just to your space but also to your confidence as a DIYer or professional. Don’t shy away from experimenting with techniques, tools, and design ideas—whether you’re aiming for a rustic charm or a sleek modern look. Every step you take toward mastering these details brings you closer to creating breathtaking spaces that you’ll be proud of for years to come. So go ahead, pick up that sander, measure twice, and start transforming your home today! Your beautiful floors are just a few thoughtful steps away.