
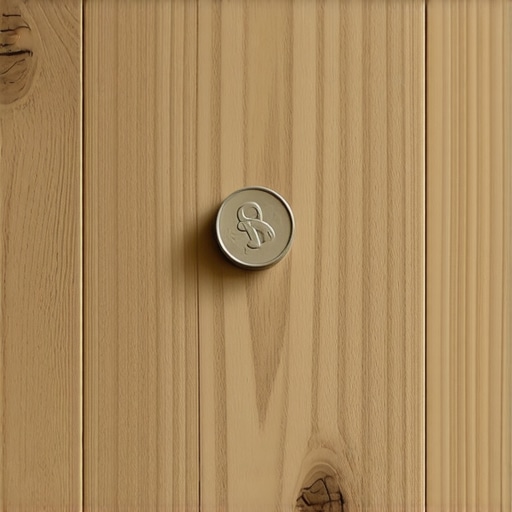
It was a morning like any other, but as I stepped onto my freshly installed hardwood floor, a strange feeling of unease washed over me. A slight bounce here, a subtle slope there—tiny imperfections that bugged me more than I expected. That moment of discomfort turned into a lightbulb moment when I realized I’d overlooked a simple yet crucial step during my installation: the coin slide test. If you’ve ever faced similar anxieties about uneven floors, you’re not alone. Today, we’re diving into a trusted technique that helped me spot and fix those sneaky seams before they become a costly nightmare.
Why the Coin Slide Test Matters More Than You Think
As a homeowner and DIY enthusiast, I learned the hard way that a seamless floor isn’t just about aesthetics—it’s about the longevity and safety of your entire space. Small dips and rises in the subfloor can cause tiles to crack, hardwood planks to squeak, and finishes to wear unevenly over time. It wasn’t until I failed to check with the coin slide test that I experienced unexpected gaps and a wobbly feel underfoot. That mistake made me realize how critical it is to verify the flatness of your subfloor before moving on to the final layers. According to industry experts, subfloor imperfections are a leading cause of flooring failures, and proper detection is key to avoiding unnecessary repair costs (source). So, if you want a durable, flawless finish, mastering this simple test is non-negotiable. Have you ever encountered those frustrating seams that just won’t stay level? If so, you’re in the right place. In the next sections, I’ll show you exactly how I learned to identify and address uneven seams early on, saving time, money, and headaches. Ready to turn your floor from good to perfect? Let’s get started.
Conduct the Coin Slide Test Step by Step
Begin by choosing a standard coin, such as a quarter or a similar-sized coin, to ensure consistent results. Clear the area of debris and dust to prevent interference with the test. Place the coin flat on the subfloor in different locations, especially over joints, seams, or uneven spots you suspect might be problematic. Gently push or slide the coin with your finger, applying slight pressure, to see if it moves or gets stuck. If it slides smoothly across the surface, that section is likely even. If it catches or resists, mark that spot for further inspection. During my personal project, I used a quarter and carefully tested multiple sections of my subfloor, discovering a few hidden dips behind a low-hanging cabinet that I hadn’t noticed visually. Addressing these early prevented future squeaks and seam gaps.
Tip: Use a Visual Marker
Keep a marker or tape nearby to mark areas where the coin doesn’t slide well. This allows you to systematically identify and prioritize spots for repair, saving time during the leveling process. Remember, the coin slide test isn’t just about catching large dips; even small imperfections can cause uneven wear and squeaks over time. Testing systematically ensures every inch of your subfloor passes the flatness check.
Address Found Imperfections Correctly
Once you identify uneven spots, elevate or sand down high points carefully, or fill dips with suitable leveling compounds. For minor dips, a quick application of self-leveling underlayment can smooth out imperfections efficiently. For larger dips, you might need to remove and replace sections of subfloor or add plywood shims to create a uniform surface. My experience taught me that rushing this step results in later issues, such as cracked tiles or squeaks, which are a nightmare to fix. Always double-check your work by running the coin slide test again after making adjustments. For detailed instructions on leveling your entire floor accurately, consult our comprehensive guide.
Use the Right Tools and Materials
Equip yourself with a high-quality self-leveling compound, a trowel, and a straightedge or level. For precision, a laser level or chalk line can help you visualize the overall flatness before starting spot repairs. Remember, the goal isn’t just to pass the coin test in isolated spots but to achieve a uniformly flat surface across your entire subfloor. Applying the right amount of leveling compound is crucial; too little won’t fill dips effectively, too much can cause another uneven surface. During my project, I repeatedly tested as I worked, confirming each section was within acceptable tolerances, thus ensuring a seamless installation process. For more expert tips on achieving perfect subfloor preparation, see our leveling guide.
Verify and Re-Test Before Installation
After making adjustments, re-run the coin slide test across all test points to verify improvements. Take your time here: rushing can leave unseen imperfections that surface later as squeaks or cracks. If some spots still resist smooth sliding, address them again before proceeding. It’s better to spend an extra hour now than to face costly repairs down the line. I found this approach saved me both time and money, ensuring my hardwood planks laid evenly and without squeaks, providing peace of mind for years to come. Remember, a well-leveled subfloor is the foundation of a durable, flawless flooring finish. For a complete walkthrough of floor leveling techniques, visit our Floor Leveling Challenges article.Many homeowners believe that choosing beautiful hardwood or tile is enough to ensure a perfect floor, but the real secret lies beneath the surface. A common misconception is that leveling a subfloor is a straightforward step, yet overlooked nuances can lead to costly repairs down the line. For example, some assume that a simple sweep and visual inspection suffice, but subtle dips and high spots often evade the naked eye, causing uneven wear and squeaks over time. My experience confirms that mastering advanced floor leveling techniques, like the precise use of self-leveling compounds and understanding substrate compatibility, can save you headaches.
Why do many get the subfloor prep wrong despite following basic steps?
It turns out that many underestimate the importance of moisture barriers, proper screw patterns, and the sequence of leveling application. Industry experts suggest that failure to account for humidity fluctuations or to follow optimal screw placement can induce flexing and unevenness, which compromises the entire installation (source). Moreover, the belief that a quick fix like over-application of leveling compounds will mask underlying issues is a dangerous trap; comprehensive checks and adherence to professional guidelines are essential. For advanced strategies on achieving a truly flat and durable subfloor, it’s worth exploring detailed techniques available through our floor leveling guide.
Keep Your Floor in Top Shape with the Right Tools
Ensuring your hardwood or tile flooring remains pristine over time requires more than just occasional cleaning; it demands the right set of specialized tools. I personally swear by a high-quality moisture meter, such as the Protimeter Surveymaster, to regularly check subfloor conditions, especially if you live in areas prone to humidity fluctuations. This device provides instant readings on moisture content, helping prevent warping and buckling before they become visible. Moisture barriers are another critical component in flooring longevity, creating an effective shield against water vapor that can deteriorate adhesives and adhesives.
For cleaning, I prefer a microfiber mop combined with pH-neutral cleaners designed for wood or tile, which preserves finishes without stripping protective coatings. To tackle stubborn grout haze or surface stains, a professional-grade, soft-bristled grout brush combined with a gentle chemical cleaner makes a noticeable difference without damaging the surface. Trust me, investing in the right equipment saves you hours of frustration and keeps your floor looking new for years.
Embracing Technology to Maintain and Scale
Automation and smart devices are revolutionizing floor maintenance. Smart moisture sensors connected to your home system can provide real-time alerts if humidity rises beyond ideal levels. Similarly, robotic vacuum cleaners with gentle, hardwood-safe brushes ensure daily debris removal without damaging delicate finishes. As technology advances, I predict a trend towards integrated systems that monitor, clean, and even perform minor repairs autonomously—making flooring upkeep more effortless than ever.
How do I maintain my flooring system over time?
Consistent maintenance involves regular cleaning, moisture checking, and prompt repairs. Scheduling annual professional inspections can help identify issues early. Additionally, applying protective coats like polyurethane periodically can restore gloss and add an extra layer of defense against wear and tear. Properly using edge protectors during moving or furniture placement also minimizes scratches and dents.
Long-Term Results Require a Proactive Approach
Whenever I complete my flooring projects, I emphasize preventative measures. For example, installing expansion joints correctly and sealing seams prevents unwanted movement and moisture intrusion, which can cause long-term damage. Using quality sealants and finishes designed for your specific flooring material ensures durability. Remember, the key to long-term success isn’t just initial installation but diligent, ongoing care.
Scaling Up: From DIY to Professional Maintenance
If your project has grown in size or complexity, consider professional-grade systems for floor leveling and surface sealing. Equipment like high-powered floor sanders and industrial-grade epoxy sealers can handle larger areas efficiently, ensuring consistent quality. But even in larger projects, basic tips like re-running the coin slide test after repairs can save significant headaches later. Whether scaling up or maintaining your existing floors, investing in proper tools and knowledge pays dividends in longevity and appearance.
Unearthing Hidden Truths About Floor Leveling
One of the most eye-opening lessons I learned was that even a seemingly perfect floor can harbor unseen imperfections. Using the coin slide test revealed dips and high spots I had overlooked, emphasizing that visual inspections aren’t enough. It taught me that attention to detail, combined with simple tools, can save significant time and money down the line. This experience reinforced that proactive detection—before the finishing touches—builds a foundation for durability and beauty.
Tools and Resources That Transformed My Approach
Trustworthy tools like a laser level and a high-quality moisture meter, such as the Protimeter Surveymaster, became game-changers. They provided precision and early warnings about potential issues, guiding me through complex repairs with confidence. Additionally, the comprehensive guides on floor leveling from trusted sources helped me understand nuances that textbooks often overlook. Investing in such resources elevates your skills from DIY hobbyist to home contractor.
The Power of Consistency and Patience
Taking the time to re-test after each adjustment might seem tedious, but it’s vital. Rushing through the process risks leaving imperfections that manifest as squeaks or cracks later. My lightbulb moment was realizing that diligent rechecking ensures every section meets standards, turning an average project into a professional-quality finish. Remember, patience and meticulousness in these initial steps set the stage for the ultimate aesthetic and longevity of your floor.
Next Steps in Your Flooring Journey
If you’re serious about achieving flawless hardwood or tile surfaces, don’t stop at the coin test. Explore advanced leveling techniques and always verify your work with systematic inspections. Consider visiting our design innovations for inspiration on elevating your space, and keep learning about the subtle art of surface preparation. The key is ongoing education—each project refines your expertise and confidence.
Your Turn to Shape Your Space
Embracing a thorough, detail-oriented approach to floor leveling transforms not just your home, but your mindset towards craftsmanship. Have you tried the coin slide test yourself? What unexpected challenges have you encountered when preparing your floors? Share your experiences below—your insights could inspire someone else to take that next step toward perfection!