
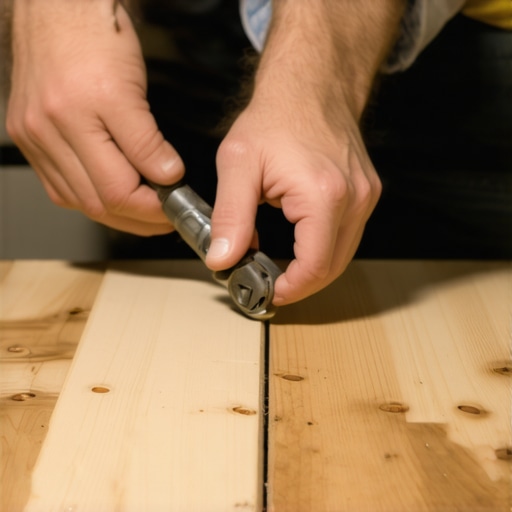
Ever spent hours installing new flooring only to find stubborn gaps appearing after a few days? I remember my first hardwood installation; I was so proud—until I noticed those tiny not-so-tiny gaps between planks. At first, I thought it was just a settling issue, but as the gaps persisted and even widened, frustration set in. That’s when I stumbled upon what I now call the ‘Double-Bump’ Technique, a simple yet effective method that transformed my approach and saved me from future headaches.
Tackling the Gap Puzzle Before It Gets Worse
The truth is, gaps in flooring are more than just an aesthetic concern—they can lead to damage, quality loss, and even safety hazards. Especially in areas with fluctuating humidity or temperature changes, floors tend to shift, swell, or contract, creating those unwanted spaces. I learned early on that merely pushing the planks together or trying to fill gaps later isn’t enough. Instead, addressing the root cause with a targeted technique can make all the difference.
Is the Double-Bump Technique Actually Worth the Hype?
Initially, I was skeptical. Like many DIYers, I made the mistake of rushing into gap filling without understanding the mechanics. I assumed that if I hammered the boards tighter, the gaps would close. Spoiler: that only made things worse, causing splits or uneven flooring. It wasn’t until I read about the importance of proper flooring tensioning—found in detailed guides like this comprehensive floor leveling guide—that I realized my mistake.
The Double-Bump Technique involves carefully creating controlled ‘bumps’ or compression points during installation, which compensates for natural expansion and contraction. It’s a small adjustment during laying that prevents gaps from appearing or worsening over time.
Would you like to discover how this method can work on your project? If you’ve faced stubborn gaps that just won’t go away or keep coming back, then keep reading. This technique has helped countless homeowners and professionals achieve a seamless, long-lasting surface—without the need for constant repairs or misleading gap fillers. Getting your flooring level and gap-free might just be easier than you think.
Let’s dive into the #1 trick that guarantees a tight fit, every time. Steady your tools, and prepare for some proven strategies to elevate your flooring game.
Prepare Your Tools and Surface Carefully
Before applying the double-bump method, gather your necessary tools: a rubber mallet, tapping block, spacers, tape measure, and floor-leveling compound if needed. Ensure your subfloor is clean, dry, and free of debris, cracks, or previous adhesive residues. I once overlooked this step and faced uneven bumpy areas after installation, which took extra effort to fix. Proper surface prep is the foundation for a smooth finish.
Create a Precise Starting Line
Use a chalk line or laser level to mark a straight, square starting line. This guides your plank placement, preventing crooked rows that can complicate bump adjustments later. When I installed my first hardwood floor, skipping this step led to misaligned planks, creating gaps that persisted even after adjustments. Becoming meticulous at this stage up front saves headaches later.
Install the First Row with Control and Care
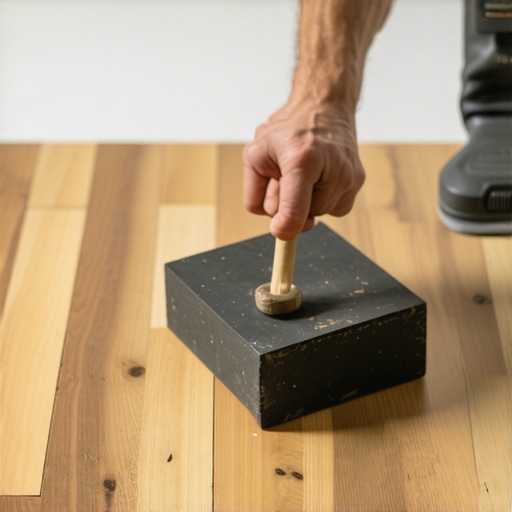
Lay your first row of planks, spacing them with spacers to maintain expansion gaps—typically ¼ inch. Tap each plank into position using the tapping block, ensuring tight but not overly forced connections. I remember gently tapping a stubborn plank into place, noticing a slight bump; I used that as a reference point for future rows. This initial effort sets the tone for the entire floor’s levelness.
Implement the Double-Bump Technique During Rows
As you proceed with subsequent rows, periodically insert a small wedge or shim at the end of each row before tapping. This creates a controlled compression point, allowing the planks to settle into a tight fit. When I laid my second row, I placed a wedge to exert gentle pressure, which helped eliminate gaps and ensured consistent tension. The key here is controlled force—avoid overtightening, which can cause splits.
Fine-Tune with Tapping and Checking
After every few rows, measure the elevation at multiple points with a level or straightedge. If you notice a dip or rise, insert shims or adjust the tapping pressure accordingly. I found that small, incremental corrections—like a gentle tap—made a huge difference in achieving a flat surface. Regular checks prevent compounding errors and keep the flow even.
Address Expansion and Contraction
Leave appropriate gaps at walls and thresholds. For large rooms, apply the expansion joints rules mentioned in this guide to accommodate seasonal shifts. During my install, I overlooked this and later saw boards widen gaps with temperature changes. Incorporating expansion space is crucial for long-term stability.
Finish the Edges and Transitions
Once the main area is installed, remove the shims, and install molding or thresholds to conceal expansion gaps. Use a punch hammer to secure them snugly without stressing the flooring. When I installed my baseboards, I left some wiggle room in the nails to avoid warping the planks over time. Proper finishing enhances both the appearance and durability of your floor.
 Many homeowners believe that laying a floor is simply about selecting the right material and following basic steps. However, this oversimplification can lead to costly mistakes, especially when it comes to ensuring durability and a seamless finish. For example, a widespread myth is that hardwood and tile installation are interchangeable processes; in reality, each requires specific preparation and techniques to account for nuances like subfloor conditions and material expansion. Overlooking these details often results in issues like buckling, cracking, or persistent gaps, which are not just aesthetic problems but can compromise the integrity of your entire flooring system.
One crucial aspect that many skip is proper subfloor assessment. A common mistake is assuming that a concrete slab is perfectly flat when, in fact, minor ridges can lead to uneven tile surfaces or cracked grout lines over time. Experts emphasize the importance of detailed floor leveling, as discussed in this comprehensive guide. Failing to address subfloor imperfections can cause tiles to pop or crack, and hardwood floors to develop squeaks, especially when subjected to seasonal temperature variations.
A lesser-known nuance involves understanding the material’s response to environmental factors. For instance, many assume that once installed, flooring remains stable. However, hardwood and tile are sensitive to humidity and temperature changes. Hardwood, particularly engineered variants, can expand or contract, leading to gaps or buckling if proper expansion joints and acclimation procedures are ignored. In the case of tile, inadequate substrate preparation or insufficient grout joint flexibility can cause cracking during temperature swings.
Have you ever fallen into this trap? Let me know in the comments.
Why do most people underestimate the importance of moisture barriers?
Many think that moisture barriers are optional, especially in above-grade installations. This misconception is dangerous because moisture migrating from subfloors can cause severe damage to hardwood and tile, including warping, mold growth, and adhesive failure. Experts recommend always installing a quality vapor barrier—like polyethylene sheets—when dealing with concrete slabs or wood subfloors. This practice is backed by studies in flooring science demonstrating that moisture management is fundamental to longevity (see this research). Neglecting moisture issues may not produce immediate problems but can significantly shorten your floor’s lifespan and lead to costly repairs.
Understanding these nuances and debunking common myths can save you time, money, and frustration. Don’t settle for surface-level work; dive into the details like a seasoned pro. For more advanced tips on achieving flawless finishes, check out mastering floor leveling secrets. Are your projects falling flat? Re-evaluate the fundamentals and consider whether overlooked details might be behind your issues.
Keep Your Floors in Peak Condition with the Right Tools and Routine Maintenance
Investing in quality tools isn’t just about making installation easier—it’s about ensuring your flooring remains durable and beautiful over time. For instance, I always rely on a high-precision laminate moisture meter, such as the Protimeter MMS2, to regularly check subfloor conditions before any repair or new installation. This device provides instant readings, helping me spot hidden moisture issues that could lead to warping or mold if overlooked.
Another indispensable tool is a professional-grade pressure-adjustable floor sander. Unlike rental models, my favorite sander features variable speeds and customized abrasive pads, allowing me to meticulously remove old finishes or smooth out minor surface imperfections without damaging the underlying wood. Proper sanding not only restores the floor’s appearance but also prolongs its lifespan for years to come.
When maintaining tile surfaces, I recommend investing in a quality steam cleaner. I prefer models with adjustable steam levels, as they effectively dissolve dirt and grime from grout lines without harsh chemicals. Regular cleaning with such equipment prevents buildup that can cause discoloration or deterioration, especially in high-traffic areas.
Looking ahead, technological advancements are making tools smarter and more efficient. For example, laser-guided nailers now ensure precision nail placement, reducing damage and improving finish quality. Additionally, software like FloorPlan 3D helps visualize and plan interior layouts, predicting how flooring choices will look and perform in real-world conditions. Staying current with these tools can significantly streamline your projects.
How do I maintain my flooring’s integrity over time?
Routine inspections and proactive repairs are key. Regularly check for signs of moisture intrusion, loose boards, or grout cracking. Applying protective finishes, like a high-quality polyurethane, shields your hardwood from scratches and spills, extending its life. For tile floors, sealing grout lines annually prevents staining and deterioration. Consistent cleaning, avoiding excess water, and promptly addressing any signs of damage will keep your floors looking pristine for decades. Remember, proper maintenance is vital—learn more about professional tips at this expert guide. Try implementing a scheduled maintenance check once every quarter, incorporating some of the advanced tools mentioned, and you’ll notice your flooring remaining in top shape effortlessly.
Lessons That Changed My Flooring Game
One of the toughest realizations I had was that rushing the subfloor assessment can lead to a cascade of problems later, from uneven surfaces to cracks. I once skipped detailed moisture testing, only to see my hardwood swell during summer; now I swear by never skipping this vital step. Another lightbulb moment was understanding how seasonal humidity swings influence expansion gaps—knowing this transformed my approach from reactive to proactive. The most invaluable lesson? The art of precise control during installation, especially with the double-bump technique, which prevents gaps before they even form. These insights weren’t just tips—they reshaped my entire philosophy about flooring, making every project a confidently executed masterpiece.
My Go-To Tools and Books for Flooring Success
Over the years, I’ve built a toolkit that’s become my trusted sidekick. First, a high-accuracy moisture meter like the Protimeter MMS2 helps me catch hidden water issues before they sabotage my work—a non-negotiable for peace of mind. I also rely on a premium adjustable floor sander for refinishing and smoothing out imperfections, which saves time and enhances durability. When it comes to references, this comprehensive guide changed how I approach leveling, revealing nuances I’d overlooked. Books like “Hardwood Floor Mastery” by Joe B. have deepened my understanding of material responses. Lastly, seeking expert advice from industry seminars or online courses keeps me updated on innovative techniques—learning is a continuous journey in flooring achievement.
Your Step Toward Flawless Floors
Every excellent floor starts with a decision—are you ready to elevate your skills and approach? Remember, mastering your flooring project is about paying attention to the tiny details—like surface prep, controlling humidity, and controlled tension. Don’t let common pitfalls like neglecting expansion gaps or underestimating moisture control hold you back. The journey toward perfection may seem challenging now, but with the right knowledge, tools, and mindset, you can transform your space into something truly remarkable. Take action today—your future self will thank you for the floors that last and impress. What’s the first step you’ll take to improve your flooring technique? Let me know below.