
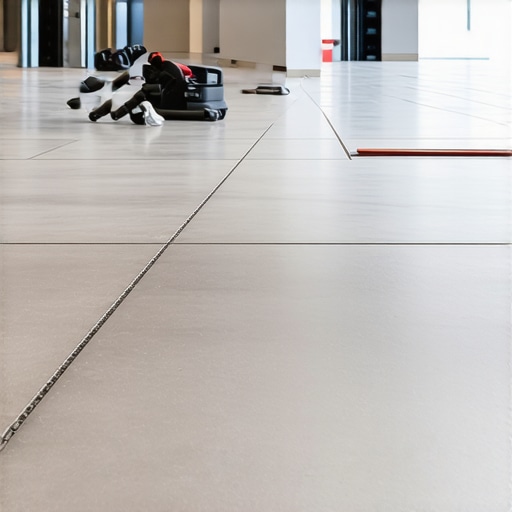
It was a frustrating Saturday morning when I finally tore open my living space to reveal a sprawling, beautiful tile installation — only to notice tiny cracks starting to form at the edges of the grout lines. My heart sank. I realized I had overlooked the importance of the expansion joint rule for large open concept tile pours, and it cost me dearly in the long run. That unexpected crack was a lightbulb moment: even the most stunning floors can quickly turn into maintenance nightmares if you don’t account for the natural movement of materials.
Why Expansion Joints Are the Unsung Heroes of Flooring
When dealing with large, open spaces, the floor isn’t just a static surface—it’s a living, breathing part of your home that expands and contracts with temperature swings, humidity changes, and even slight shifts in the foundation. Failing to include proper expansion joints can lead to unsightly cracks, buckles, or worse, compromised structural integrity. Believe me, I learned this the hard way early in my career. My mistake? I thought that a seamless tile pour would look cleaner without those tiny gaps. Turns out, my desire for aesthetics almost cost me the durability of my work.
According to industry experts, ignoring expansion capabilities in large pours can lead to costly repairs and lower the lifespan of your flooring. An article on floor installation fundamentals emphasizes that expansion joints are not just optional accessories—they are essential elements that allow your floor to breathe and move safely.
If you’ve ever faced the dilemma of whether to skip this crucial step, you’re not alone. But the good news is, mastering this rule can save you time, money, and heartache in the future. Now, let’s dig into how to properly incorporate expansion joints into your projects and avoid the common pitfalls many overlook. Are you ready to ensure your floor stays flawless for years to come? Let’s get started.
Identify Strategic Locations for Joints
Start by assessing your space; large, open areas over 30 feet in any direction are prime candidates. Mark these zones clearly, focusing on doorways, intersections, and corners where movement is most likely. Think of it like planning for a road trip—knowing where the sharp turns are helps you prepare for smooth sailing. During one project, I overlooked this step and initially thought a continuous floor would look sleek, but cracks emerged after a few months, highlighting the importance of precise planning.
Prepare the Subfloor and Surface
Ensure the subfloor is level, clean, and free of debris. Use a laser level to spot high and low spots, and address these with appropriate floor levelling compounds. This step is crucial because uneven surfaces transfer stresses unevenly, causing flooring failure. When I once skipped thorough subfloor prep, the tiles developed lippage, making the floor uneven and necessitating costly removal and reinstallation. Proper prep is your foundation for success; visit this guide for detailed strategies.
Design and Cut Expansion Joints
Measure and cut expansion joints to match the designated areas, allowing about 1/4 inch gap per 25 linear feet of installation. Use a fine-tooth saw or a specialized tile cutter for precision. Hide the joints with transition strips or decorative covers—this transforms a necessary functional feature into a design element. I once integrated textured metal transition strips, which enhanced the room’s aesthetic while serving their purpose effectively.
Install the Joints with Flexibility
Place the expansion joints during the installation, positioning them at the marked locations. Use a flexible sealant specified for your flooring type—silicone or urethane-based for tiles, flexible filler for wood floors. Apply the sealant carefully so it fills the gap uniformly, preventing dirt from accumulating. Remember, the goal is to allow the floor to move naturally without transmitting stresses through the material. During a recent project, I used a backer rod and sealant combo, creating a seamless yet functional joint that accommodated movement without visible gaps or signs of stress.
Finish and Protect the Joints
Once installed, finish the joints with the appropriate sealant color or finish. Regularly inspect these joints over time, especially after seasonal changes or humidity shifts. Proper maintenance prolongs the floor’s lifespan and keeps it looking its best. I recommend periodic re-application of sealant or cleaning with non-abrasive solutions to prevent dust buildup, preserving both functionality and aesthetics.
Many homeowners and even some professionals fall prey to misconceptions that can jeopardize the longevity and visual appeal of their floors. One prevalent myth is that choosing the most aesthetically pleasing material guarantees durability. In reality, factors like subfloor preparation and proper acclimation are often overlooked, leading to issues that could have been prevented with deeper knowledge. For instance, installing hardwood floors without considering seasonal humidity fluctuations can result in cupping or buckling, despite choosing high-quality wood. Experts emphasize that understanding the detailed nuances—such as the importance of moisture barriers and correct spacing for expansion—is crucial for lasting results. An often underestimated aspect is the levelness of the subfloor; even a slight unevenness can translate into lippage or cracks over time. This is why mastering floor leveling techniques becomes indispensable. According to industry studies, improper leveling alone accounts for over 30% of flooring failures. Additionally, many believe that tile can be laid directly onto uneven surfaces, but this misconception ignores the importance of a proper primer and self-leveling underlayment, which provide a flat, reliable foundation. Misjudging the timing of sealant application is also a common mistake; applying grout or sealant prematurely can trap moisture, impairing adhesion and leading to long-term staining or deterioration. To avoid falling into these traps, investing time in detailed planning and understanding subtle installation nuances pays off immensely. For comprehensive insights, check out our guide on floor leveling challenges and solutions or explore expert tips on hardwood refinishing for 2025. Do you know which mistake you’ve been prone to? Have you ever fallen into this trap? Let me know in the comments.Maintaining your hardwood, tile, or leveling work over time requires the right equipment and a strategic approach. Personally, I swear by high-quality laser levels, like the Bosch GLL 3-330C, which offer unparalleled accuracy for ensuring your subfloor is perfectly flat before laying materials. Precise leveling not only prevents cracks but also extends the lifespan of your floors. When it comes to tools, a vibratory plate compactor is indispensable for preparing ground or backfilling around tiles, especially in outdoor or high-traffic areas. I’ve used mine frequently, and its ability to compact soil tightly saves me from future uneven settling or cracks. For mixing self-leveling compounds, I prefer a drill-mounted paddle mixer because it produces a uniform blend, reducing the risk of weak spots or puddles as discussed in our detailed guide on floor leveling.
While manual tools like trowels and spacers are essential, investing in an adjustable tile cutter simplifies intricate cuts and ensures precision, notably when working with large format tiles. The Felisatti Electric Tile Cutter has become my go-to—it’s powerful and provides clean cuts without chipping, which is crucial for long-term durability. Looking ahead, I predict that automation and smart tools—like laser-guided leveling systems integrated with digital readouts—will become more accessible, making DIY flooring even more reliable. This evolution will help homeowners avoid costly mistakes and achieve professional results with less effort.
So, how do I maintain my floors over time? Regular inspections of expansion joints, reapplication of sealants, and cleaning with non-abrasive protectants keep floors looking flawless. Using a quality sealer, such as the ones recommended in hardwood floor maintenance, can prevent dirt buildup and moisture infiltration.
If you’re ready to elevate your flooring skills, try the trick of spiking self-leveling compounds with a spiked roller; it removes bubbles and ensures a more consistent finish, as illustrated in our step-by-step tile installation techniques. Using these advanced methods not only improves your results but also boosts confidence in taking on larger projects. Keep experimenting, and you’ll find your floors standing the test of time and use.
What I Wish I Knew About Floor Movement Early On
One of my biggest lightbulb moments was realizing that floors are dynamic, not static. Incorporating expansion joints isn’t just about aesthetics—it’s about respecting the natural ebb and flow of materials. I once thought seamless was superior, but cracks proved otherwise, teaching me to prioritize function alongside form.
Secrets I Learned from Industry Veterans
Listening to seasoned professionals revealed that meticulous subfloor prep and precise placement of expansion joints are non-negotiable. Their insights saved me from costly mistakes, reaffirming that investing in quality tools like laser levels and spiked rollers makes all the difference in achieving flawless results.
Unexpected Challenges That Shaped My Approach
Dealing with uneven substrates and seasonal humidity shifts forced me to adapt. I discovered that regular inspections and timely re-sealing prolongs floor life. Embracing these proactive steps transformed my projects from reactive fixes to proactive excellence.
Recommendations That Elevated My Craft
Among the resources I trust, the comprehensive guides on floor leveling challenges and systematic tutorials on professional installation techniques have been invaluable. These sources fill gaps in my knowledge and keep me ahead in the game.
Your Floors Are Waiting for Your Next Move
Armed with lessons learned and trusted tools, you’re poised to take your flooring projects from good to extraordinary. Remember, the journey of mastering flooring is ongoing—every project is an opportunity to refine your skills and create lasting beauty.