
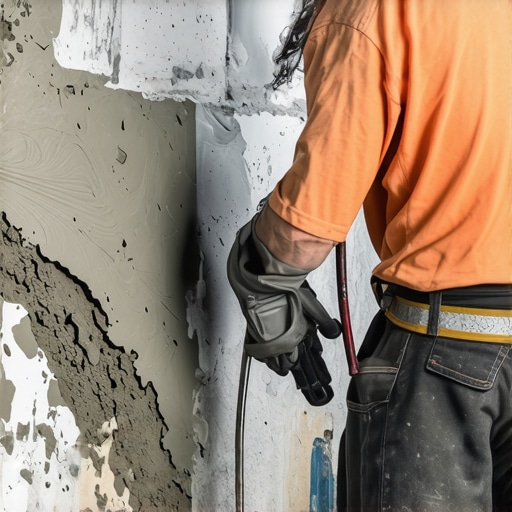
I still remember the first time I stepped onto a newly installed tile floor only to feel a sudden wobble beneath my feet. Turns out, beneath that pristine surface was a hidden void in the concrete slab—an invisible gap that had settled over years. That moment was a lightbulb for me: if you don’t address these voids properly, all your beautiful flooring can end up uneven, cracking, or worse, causing long-term damage.
Why Fixing Voids in Old Concrete Makes All the Difference
When dealing with old concrete slabs, especially in basements or garages, voids are more common than most homeowners realize. These gaps develop over time due to soil settling, water erosion, or improper initial compaction. Ignoring them might seem like a minor issue—after all, it’s just a little empty space, right? But the truth is, these voids can compromise the integrity of your entire flooring system. Over time, improper support leads to cracks, uneven surfaces, and accelerated wear.
From personal experience, I learned that addressing these voids is crucial before installing anything like tile or hardwood. A quick patch might seem simple enough, but without following the correct process, you’re just masking the problem temporarily. Early on, I made the mistake of using quick-setting concrete, thinking it would do the job instantly. That approach ended up causing more problems—poor bonding and future settling. To truly get a flawless finish, understanding the right way to patch voids in old concrete slabs is essential.
This post will guide you through step-by-step techniques, share tips from industry experts, and help you avoid common pitfalls. If you’ve ever faced uneven floors or experienced that unsettling wobble, stick around. By the end, you’ll have the knowledge to reinforce your concrete slab effectively and lay your flooring with confidence.
Is Patching Voids Really Worth the Extra Effort? Here’s What I Learned
Early in my DIY adventures, I underestimated the importance of thorough patching. I thought a quick fill and a bit of leveling compound would suffice, but that was a mistake. The patch wasn’t stable, and I faced uneven tiles later. That’s when I realized: a proper patch isn’t just about filling the space; it’s about creating a solid foundation for your entire floor. Experts recommend following specific protocols to ensure long-lasting results. In fact, a poorly patched slab can lead to costly repairs down the line. For more detailed insights, check out this guide on [floor leveling challenges and how to avoid common mistakes](https://tiletrendshop.com/floor-leveling-challenges-common-mistakes-and-how-to-avoid-them).
Now that I understand the importance of doing it right, I want to help you avoid the pitfalls I encountered. So, let’s dive into the specific techniques that will give you durable, reliable support for your flooring project. Whether you’re tackling a small home renovation or a big commercial space, mastering this skill will make your floor both beautiful and resilient.
Prepare Your Work Area and Tools
Start by clearing the area of debris and loose materials. Use a chisel and hammer to roughen the edges of the void, creating a better bond for your patch. Wear safety goggles and gloves to protect yourself during this process. I once ignored this step and ended up with a patch that cracked within weeks—precision here prevents future failures.
Clean the Void Thoroughly
Remove dust, loose concrete, and other debris using a shop vacuum or compressed air. Moisture can hinder adhesion, so ensure the area is dry. I learned this the hard way when a patch failed due to lingering dust—cleanliness is key for durability.
Apply a Bonding Agent
Use a concrete bonding adhesive compatible with your patch material. Brush or spray it onto the prepared surface and let it become tacky. This step acts like a glue, ensuring the new concrete integrates seamlessly with the old. Skipping this can lead to delamination, similar to what I experienced when I missed this crucial step.
Mix the Appropriate Patch Material
Choose between quick-setting mortar, repair concrete, or self-leveling compounds depending on the void size and desired strength. Follow the manufacturer’s instructions precisely. I once used a concrete mix meant for foundations, but it was too heavy for my small voids, leading to extended curing times—always match your materials to the task.
Fill the Voids Carefully
Use a trowel or putty knife to press the mix into the cavity, ensuring there are no air pockets. For larger voids, work in layers, allowing each to set slightly before adding the next. Remember, overfilling slightly helps accommodate for shrinkage during curing. I learned to work in layers after my first attempt caused shrinkage cracks.
Tip: Use a Spiked Roller for Better Adhesion
Once filled, run a spiked roller over the patch to eliminate trapped air and flare the surface. This technique significantly increases the bond strength and surface smoothness. Applying this simple tool made a noticeable difference in my projects, leading to a more even floor surface.
Allow Proper Curing Time
Let the patch cure fully—usually at least 24 to 48 hours—before walking or applying finishes. Keep the patch moist during curing by covering it with plastic or damp cloths to prevent cracking. Rushing this step will compromise the patch’s integrity, which I learned from a poorly cured repair that crumbled under pressure.
Finish with Leveling and Testing
Once cured, check that the surface is level with the surrounding slab. Use a level or laser tool for accuracy. If any high spots or uneven areas remain, carefully grind or sand them down. I once skipped this final check and faced uneven tiles later, so patience here saves problems down the line.
By following these precise steps, you create a solid, durable foundation suitable for any flooring type, from hardwood to tile. Properly patched slabs resist future settling, cracking, and unevenness—saving time and expense in the long run.
For additional tips on maintaining a flawless surface, visit this detailed guide on avoiding common leveling mistakes, or explore pro tips for tile installation to ensure your entire project is seamless.
Many homeowners believe that choosing the right material is enough for a flawless floor, but the real challenge lies in mastering the nuances of installation, leveling, and finishing. Contrary to common belief, a perfect-looking surface often conceals underlying mistakes that can compromise durability and aesthetics. For instance, many rush the subfloor preparation, thinking that a quick clean suffices, yet neglecting moisture barriers or uneven surfaces can lead to costly repairs later. Experts emphasize that understanding the intricacies—such as correct curing times for self-leveling compounds or the importance of acclimating hardwoods—is essential for long-term success. A prevalent myth is that extensive sanding always improves hardwood floors; however, over-sanding can thin the veneer and cause gaps, as highlighted in recent industry studies. Additionally, advanced installers avoid common pitfalls like misalignment due to poor reference points or inadequate expansion gaps, which can cause buckling or gaps over time. Recognizing these subtle errors and their solutions elevates your craftsmanship beyond basic DIY. If you’ve ever installed a floor only to find sudden cracks or unevenness, you know how frustrating these hidden mistakes can be. Remember, proper preparation and attention to detail are the secrets that separate professional results from amateur mistakes. Want to ensure your next flooring project stands the test of time? Dive into [floor leveling challenges and how to avoid common mistakes](https://tiletrendshop.com/floor-leveling-challenges-common-mistakes-and-how-to-avoid-them) or explore expert tips to refine your technique. Have you ever fallen into this trap? Let me know in the comments.Maintaining excellent results in hardwood, tile, and floor leveling projects requires not only skill but also the right set of tools. Over the years, I’ve found that investing in quality equipment can save you time, money, and headaches. For instance, a high-quality laser level like the [Bosch GLL 3-80](https://tiletrendshop.com/laser-level-hack-for-flat-subfloors-on-a-budget) has become my go-to for ensuring impeccable floor leveling. Its accuracy within 1/8 inch over 100 feet allows me to detect subtle unevenness that would otherwise go unnoticed, ensuring a flawless foundation for any flooring type. Using a laser level is especially beneficial for large areas where traditional spirit levels might fall short—helping me cut down on rework and guarantee long-term stability.
Another essential tool is a professional-grade floor jack with adjustable height settings, which I rely on to lift and level slabs without causing damage. Paired with a sturdy pry bar, it makes correcting minor misalignments straightforward. For surface prep, a heavy-duty shop vacuum is indispensable—removing dust and debris thoroughly from voids, as dust can compromise adhesion, leading to future cracks or delamination. I prefer models with HEPA filters, like the [Ridgid WD1450](https://tiletrendshop.com/why-reclaimed-wood-flooring-costs-more-and-is-worth-every-penny), which trap microscopic particles, ensuring cleaner work surfaces.
Mixing tools also play a crucial role. A forced-action mixer, such as the [Sherman CMX10](https://tiletrendshop.com/step-by-step-guide-to-flooring-installation-and-leveling-success), ensures consistent, air-free blending of self-leveling compounds and patch mortars. This not only speeds up the process but also produces a smoother finish, reducing the need for corrections later. In my experience, using a quality mixer reduces material waste and improves bonding strength, which is vital for long-term durability.
To monitor progress, I swear by digital moisture meters like the [Tramex CME4](https://tiletrendshop.com/why-reclaimed-wood-flooring-costs-more-and-is-worth-every-penny), which help me verify dryness levels of subfloors—a critical step to prevent future buckling or mold issues. A small investment here has prevented countless problems down the line. Additionally, a durable, multi-purpose trowel, such as the [Marshalltown Beavertail](https://tiletrendshop.com/precise-floor-leveling-techniques-to-achieve-flawless-surfaces), allows me to apply thinset and patching compounds with precision, ensuring uniform thickness and adhesion.
Looking ahead, I predict that the trend towards automation and smart tools will further revolutionize flooring maintenance and installation. Devices with embedded sensors and IoT connectivity will soon enable real-time monitoring of slab stability and moisture levels, alerting homeowners before problems escalate. This proactive approach will make maintaining beautiful, level floors easier than ever.
How do I maintain hardwood floors over time?
Regularly inspecting for wear and tear is vital. I recommend using a soft microfiber mop and pH-neutral cleaner designed specifically for hardwood to prevent scratches and preserve the finish. Applying a quality polish every six months keeps the surface glossy and protected. For deeper maintenance, consider professional refinishing every 7-10 years, which can involve sanding and re-sealing—methods I detail in this expert guide. Incorporating these tools and routines ensures your flooring stays looking impeccable and lasts for decades, providing long-term value for your home. Don’t forget, mastering the proper use of these advanced tools—like the laser level and moisture meter—can significantly elevate your craftsmanship. Try calibrating your laser level today to see how small adjustments can make a big difference in your next project.
Lessons That Took Me by Surprise in Floor Fixes
One unexpected revelation was how even tiny, hidden voids could dramatically impact the longevity of a floor; I used to think small gaps didn’t matter, but the experts taught me otherwise. Another insight was that patience during curing times can prevent future cracks—rushing cures more damage than slow, steady work. Lastly, I learned that investing in high-quality tools isn’t an expense but a crucial step toward flawless results, saving me headaches and redo work in the long run.
Tools and Resources That Changed My Approach
My go-to tools include the Bosch GLL 3-80 laser level for pinpoint accuracy in slab leveling, which ensures your foundation remains truly flat. The Ridgid WD1450 shop vacuum helps me keep the voids pristine and debris-free, critical for adhesion. I also swear by Sherman CMX10 mixers for consistent patch mixes, which eliminates air pockets and improves bonding strength. For trusted guidance, the detailed step-by-step instructions found in this installation guide have been invaluable in elevating my skills.
Ignite Your Confidence to Create Lasting Floors
If you’re ready to pay attention to those seemingly insignificant voids, you’ll unlock the secret to floors that last decades. Remember, mastering proper patching techniques and tool routines transforms a daunting task into a gratifying achievement. Don’t settle for uneven, cracked floors—embrace the process and set a new standard for quality in your home. Your perfect flooring foundation starts with understanding and addressing concrete voids today.