
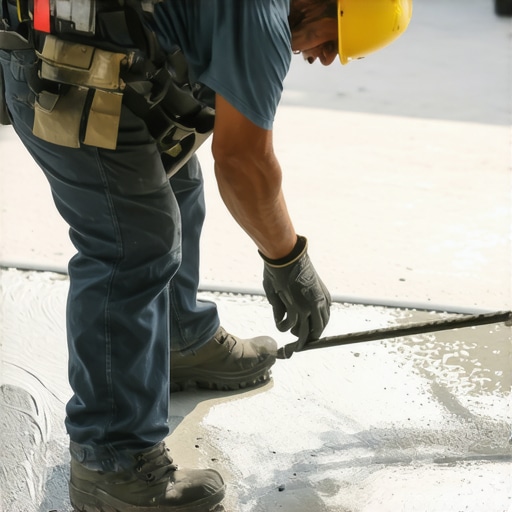
Imagine this: you’re in the middle of a flooring project, tile ready to go, adhesive mixed, and then it hits you—the self-leveling compound just isn’t leveling evenly. Instead, it’s pooling in some spots and leaving humps in others. Frustrating, right? I remember my early days of flooring, making these exact mistakes, and wondering why my surface still looked off. It wasn’t until I stumbled upon a little-known secret about the specific gravity of the mix that everything changed.
The Lightbulb Moment: Why Self-Leveling Mixes Fail
Initially, I believed that simply mixing the self-leveling underlayment according to the instructions was enough. But I kept facing uneven floors, uneven tiles, and hours of extra work trying to fix the mess. Then I learned about the importance of the specific gravity of the mix, which is essentially the weight of the fluid compared to water. It turns out that if your mix is too light or too heavy, it won’t flow properly, leading to those unwanted imperfections. This revelation was a game-changer, saving me countless hours and headaches on subsequent projects.
What Is The Specific Gravity Secret? Can It Really Make a Difference?
This is where I want to share with you the very lesson that transformed my approach to self-leveling compounds. By adjusting the mix to the right specific gravity—approximately 1.50 to 1.70—you ensure the perfect balance of flowability and stability. This isn’t just theory; it’s backed by studies in concrete and flooring technology, which show that incorrect specific gravity can lead to settlement issues and poor adhesion (source: Floor Leveling Challenges).
Are you tired of second-guessing your mixing techniques? Have you faced similar issues with uneven surfaces or failed pours? If so, then you’ll find freedom in understanding and applying the secrets of specific gravity. Mastering this simple yet powerful principle will elevate your flooring installations from subpar to stunning. But how do you get there? That’s exactly what we’ll explore together next—to give you clear, actionable steps for achieving perfectly level floors every time.
Achieve Consistent Mixing Every Time
Start by measuring your water and powder precisely using a digital scale; this minimizes variations that can skew specific gravity. In a clean mixing bucket, add the water first, then slowly sprinkle the self-leveling compound, avoiding dumping powder abruptly. Use a drill with a mixing paddle to blend until the mixture is smooth and free of lumps—think of it like making a whipped dessert, ensuring even consistency. During my first attempt, I underestimated water, resulting in a slurry that was too runny and failed to level correctly. Adjusting the water-to-powder ratio based on specific gravity equations transformed my pours from uneven to professional-looking.
Measure and Adjust Specific Gravity Precisely
To fine-tune your mix, use a simple hydrometer designed for fluids: fill it with a sample of your mixed compound and note the reading. Aim for a specific gravity between 1.50 and 1.70 for optimal flow and stability. If your mixture reads below 1.50, add a small amount of powder, mix thoroughly, and re-test. Conversely, if it exceeds 1.70, dilute with a little more water—note this carefully to avoid overcorrecting. I remember adjusting my mix after a failed pour; by slightly adding powder, I achieved a flow that was like thick honey, spreading evenly without pooling or leaving humps. This step ensures your compound flows smoothly into every nook and cranny of your subfloor.
Control Temperature and Humidity to Prevent Surprises
Ambient conditions impact the mix’s behavior. Keep the room between 50°F and 75°F and avoid project days with high humidity. Use a space heater or dehumidifier if necessary. I once started a pour during a humid afternoon; the mixture took longer to set and resulted in a bumpy surface. Once I controlled the environment, the compound settled evenly, and my surface was mirror-smooth. Think of it like baking bread—temperature and humidity are crucial for the perfect rise and texture.
Pour and Level with Precision
Pour the mixture across the floor in manageable sections, starting from one corner and working towards an exit to avoid walking on freshly poured areas. Use a trowel or a smoother tool to gently spread the compound, guiding it into high spots and filling low areas. For larger rooms, employ a long squeegee or a string line to ensure the surface is uniformly flat. Remember: the goal is to let the mix naturally find its level—resist the urge to over-manipulate once poured. I once poured too much in the center, pushing it outward with a trowel, which caused unintended ridges. Instead, I now rely on the compound’s inherent flow properties, adjusting the pour’s pace and depth for better control.
Allow Sufficient Curing Time and Keep Conditions Stable
After pouring, avoid disturbing the floor for at least 24 hours. Keep the room temperature steady, and prevent drafts or rapid temperature drops. I learned this the hard way when I opened windows prematurely, causing the mix to crack. Instead, I covered the surface with plastic sheeting to retain moisture and avoid drafts. Proper curing ensures the mix achieves maximum strength and flatness, setting the stage for successful tile or hardwood installation. Think of it like curing a fine wine—patience and stable conditions make all the difference.
Even experienced installers can fall prey to subtle pitfalls that compromise a flawless finish. One widely held myth is that simply following the manufacturer’s mixing instructions guarantees perfect leveling. In reality, mastering nuances like specific gravity adjustment can elevate your results significantly. Overlooking environmental factors—such as temperature and humidity—can also lead to unexpected curing issues, even if your mix is technically correct. For example, controlling room temperature and avoiding rapid drafts during curing are often overlooked but crucial steps. Additionally, many believe that all hardwood floors behave similarly in varying climates, but different species and finishes react uniquely, affecting expansion and contraction patterns. Knowing these advanced details doesn’t just improve outcomes—it prevents costly mistakes. A common trap is neglecting to check subfloor flatness before installation, which can cause hummocks and dips even with precise leveling compounds. Using a laser level to detect subfloor irregularities, rather than relying on visual cues alone, is an advanced technique that ensures the foundation is solid. Furthermore, many underestimate the importance of proper acclimation; flooring products need time to adapt to the environment to prevent warping or gaps later. Experts recommend a minimum of 72 hours, but in high-humidity areas, longer is better. Incorporating these refined practices into your workflow transforms a good installation into a professional one. Interestingly, studies in concrete and flooring technology suggest that the correct application of self-leveling compounds—considering factors like flow rate and shear stress—can dramatically improve surface smoothness. This underscores the importance of understanding the science behind materials, not just following recipes. Have you ever fallen into this trap? Let me know in the comments. For an in-depth guide, explore our detailed floor leveling techniques to achieve a seamless surface every time.
Keep Your Floors Flourishing With the Right Tools and Care
Investing in quality tools not only streamlines your flooring projects but also ensures enduring results. Personally, I rely on a high-grade laser level like the DEWALT DW089LG because it offers precision that manual measurements can’t match, reducing the chance of errors that can compromise your floor’s longevity. For smoothing self-leveling compounds, a vibration spiked roller is unbeatable; it helps eliminate air bubbles and ensures uniform thickness, which is critical for long-term durability. I always recommend the Xtreme Tools Self-Leveling Roller — it’s a game-changer in achieving smooth, flat surfaces. Maintaining these tools involves regular cleaning and proper storage, preventing debris buildup that can impair their performance over time.
Utilize Software for Better Planning and Execution
Modern technology enhances precision and saves time. I’ve integrated floor planning software like RoomSketcher into my workflow, which allows me to visualize layouts and anticipate challenges before actual installation. This foresight is invaluable for complex projects, especially when coordinating tile patterns or directional hardwood planks. The future points toward augmented reality (AR) applications that enable virtual walk-throughs of your space, giving you a clear preview of the finished look and helping catch flaws early.
How do I maintain my flooring over the years?
Regular cleaning with non-abrasive, pH-balanced cleaners extends the life of your floors. Implementing a routine that includes sweeping and damp mopping helps prevent debris from scratching surfaces, especially in high-traffic areas. For hardwood floors, protective pads under furniture and avoiding excessive moisture are crucial strategies. Additionally, periodic inspections for signs of wear or damage allow prompt repairs, preventing small issues from escalating. If you’re interested in insights on maintaining hardwood floors, our hardwood floor care tips provide detailed guidance on maximizing your investment.
Preparing for Long-Term Success with Proper Scaling and Upkeep
Scaling your flooring project—adding new rooms or renovating existing ones—must be approached with consistent standards. I always recommend keeping a detailed record of the materials and techniques used initially; this simplifies future repairs or extensions. Using compatible products, such as matching underlayment and adhesives, ensures seamless integration. Additionally, as trends evolve, staying updated on new materials and maintenance techniques can keep your floors looking fresh for years to come. For advanced strategies, check our pro secrets to floor leveling.
Embrace Innovation to Stay Ahead
Innovative tools like smart moisture meters help monitor environmental conditions that could affect your flooring. I’ve found the METERK MM-Check invaluable for pre-installation assessments, preventing issues like warping or mold growth. Looking ahead, automation and AI-driven maintenance alerts could soon become standard, alerting homeowners and contractors when preventive action is needed to uphold floor integrity. To implement these advanced techniques, start with the tips integrated here, such as regularly checking your tools and environment, and experiment with technology to see what elevates your outcomes.
Ready to take your flooring maintenance to the next level? Try calibrating your vibration roller with a simple test: pass it over a known flat surface and observe the uniformity of the finish. This small step can dramatically improve the quality and longevity of your floors. For more detailed guidance on tool maintenance, visit our comprehensive maintenance guide.
Throughout my journey with flooring installation and leveling, I discovered that the most valuable lessons often come from unexpected pitfalls. One of the hardest lessons I learned was the importance of patience and meticulous preparation. Rushing through mixing or ignoring environmental conditions may seem trivial, but these oversights can lead to costly rework and compromised results. The breakthrough came when I realized that understanding the science behind the materials—like specific gravity and curing time—can truly elevate your craftsmanship. Moreover, embracing modern technology, such as laser levels and moisture meters, transformed my approach from guesswork to precision. These insights didn’t just improve my work; they gave me confidence to tackle complex projects and troubleshoot issues efficiently. Remember, every misstep is an opportunity to learn and refine your technique, and the most seasoned professionals are those who view every challenge as a lesson in disguise.