
Have you ever stood in the middle of your living room, vinyl plank in hand, feeling a mix of excitement and dread? I remember my first attempt at cutting luxury vinyl without the proper power tools—almost disastrous. I struggled with uneven cuts, frayed edges, and the nagging fear that I’d ruin a whole box of beautiful flooring. That lightbulb moment hit me hard: there’s a smarter way to do this that doesn’t require knocking down walls or splurging on expensive power saws.
The Real Challenge of Cutting Luxury Vinyl
When I first started my flooring project, I assumed that owning a powerful saw was the only way to get perfect cuts. Spoiler alert: Turns out, that’s not entirely true. The truth is, luxury vinyl flooring is surprisingly forgiving if you know the tricks to cutting it properly. The key is understanding the material and using the right tools—without going full DIY disaster mode. Avoiding unnecessary noise, mess, or damage means mastering some simple, effective techniques that don’t break the bank or your back. If you’re tired of struggling with flimsy handsaws or risking chipping your beautiful planks, stick around. Today, I’ll share how I learned to cut vinyl precisely—using tools you already have or can pick up cheaply—and how you can do the same.
Is Cutting Without Power Tools Even Possible?
Before we dive into the juicy tips, I want to clear a common skepticism—can you really get clean, accurate cuts without a fancy saw? Absolutely. My early mistake was relying solely on a utility knife, thinking it wouldn’t be precise enough. But with the right technique and some patience, I discovered that a sharp blade and a straightedge can give you results just as professional as power tools. Plus, it’s quieter, safer, and much less intimidating for DIYers. Want to learn how to master this skill without sacrificing quality? Keep reading.
If you’re curious about choosing the best materials, check out my recent tips on tile selection for elegant hardwood floors, which pairs perfectly with your vinyl upgrades. And if you’ve ever experienced setbacks from improper floor leveling, I highly recommend reviewing common mistakes in floor leveling to ensure your entire project stands on solid ground. Now, let’s get to the meat of those cutting tricks that will change your DIY game forever.
Use a Sharp Utility Knife and Straightedge for Perfect Cuts
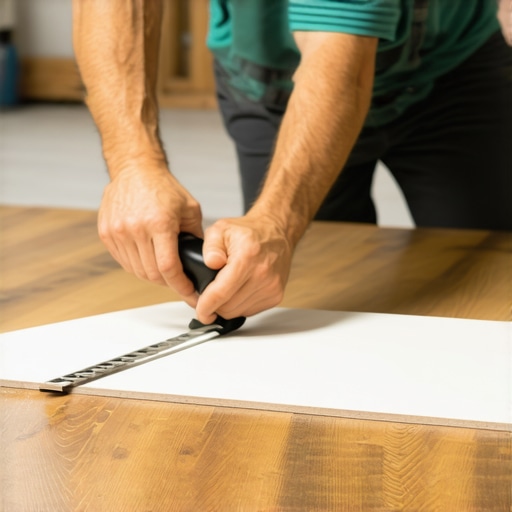
In my own experience, lining up a straight, clean cut on vinyl flooring starts with a quality blade. I always opt for a fresh, sharp utility knife blade—dull blades crush the vinyl, causing jagged edges. I place a straightedge, like a metal ruler or carpentry square, along the marked cut line. With firm, consistent pressure, I score the vinyl repeatedly with the utility knife, deepening the cut each time. This method transforms a seemingly rough job into a precise, smooth edge—no power saw needed. Once scored, I gently snap the vinyl along the score line, revealing a clean, professional edge. This technique is perfect for cuts around door jambs or outlets where accuracy is paramount.
Score Multiple Layers for Thick Vinyl
When working with thicker luxury vinyl planks, a single pass might not penetrate fully. I found that scoring multiple times—each with a light pass—weakens the vinyl’s internal bonds, making snapping easier. Think of it like carving through soft butter in layers; each cut creates a fracture line. After a few passes, I align the straightedge and flex the vinyl over the edge of a work surface, snapping along the scored line. This method minimizes chipping and ensures straight edges, which are crucial for tight-fitting flooring joints. Practice is key—if your first attempt isn’t perfect, rescore and snap again, refining your skill with each cut.
Smoothing Edges with Sandpaper
After snapping the vinyl, the edge can sometimes be slightly rough or frayed. I measure a fine grit sandpaper or sanding block and gently smooth the cut edge. This prevents snags during installation and gives a cleaner overall appearance. I avoid over-sanding—just enough to remove any jaggedness—then wipe away dust with a damp cloth. This step improves fitment, especially along irregular cuts or intricate patterns. It’s like tailoring a suit: small adjustments make a big difference in the final look.
Managing Intricate Cuts and Corners
For curves or tight corners, a utility knife becomes less practical. I use a small handheld craft or detail knife—similar to an X-Acto blade—with guided cuts along templates or patterns. Instead of trying to cut a perfect curve in one pass, I make multiple shallow passes, gradually following the curve. This approach minimizes mistakes and prevents tearing. It’s like sculpting: small, deliberate cuts shape the final form precisely. I also employ masking tape along the cut line as a guide—this prevents the blade from slipping and ensures accuracy. With patience and steady hands, I can handle even complex cuts confidently without power tools.
Handling Gaps and Imperfections
If a cut results in small gaps or uneven edges, I keep a tube of vinyl seam filler or matching putty nearby. After sanding, I apply a tiny amount into the gap, smoothing it with a fingertip. Once dried, I lightly sand again if needed. This ensures seamless joints between planks and enhances the overall finish without requiring expensive equipment. Remember, patience in finishing touches often outshines rushing through the initial cut.
Practice, Preparation, and Safety
Before starting, I always prepare my workspace by cleaning the surface and placing a dust cloth beneath the vinyl to protect the subfloor. Wearing cut-resistant gloves increases safety—vinyl edges can be sharp. Practice on scrap pieces first to perfect your technique. With consistent practice, you’ll develop the confidence to make precise cuts manually, saving money and avoiding the noise and dust associated with power tools. This method proves that you don’t need fancy equipment to achieve professional-looking results in your flooring projects.
For more tips on meticulous flooring installation, check out how to achieve flawless floor leveling before tile laying or dive into precise floor leveling techniques for flawless surfaces.
Many DIY enthusiasts believe that choosing high-end materials alone guarantees a flawless floor, but that’s a misconception. Even premium tiles and hardwood can turn problematic if not installed considering subtle nuances like substrate conditions or moisture levels. For instance, the common myth that a perfectly level subfloor isn’t critical is false; a minor dip can cause tiles to crack or grout to crack over time, leading to costly repairs. Moreover, novices often underestimate the importance of proper acclimation of wood flooring, which should last several days in the installation environment to prevent warping or gaps. Advanced errors, such as neglecting the expansion joints in large areas, can result in buckling or buckling months after installation. It’s essential to understand these details, as they significantly influence durability and aesthetic longevity. For example, using incorrect thinset mortar in tile setting might cause delamination—an issue thoroughly discussed in expert articles—so always match the mortar type to your tile material and substrate. Additionally, many assume that leveling compounds are a cure-all for uneven subfloors; however, if applied improperly—say, over a moist or contaminated surface—they can fail, causing unevenness to reappear. Remember, the durability of your flooring hinges on meticulous preparation and knowledge of these specific nuances, not just material selection. Want to dive deeper into perfecting your installation? Explore our guide on how to achieve flawless floor leveling before tile laying and avoid common pitfalls. Making small adjustments—like verifying moisture levels with sensors—can save hundreds in repairs down the line. The take-home message: mastery involves understanding subtle yet impactful details, not just following basic tutorials. Have you ever fallen into this trap? Let me know in the comments.
How Do I Keep My Hardwood and Tile Floors in Top Shape Over Time?
Maintaining your flooring is crucial to preserve its beauty and functionality for years to come. I recommend investing in high-quality, specialized tools tailored for different flooring types and routine upkeep. A precision floor buffer, for example, can significantly ease the process of refinishing hardwoods—remember, expert tips highlight the importance of using the right equipment for a professional finish.
For tile floors, a steam cleaner with adjustable settings is invaluable for deep cleaning without harsh chemicals, ensuring longevity and avoiding grout deterioration. Regularly checking and replacing worn-out grout trowels and sponges helps maintain a seal that prevents water infiltration, which is vital as water damage can undermine both tile and hardwood floors. Keep a set of soft-bristle brushes handy for detailed cleaning around edges and tight corners—this prevents dirt buildup, which can accelerate wear.
Implementing a routine maintenance schedule, including clearing debris with a microfiber mop and promptly addressing spills, extends your floors’ lifespan. To stay ahead of potential issues, consider monitoring moisture levels regularly; high moisture can cause hardwood warping or tile grout cracking. Using a reliable moisture meter, like the one recommended by flooring professionals, enables early detection and prevents costly repairs down the line.
Looking forward, smart flooring sensors are becoming more mainstream, offering real-time data on environmental conditions that affect your floors. Embracing these innovations now can ensure your flooring investment remains sound and attractive in the long run. Combining diligent maintenance with the right tools—not just makes your floors look good but also guards against unexpected damages—so take the time to equip yourself properly today.
For example, using an advanced floor leveler spiked with a spiked roller can correct uneven surfaces for flawless installations, which is a game-changer in preserving a smooth, long-lasting surface. So, why not try this technique on your next project and see the difference it makes? Staying proactive with maintenance tools today sets the foundation for enduring beauty tomorrow.
The Hardest Lesson I Learned About tile,hardwood floors,floor leveling,flooring installation
One of my most significant insights came unexpectedly when I realized that rushing the preparation phase often leads to mistakes that sabotage the entire project. Prepping the subfloor properly and understanding its nuances can save days of frustration later on. If I had known earlier that precise moisture testing and leveling set the foundation for successful installation, I would have approached my DIY journey differently. These small yet crucial steps are often overlooked but can make or break your flooring’s durability and appearance.
3 Myths About tile,hardwood floors,floor leveling,flooring installation That Held Me Back
- Myth 1: You don’t need to level every inch of your subfloor.
Truth: Even minor dips can cause cracks and uneven wear; proper leveling is essential for long-term stability. - Myth 2: Higher price means better tools and materials.
Truth: Knowledge and technique often matter more than brand names. Appropriate, well-maintained tools produce superior results regardless of cost. - Myth 3: Sealing grout is optional.
Truth: Sealing grout prevents stains and moisture infiltration, extending the life of your floors significantly.
What Experts Won’t Tell You About tile,hardwood floors,floor leveling,flooring installation
The nuance lies in the details, like the importance of environmental conditions—moisture levels, temperature, and acclimation time—that aren’t always emphasized in DIY tutorials. Knowing when and how to use specific materials, such as choosing the right thinset mortar or vapor barrier, can prevent costly failures. These insights only come through experience or guidance from seasoned professionals, which is why I recommend digging into detailed resources, like learning about precise floor leveling techniques. They helped me make smarter decisions and avoid common pitfalls.
Why 2025 Will Bring a New Wave of Flooring Confidence
As I reflect on my journey, I see how embracing continuous learning—whether from books, expert blogs, or hands-on practice—can transform your approach to flooring installation. The future is bright for DIYers willing to master not just the materials but the subtle art of preparation, leveling, and finishing. Investing time now to develop these skills ensures your floors will stand the test of time, making your home a true reflection of your effort and care. So, take that first step today, knowing that every mistake is a step closer to mastery.
Curating Your Path with Trusted Resources
- Essential Toolbox: A quality spiked roller and leveling system have revolutionized my installation accuracy. They’re worth every penny for the peace of mind they bring.
- Inspiring Reads: The comprehensive guide Mastering Hardwood Floor Refinishing provided me with advanced techniques that elevated my projects beyond basic skills.
- Online Communities: Forums and YouTube channels specializing in flooring give real-world advice and troubleshooting tips, cultivating confidence in tackling even challenging tasks.
- Professional Consultations: When in doubt, a quick call or email to seasoned installers saved me from costly errors, emphasizing the importance of expert guidance in complex scenarios.
Seize Your Flooring Moment Today
Taking on flooring projects isn’t just about laying planks or tiles—it’s about transforming your space and building your confidence. Remember, mastery is a journey that involves patience, preparation, and a willingness to learn from every mistake. Each step you take today, armed with the right knowledge and tools, brings you closer to achieving stunning floors that will impress for decades. Don’t let self-doubt hold you back—your perfect floor is within reach. Have you encountered a hurdle that changed your approach? Share your experience below and let’s grow together.