
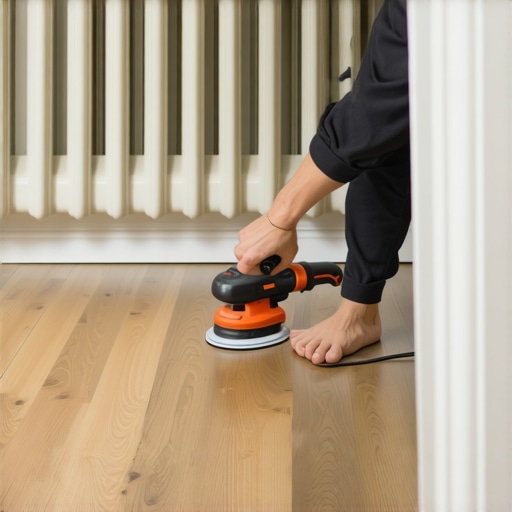
One day, as I knelt down in my living room, trying to sand the stubborn edge of my hardwood floor, I realized I was completely stumped. The low-profile radiator right beside it made the job trickier than I expected. Dust floated in the air, interference from the radiator’s tiny gap made it hard to reach, and I kept thinking—there’s gotta be a better way. Have you ever faced this frustrating challenge where your radiant heater blocks your sanding efforts, leaving uneven spots or damaged flooring? If so, you’re not alone. This is a common issue that many DIYers and even seasoned pros stumble upon.
The Hidden Difficulty of Sanding Hardwood Under Low-Profile Radiators
When you’re installing or refinishing hardwood floors, achieving a seamless, smooth surface is key. But low-profile radiators, while sleek, often sit just high enough to leave a narrow gap, making it almost impossible to sand the area evenly without damaging the radiator or the floor. Early in my project, I made a mistake I now warn everyone about: I attempted to sand right up to the edge without carefully preparing the space or using the right tools. The result? Scratched radiators or uneven flooring that forced me to redo sections—time-consuming and discouraging.
This experience taught me that understanding how to approach sanding beneath these tricky heating units is essential. Saving yourself this hassle means knowing the best techniques and tools, which I promise to share. We’ll cover everything you need to create a perfectly level hardwood floor that works beautifully with your low-profile radiators, making the entire process smoother, faster, and more satisfying.
Is it really worth fussing over tiny gaps? Absolutely.
A little extra effort in these tight spots translates to a polished look that elevates your entire space. Plus, properly sanding beneath low-profile radiators helps prevent future issues like squeaks, uneven wear, or moisture buildup. Trust me, understanding the nuances can significantly save you time and money in the long run. Curious how I learned the tricks? Stick around, because I’ll guide you through each step, ensuring you’re well-equipped to handle this common, yet often overlooked, challenge.
Prepare Your Workspace to Access Tight Spots
Before you start sanding, remove or secure any obstacles around the radiator. Use painter’s tape to mask sensitive surfaces and clear the area of any debris. Think of this as unclogging a narrow alley to make space for your work—without this step, you’ll struggle with uneven results or accidental damage.
Use a Flexible Sanding Tool for Precision
Switch from a standard sanding belt to a detail or corner sander with a narrow or flexible pad. This tool acts like a flexible arm reaching into tight corners, much like using a paintbrush instead of a roller for intricate work. During my last project, I used a detail sander to work beneath a radiator base—getting into the small gap without scratching the radiator surface.
Install a Custom-Fitted Buffer or Spacer
Build or buy a thin shim or wedge that fits between the radiator and the floor. Place this spacer to lift the edge of the flooring, creating a cavity for your sander to slip underneath. It’s akin to raising the floor slightly to access the hidden parts, which really speeds up the process and protects your radiator from accidental hits.
Employ Extenders or Long-Handle Attachments
Attach a long handle or extension to your sanding tool. This extension allows you to reach beneath the radiator without crawling or risking contact. Think of it like using a selfie stick—you gain reach without compromising control. I found that a 24-inch extension made it much easier to reach the shallow gap, saving me hours of manual effort.
Work in Stages for Even Results
Divide the area into smaller sections and focus on one at a time. Use gentle, overlapping passes, similar to painting a wall—this prevents gouging or uneven sanding. During my recent flooring job, I sanded the sections closest to the radiator first, then moved outward, ensuring consistent levelness and avoiding scratches.
Finish with Fine Detailing and Cleaning
After the bulk sanding, switch to a fine-grit pad for polishing the edges and surfaces beneath the radiator. Vacuum or wipe away dust thoroughly to prevent particles from embedding in the finish. Remember, a clean, smooth surface ensures optimal adhesion and a flawless look for your hardwood.
Extras to Consider for Future Projects
If you’re planning ongoing refinishing, consider sealing radiator gaps with spacers or adjustable cover plates to facilitate easier maintenance. This small step preserves your work quality and reduces future hassle. For comprehensive guidance, check our detailed [floor leveling challenges](https://tiletrendshop.com/floor-leveling-challenges-common-mistakes-and-how-to-avoid-them) to avoid common pitfalls.
Many homeowners and even some professionals hold onto beliefs about flooring installation that might seem intuitive but are actually misconceptions. One prevalent myth is that opt for the cheapest materials and straightforward installation methods to save money. However, this approach often results in long-term issues like warping, cracking, or uneven surfaces, which end up costing more to fix. In contrast, investing in quality materials and understanding proper installation nuances can significantly enhance durability and aesthetic appeal. For instance, selecting the right adhesive or underlayment, as discussed in our tile installation pointers, is crucial in preventing future problems.
Another common mistake is neglecting the importance of subfloor preparation. Many overlook that an uneven or moist subfloor is the root cause of many flooring failures. While it might seem tedious, properly leveling and moisture-proofing the subfloor, as explained in floor leveling challenges, is essential for a flawless finish and longevity.
People often underestimate how critical it is to consider expansion gaps, especially with hardwood floors. Ignoring these can lead to buckling or gaps once the wood expands with humidity changes. This nuance is often missed by beginners but well-understood by seasoned installers. Properly leaving and maintaining expansion gaps ensures that your floor expands and contracts naturally without damage, a subject extensively covered in our guides on floor installation success.
How can advanced techniques improve flooring longevity?
Enticing as it might be to follow standard DIY tips, mastering subtle techniques—like precise undercutting of door casings, implementing vapor barriers, or choosing the correct trowel size—makes a substantial difference. For example, the blue tape trick is a subtle but effective method to achieve clean cuts and avoid damage, especially during detailed areas. Moreover, understanding moisture mitigation strategies—like using proper barriers or acclimating the materials—can prevent warping or buckling, often overlooked by amateurs but vital in expert practice.
Experts emphasize that rushing or shortcutting these details can lead to costly repairs down the line. A comprehensive understanding of the entire installation process—including substrate preparation, material selection, and environmental conditions—is key. For a deeper dive into sophisticated techniques, I recommend reviewing the ultimate guide to floor leveling.
Remember, doing it right from the start saves frustration and money later. The hidden truth is that many installation failures are rooted in overlooked nuances, often wrapped in old wives’ tales. Do you think you’re accounting for all these factors in your project? Let me know in the comments. To master these subtleties, check out related articles or consult experts to elevate your flooring game!
Ensuring your flooring remains pristine and functional over the years requires more than just precise installation; it hinges on selecting the right tools and maintaining them properly. One indispensable instrument I swear by is the dual-action palm sander. Its compact size allows for detailed work in tight spaces, especially beneath low-profile radiators or when smoothing uneven subfloors. Unlike bulky orbital sanders, the palm sander’s versatility makes it my go-to for finishing edges and hard-to-reach spots, ensuring a level surface that promotes lasting adhesion and wear resistance. To keep these tools performing optimally, I recommend cleaning the abrasive pads after each session and periodically replacing worn-out sandpapers, which maintains consistent grinding power and prevents unnecessary damage to delicate surfaces.
Next, investing in a high-quality moisture meter is crucial, especially when working with hardwood floors or tile installations. Variations in moisture levels can lead to warping, buckling, or premature grout failure. I prefer digital models with quick response times and multiple measurement modes, allowing me to monitor both surface and subfloor moisture content accurately. Regular checks throughout the project help catch potential issues early, saving significant troubleshooting time later. For example, prior to applying thinset or grout, testing substrate moisture aligns with best practices outlined in precise leveling methods and prevents delamination.
Tools like laser levelers are revolutionizing how we approach long-term results. I rely on a self-leveling laser for its accuracy and efficiency in establishing true horizontals across large spaces, confirming that floor leveling is uniform before laying down tile or hardwood. Modern laser levels with pulse mode and smart detection are becoming more affordable, making them accessible to DIY enthusiasts and professionals alike. Simple calibration checks at the start of each project—not just once—ensure consistency and avoid cumulative errors that can compromise the entire flooring surface. As technology advances, future tools will likely incorporate AI-powered sensors that suggest real-time adjustments, making projects even more precise and durable.
How do I keep my flooring installation in top shape over time? Routine maintenance involves cleaning with suitable products, avoiding excessive moisture, and inspecting for signs of movement or damage. For hardwood floors, using a specialized cleaner like hardwood floor care secrets can extend shine and prevent scratches. Tile surfaces benefit from sealing grout lines periodically, especially in high-traffic areas, to thwart stains and moisture ingress. I also recommend scheduling annual inspections to identify subtle issues before they escalate into costly repairs, in line with advice from installation wisdom. Adopting a proactive approach with the right tools and maintenance habits ensures your flooring stands strong and beautiful for decades to come.
How do I maintain my flooring tools over time?
Proper storage in a dry, temperature-controlled space and regular cleaning after each use extend tool lifespan. Applying lubricant to moving parts and replacing consumables like sanding pads or batteries according to manufacturer guidelines helps maintain peak performance. Additionally, keeping records of usage and service dates simplifies maintenance schedules and prevents unexpected breakdowns. This disciplined approach aligns with professional standards discussed in our floor leveling mastery content, emphasizing that well-maintained tools are key to enduring results. I challenge you to calibrate your laser level this week—it’s a straightforward step that significantly improves accuracy, translating into longer-lasting, more even floors.
What I Didn’t Expect About Working Beneath Radiators
One of the most eye-opening lessons I learned was that patience and preparation trump brute force. Initial attempts to rush through tight spots often led to damage, but slowing down and planning meticulously—like planning a strategic move in chess—paid off spectacularly. It became clear that every extra minute spent on prep adds value by preventing costly mistakes later.
My Top Tool That Transformed My Flooring Projects
Investing in a quality detail or corner sander changed my perspective on precision. This small but powerful tool allowed me to reach into those narrow gaps effortlessly, much like a craftsman honing a masterpiece. It’s a reminder that choosing the right tools—especially for tight spots—is crucial for achieving professional results without damaging your radiators or floors.
Being Ready for the Unexpected Made All the Difference
Sometimes, things don’t go as planned—moisture levels fluctuate, or a spacer shifts. Staying adaptable and having backup plans, like extra spacers or a portable moisture meter, keeps projects on track. This flexibility has saved me countless hours and helped turn challenges into opportunities for learning and growth.
Custom Spacers Are Easier Than You Think
Creating a custom-fitted buffer from simple materials like thin shims or wedges is a game-changer. It’s akin to giving your floor a gentle lift, creating just enough space for safe, even sanding beneath radiators. This simple step ensures protection and significantly reduces tedious manual work, making the process more enjoyable and efficient.
Sharing What Works Is the Key to Continuous Improvement
Discussing and exchanging ideas with fellow DIYers or professionals has enriched my approach. For instance, online forums and tutorials, like those shared on reliable sources, provided me with insights that I wouldn’t have discovered alone. Open-mindedness fosters innovation, turning imperfect projects into showcase-worthy spaces.
Don’t Underestimate the Power of Small Adjustments
Tricking myself into thinking that tiny tweaks wouldn’t matter was a mistake. Each subtle adjustment, whether in tool angle or spacer size, contributed to a more level and durable floor. Remember, the devil is in the details, and paying attention to those details sets a professional apart from a hobbyist.
Where to Continue Your Flooring Journey
If you’re eager to expand your knowledge, I recommend checking out detailed guides on floor leveling techniques or exploring our tile and hardwood selection tips. These resources will help you make informed decisions, ensuring your projects are not only beautiful but built to last.
Elevate Your Craft: Take Action Today
The most rewarding part of mastering the art of flooring under radiators is the confidence you gain to tackle challenging spaces. Each project becomes an opportunity to learn, improve, and create a space that truly reflects your vision. Remember, the journey may be intricate, but with patience and the right tools, you’ll craft floors that stand the test of time.
Have you ever faced a tricky spot under a radiator or similar obstacle? Share your experience below—I’d love to hear your stories and solutions!
,