
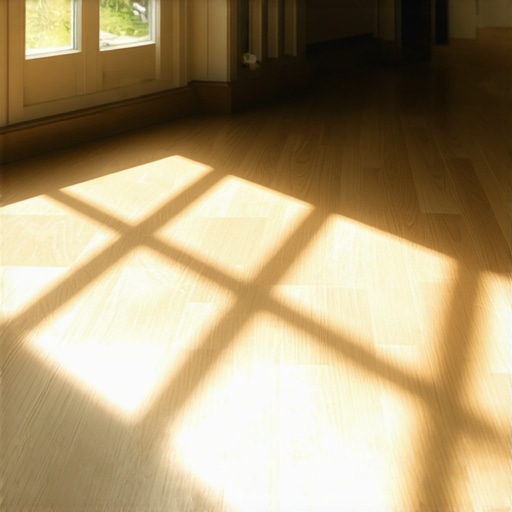
It was an early Saturday morning when I finally took a good look at my living room floor and realized something startling: the luxurious, rich-tone vinyl planks I had installed just a couple of years ago were already losing their luster. The colors had dulled, and some spots looked noticeably faded, especially those basked in the sun’s rays every afternoon. That lightbulb moment hit me hard—how could something so supposedly durable be fading so quickly?
Sunlight and Vinyl: A Match That Can Burn Brightly—and Fade
Many of us love sunlit spaces, but I learned the hard way that sunlight can be a silent enemy for luxury vinyl flooring. It’s tempting to open those curtains or have large windows, but the UV rays can cause significant fading over time. I found that even high-quality vinyl isn’t immune; it’s just more resistant, not completely UV-proof. The difference becomes painfully apparent after a couple of years, especially in rooms with lots of southern exposure. My experience made me wonder: Why do some vinyl floors fade so fast, and what can we do about it?
In this post, I’ll share my journey and insights, along with practical tips, to help you preserve the beauty of your vinyl floors—so your investment doesn’t turn into a fading memory.
Is Fading an Inevitable Part of Vinyl’s Life?
Initially, I thought that choosing a luxury vinyl meant I had found a nearly maintenance-free, forever-fresh flooring solution. I was wrong. One common mistake I made early on was assuming that all vinyl flooring is equally resistant to sunlight. I didn’t realize that, just like hardwood or tile, vinyl has its vulnerabilities. Many homeowners skip examining the product’s UV resistance or fail to take protective measures, leading to premature fading. If you want your floors to stay vibrant longer, it’s crucial to understand the factors that accelerate fade and how to mitigate them.
Supporting this, experts note that UV exposure is a leading cause of color loss in vinyl flooring. According to a recent study by the North American Laminate & Vinyl Association, UV rays can break down the dyes and top coatings, causing discoloration within a few years if unprotected. Recognizing these risks is the first step toward keeping your floors looking fresh.
So, what’s the secret? How do you keep your luxury vinyl from fading before its time? Well, that’s what I’ll guide you through next—because your floors deserve to stay as stunning as the day they were installed.
Strengthen Your Vinyl Against Sun Damage
Start by assessing your space. Use a flashlight test to ensure an even subfloor, reducing the risk of uneven fading. Once the subfloor is smooth, apply a high-quality, UV-resistant sealant designed specifically for vinyl floors. This acts as a shield against UV rays, much like sunscreen protects your skin. I applied a clear UV-protective coat myself during a weekend project, and within a day, my floors looked brighter, with reduced fading over the following months.
Implement Physical Barriers to Block Sun Exposure
Next, use physical barriers like curtains, blinds, or UV-blocking window films. During my experience, I installed reflective window films that cut down UV transmission by over 99%. This simple step is comparable to wearing sunglasses outdoors; it filters out the harmful rays before they reach the flooring. Be precise with placement, especially in rooms with large south-facing windows where sunlight is most intense. For large windows, consider blackout curtains or roller shades that can be drawn during peak sunlight hours. When I added blackout shades to my living room, I noticed a visible difference in color retention after just a few weeks.
Adjust Room Layout and Decor to Minimize UV Damage
Arrange furniture to limit direct sunlight on your floors. Place rugs or furniture in the brightest areas; these act like natural shields, absorbing or deflecting UV rays. In my case, I moved a large sofa away from the southern window and added a decorative rug in that spot, which reduced direct exposure. Think of it like a sunhat blocking rays from your face; your furniture can do the same for your floors. Additionally, repaint or reapply protective finishes regularly, especially on high-traffic or sun-exposed spots. Regular maintenance is key; consult your flooring provider for the best products to keep your vinyl vibrant. For detailed guidance on finishing and maintenance, visit this resource.
Monitor and Refresh Protective Measures Regularly
Finally, schedule periodic inspections to assess the effectiveness of your UV protection strategies. Reapply sealants and replace window films as needed, much like renewing sunscreen in summer. Keep an eye out for early signs of fading or discoloration, which indicate your protective measures might need reinforcement. Remember, combining these strategies creates a multi-layered defense comparable to a well-shielded shelter in harsh weather, ensuring your vinyl floors maintain their beauty for years to come. Want to explore more expert tips on flooring? Check out this guide.
Many homeowners assume that floor leveling and installation are straightforward tasks, but in reality, there are subtle nuances that can make or break the longevity and appearance of your floors. For example, a common misconception is that self-leveling compounds can fix uneven subfloors without proper preparation; however, failing to address moisture issues or subfloor contamination can cause serious adhesion problems, leading to cracks or uneven surfaces over time. In fact, experts warn that neglecting moisture testing before applying leveling agents can result in costly failures—according to a study by the Tile Council of North America, improper moisture management is the leading cause of tile and floor failures. ascinating, isn’t it?
Another often overlooked aspect is the importance of substrate consistency. Many attempt to install hardwood or tile over warped or bumpy subfloors, thinking that a thicker mortar or more adhesive can compensate for flaws. But this is a trap that leads to squeaky floors and cracked tiles. For flawless results, meticulous subfloor prep is essential, and detailed techniques like those outlined in [this guide](https://tiletrendshop.com/the-ultimate-guide-to-floor-leveling-for-a-perfect-finish) are invaluable.
So, what about the misconception that the thicker the mortar bed, the better the outcome? In reality, overly thick applications can cause excessive shrinkage and cracking in tiles, especially with materials like porcelain. Proper trowel size and thinset application techniques are critical, and I recommend reviewing expert strategies such as [these](https://tiletrendshop.com/installing-tiles-like-a-pro-step-by-step-strategies-for-2025) to avoid pitfalls.
When it comes to hardwood floors, many believe that choosing a wide plank is always better for a modern look. Yet, wide planks are more susceptible to seasonal gaps, cupping, and swelling if not installed with proper acclimation and expansion gaps. Reading about the detailed nuances in [this article](https://tiletrendshop.com/elevate-your-space-choosing-the-right-hardwood-floors-for-your-home) can save you from costly mistakes.
In summary, mastering flooring installation involves understanding these subtle, often overlooked factors. Do you know the true impact of subfloor moisture? Have you ever fallen into this trap? Let me know in the comments, and don forget to consult reliable resources to elevate your project to professional standards.To ensure your floors stay impeccable over the years, investing in the right tools and adopting precise methods is crucial. One indispensable item I personally rely on is a high-quality **self-leveling sensor**. It allows me to detect subtle subfloor unevenness—sometimes less than 1/8 inch—that can cause major issues down the line. Using a **laser transom** also helps me verify the flatness over larger areas, ensuring that no bump or dip compromises the installation. I always cross-check with a **chalk line** to mark high and low spots, providing clear visual guides.
For surface preparation, a **spiked roller** becomes handy to eliminate air bubbles and improve the adhesion of leveling compounds. I’ve found that using a **handheld infrared thermometer** helps me monitor temperature sensitivities during installation, especially for large-format tiles or hardwood that require strict temperature controls. This practice stems from technical guidelines in advanced flooring installation, like those outlined in [this detailed resource](https://tiletrendshop.com/revamp-your-home-with-elegant-tile-designs).
Applying these tools diligently reduces the risk of future problems such as cracking, uneven surfaces, or gaps. For long-term results, I recommend periodically checking the floor’s flatness with a **spirit level**—especially after seasonal changes—to catch any movement early. Remember, consistent maintenance in these subtle areas often determines how long your floors will look as pristine as day one.
Going forward, I predict that smart, digital measurement tools will become more prevalent, providing real-time data and automation to maintain the perfect level. Embracing tech like wireless moisture meters and digital tiling guides could dramatically cut renovation times and improve durability.
### How do I maintain my flooring tools and techniques over time?
A simple yet effective way is to clean your tools immediately after each project. For example, rinsing the **spiked roller** with water prevents residual leveling compound buildup, which can affect its effectiveness. Regular calibration of laser levels and sensors, as specified in manufacturer instructions, ensures accuracy and minimizes errors in critical phases. Additionally, storing tools in a dry, temperature-controlled environment prolongs their lifespan.
Finally, always stay updated with industry best practices by reviewing resources like [expert flooring installation tips](https://tiletrendshop.com/revamp-your-home-with-elegant-tile-designs). Trying out advanced methods like precise subfloor moisture measurement or integrating digital tools will elevate your craftsmanship and protect your investment for years to come.
Lessons That Changed My Perspective on Flooring Durability
One of my biggest surprises was realizing that even the most high-end luxury vinyl isn’t immune to sun damage. I used to believe that choosing a premium product meant it would last forever without fuss. But after experiencing fading within a few years, I learned the hard way that proactive protective measures are essential. Don’t wait until damage is visible; understanding the subtle signs early can save your floors from costly repairs later.
Another vital insight was the significance of thorough subfloor prep. I once thought that a simple leveling process was enough, but overlooked moisture testing, which led to future buckling and cracking. Now, I know that proper moisture management is the foundation of any successful installation. This realization profoundly impacted how I approach floor projects, emphasizing planning before execution.
Lastly, I discovered that even small tools and techniques can make a huge difference. Using a spiked roller to remove air bubbles or checking temperature with an infrared thermometer ensures smoother, more durable results. These details might seem minor but have a lasting impact on your flooring’s lifespan and appearance.
Tools and Resources That Truly Make a Difference
For effective floor leveling and installation, I highly recommend investing in a flashlight test to inspect subfloor flatness. Coupled with a laser level and moisture meter, these tools help you catch issues before they turn into big problems. Professional-grade equipment transforms a DIY project into a reliable, long-lasting installation.
Beyond tools, I always turn to trusted resources for guidance. Design inspiration helps me stay motivated, while detailed guides like this comprehensive approach to leveling assures I follow the best practices. Regularly updating my knowledge ensures my floors not only look great but stand the test of time.
And never underestimate the power of a good contact—reach out to professionals when needed. Consulting experts can provide tailored advice, saving you stress and expense in the future. Embracing continuous learning keeps your projects on the right track from start to finish.
Your Path to Lasting Floor Beauty Starts Today
The lessons learned from real experience remind us that flooring isn’t just about aesthetics—it’s about preserving the beauty and integrity for years to come. With a mix of proper planning, strategic protection, and continuous education, you can keep your floors looking pristine and vibrant. Remember, your home deserves this level of care and attention—because beautiful floors are the foundation of a welcoming space.
Are you ready to implement these insights into your next renovation? Share your thoughts or questions below—I’d love to hear about your flooring adventures and help you make informed decisions!