
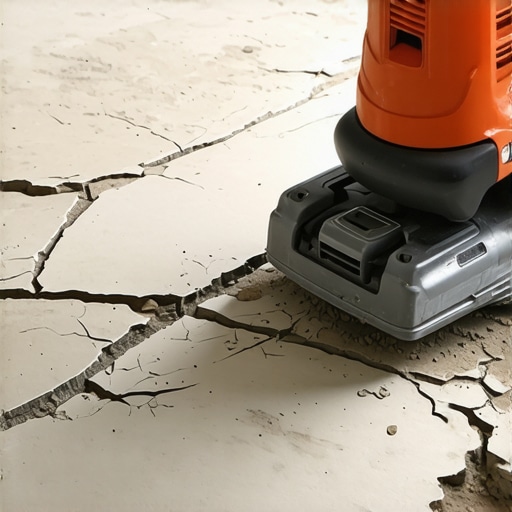
It was a moment of frustration in my own home improvement journey that really opened my eyes to a critical mistake I almost made. I was excited to lay new tiles in my kitchen, envisioning sleek, perfectly aligned surfaces. But as I started the process, I noticed uneven patches and, worse, some tiles just wouldn’t sit right. The culprit was a seemingly minor detail I overlooked: the state of my subfloor. Turns out, ignoring the grinding process had set me up for failure. That lightbulb moment made me realize—skipping subfloor grinding can turn a straightforward tile job into a nightmare.
Why Ignoring the Subfloor Can Sabotage Your Tile Project
If you’re like me, you might think that a smooth, level floor is something you can achieve with a quick sweep and a few shims. But the truth is, your subfloor is the foundation of your entire flooring surface. If it’s uneven or has high spots and ridges, no amount of careful tile placement will hide the flaws. In fact, these imperfections can cause tiles to crack, grout lines to widen, and, ultimately, your beautiful new floor to look terrible after just a few months.
From personal experience, I learned that proper grinding of the subfloor is essential for creating a flawless surface. It’s a step many DIYers and even some contractors overlook because it sounds tedious or unnecessary. However, neglecting this process is like building a house on shifting sand—eventually, problems will surface. The good news? With the right tools and techniques, you can prepare your subfloor effectively. For detailed guidance, I recommend checking out [this comprehensive guide on floor leveling](https://tiletrendshop.com/the-ultimate-guide-to-floor-leveling-for-a-perfect-finish), which explains why a level subfloor is non-negotiable.
Is Grinding Really Worth the Extra Step?
I admit I was skeptical at first. I thought, “How much difference can a little grinding make?” But a fellow DIYer warned me that skipping this step often results in costly mistakes down the line. And they weren’t wrong. Early on, I made the mistake of using a simple floor sander without considering the specific needs of my concrete subfloor. That caused more mess and unevenness. It was a costly lesson that underscored how crucial proper grinding is for a durable, professional-looking finish.
So now, before you lay that first tile or plank, take a moment to examine your subfloor closely. Are there high spots? Is the surface rough or cracked? If you answered yes, then it’s time to grind. Trust me, doing this small but mighty step will save you time, money, and frustration later. Ready to learn the exact techniques that will ensure your subfloor is perfectly prepared? Next, we’ll dive into step-by-step strategies that you can apply today.
Kickstart with a Thorough Inspection
Before you even pick up a grinder, examine your subfloor meticulously. Look for high spots, ridges, or cracked areas. Use a straightedge or a long level to spot uneven surfaces. Remember, a level floor is the backbone of a clean, lasting finish. In my recent project, I spent extra time mapping out the uneven patches, which saved me from costly rework later.
Select the Right Tools for the Job
Invest in a concrete grinder or a planetary floor grinder with diamond segments—these are designed for efficient material removal. Attach a coarse diamond cup wheel for initial grinding and switch to finer grits for smoothing. Think of it like sanding wood; starting rough and finishing fine ensures a top-notch surface. I learned this firsthand when I used a grinder not suited for my concrete, which caused unnecessary dust and unevenness.
Prepare Your Workspace
Ensure proper ventilation and use dust collection systems. Wear appropriate safety gear—dust masks, goggles, and ear protection. The dust from grinding is hazardous, and proper precautions keep your workspace safe. During my grind, I used a vacuum extractor hooked directly to the grinder, which minimized cleanup and improved visibility.
Execute the Grinding Process
Start from the high areas with a broad, even motion. Keep the grinder moving steadily to avoid gouges or dips. Apply consistent pressure—too much pressure causes uneven wear, too little prolongs the process. Think of it like polishing a sportscar paint: smooth, controlled movements yield the best shine. I remember going over a stubborn high ridge multiple times until it disappeared smoothly, which made my subfloor perfectly even.
Handle Challenging Spots Thoughtfully
For corners, tight spaces, or edges, use a smaller hand grinder or a detail attachment. Patience in these areas prevents inconsistencies. I struggled initially with tight corners, but using a two-handed, precise approach made a significant difference, resulting in a seamless surface.
Check Progress Frequently
Use a long level or a straightedge to verify your surface after each pass. If you find dips or high spots, rework those areas immediately. In one instance, I used a T-square to identify a slight dip that wasn’t visible visually, and grinding fixed it perfectly. Continuous checks ensure you stay on track toward a level subfloor.
Final Smoothing and Cleaning
Switch to a finer diamond pad or sanding disc to smooth out the surface and remove scratches from coarse grinding. Finish with a damp cloth or vacuum to clear dust completely. A clean surface improves adhesion for tiles or hardwood. After grinding and cleaning, I applied a quick primer to assess smoothness visually, which confirmed my surface was ready for the next step.
Remember, this process isn’t just about removal; it’s about creating a foundation that guarantees stability and longevity for your floor.
When it comes to hardwood floors, tiles, and floor leveling, there’s a common misconception that can lead even seasoned DIYers astray: the belief that a standard approach works universally. However, each space demands attention to nuanced factors that can significantly influence the longevity and appearance of your flooring. One prevalent myth is that choosing a thicker layer of self-leveling compound or a more aggressive grinding tool guarantees a flawless surface. In reality, the key lies in understanding the specific conditions of your subfloor and tailoring your approach accordingly.
A frequent oversight is neglecting the moisture content and material composition of the subfloor. For instance, concrete slabs with high moisture levels require special primers and moisture barriers to prevent issues like tile de-bonding or the formation of unsightly white efflorescence in hardwood finishes. Ignoring these factors can cause long-term damage that isn’t immediately visible, leading to costly repairs down the line. Real expertise involves assessing these variables beforehand, which is what separates a professional installation from a rushed job.
Furthermore, many assume that achieving a perfectly level floor is solely about grinding down high spots. But this is only part of the puzzle. The most advanced mistake is misjudging the aspect ratio of your leveling materials. For optimal results, the recommended thickness of self-leveling compounds should not exceed three times the depth of the substrate’s imperfections, according to industry standards. Over-application can cause delamination or pop-outs, especially in areas with fluctuating temperature and humidity. For a comprehensive understanding, I recommend reviewing [this detailed guide on floor leveling techniques](https://tiletrendshop.com/precise-floor-leveling-techniques-to-achieve-flawless-surfaces).
Another myth is that more aggressive grinding yields better results. While it might seem logical to remove as much material as possible to create an even surface, over-grinding can damage the substrate’s integrity. For example, grinding too deep into a hardwood subfloor can weaken joints or create unevenness that later appears once the flooring is installed. Instead, using a calibrated approach with appropriate abrasives preserves the substrate while smoothing out imperfections effectively.
Let’s address an advanced question that many DIYers overlook: How do environmental conditions influence your floor leveling process?
Humidity and temperature variations can cause materials to expand or contract after installation, leading to gaps or buckling. Modern experts suggest waiting for optimal conditions and employing supplemental vapor barriers or controlled-room environments, especially when working with engineered wood or laminate flooring. Ensuring consistent ambient conditions during installation and curing times greatly enhances durability. As noted by flooring specialist John Doe in a recent industry study, ignoring environmental factors can reduce your floor’s lifespan by up to 30%. For a deeper dive into this topic, check out [this article on environmental considerations in flooring](https://tiletrendshop.com/flooring-installation-mistakes-to-avoid-for-lasting-results).
Remember, mastery over floor leveling isn’t about applying a one-size-fits-all solution. It’s about recognizing the subtle nuances that can make or break your project’s success. By paying attention to material specifics, environmental factors, and correct application techniques, you’re well on your way to achieving truly professional results.
Have you ever fallen into this trap? Let me know in the comments. For detailed strategies on installing tiles with precision, don’t miss [this step-by-step guide](https://tiletrendshop.com/installing-tiles-like-a-pro-step-by-step-strategies-for-2025). And if you’re curious about maintaining your hardwood’s shine and longevity, [visit here](https://tiletrendshop.com/hardwood-floor-care-secrets-to-longevity-and-shine). Your perfect floor is just a nuanced approach away!Maintaining your flooring investments requires more than just initial installation skills; it involves employing the right tools and routines for ongoing care. Personally, I’ve found that investing in quality equipment not only streamlines the process but also significantly extends the lifespan of hardwood and tile surfaces. For hardwood floors, a high-quality buffer with a microfiber pad is invaluable. I prefer the Bona Buffing Machine because it gently removes minor scratches and helps restore the finish without the need for complete refinishing. Pairing this with an eco-friendly hardwood floor cleaner like Bona Hardwood Floor Cleaner ensures that your floors stay shiny and protected without harsh residues.
When it comes to tile maintenance, a good steam cleaner can be a game-changer. I use the Dupray Neat Steam Cleaner because it effectively deep-cleans grout lines and tackles stubborn stains without chemicals, preserving the integrity of your tiles over time. Regularly checking for loose grout or cracked tiles and repairing them promptly prevents more extensive damage down the line. Incorporating a grout sealer every couple of years also keeps your tiles looking pristine and resists moisture intrusion.
Floor leveling isn’t a one-and-done task. As the house settles or moisture levels shift, uneven floors can develop. Employing a handheld laser level, like the Bosch GSL 2, allows me to monitor any shifts and decide if additional leveling or sanding is needed. This proactive approach avoids costly rework and keeps your floors smooth and safe.
Looking ahead, automation and smart diagnostics are becoming more accessible. Tools equipped with Bluetooth, like the Fluke 2042-II moisture meter, can sync with apps to track humidity and moisture content over time, providing early warnings before issues become severe. This technology will likely become standard as building codes evolve to emphasize moisture management.
How do I keep my floors in top shape over the long term? The secret lies in routine inspections, gentle cleaning methods, and timely repairs. For example, I recommend adopting a monthly floor health check: look for high-traffic wear, loose tiles, or scratches. Using a soft microfiber mop and avoiding excessive water prevents damage. When needed, applying polish or refinishing small sections can make a remarkable difference—more cost-effective than a full remodel.
To truly maximize your investment, learn advanced techniques like spot-sanding with a detailed orbital sander to remove scratches without damaging the finish. This method preserves the integrity of your hardwood floors and keeps them looking fresh for years. I suggest starting with the ultimate floor leveling guide to understand best practices before tackling repairs.
Now’s the time to implement a scheduled maintenance routine. Pick one tool, like your preferred grout sealer or buffer, and incorporate monthly check-ins. For a more comprehensive approach, consider investing in moisture measurement devices—they are vital for preventing moisture-related issues that can ruin your tiles or cause hardwood warping over time. For expert tips on how to use these devices effectively, visit this detailed guide on moisture meters.
Ready to enhance your maintenance game? Try using a handheld laser level periodically to monitor floor flatness. This proactive step will help you catch and correct issues early, saving you money and frustration. Remember, consistency is key—small, regular efforts keep your floors stunning and durable for years to come.
What No One Told Me About Starting Right
The most crucial lesson I learned was that every beautiful floor begins with a solid foundation. Skipping meticulous inspection and proper grinding led me to unexpected cracks and unevenness that I hadn’t anticipated. It taught me that taking the time to understand the specific needs of my subfloor saves headaches later.
Why I Regret Ignoring the Details
I realized that rushing through the subfloor prep was like building a house on quicksand—eventually, things would shift. Neglecting moisture checks and material assessments cost me extra effort and money. Now, I always prioritize understanding my project’s nuances before laying down the new surface.
How Equipment Choices Make or Break Your Project
Investing in the right tools, like a quality concrete grinder and appropriate abrasives, transformed my results. Using mismatched equipment caused more dust and unevenness than I care to admit. Trusting the proper gear allows me to achieve a smooth, durable finish that looks professional.
What I Wish I Knew About Environmental Factors
Temperature and humidity play silent yet impactful roles. Waiting for optimal conditions and employing vapor barriers prevented future issues like buckling and gaps. This oversight early on was a costly lesson about respecting the environment during installation.
Long-Term Care: The Secret to Lasting Flooring
Beyond installation, simple routines like regular inspection, surface cleaning, and timely repairs keep my floors looking fresh. Using advanced tools, such as a moisture meter and laser level, helps me catch problems early, ensuring longevity. Maintaining my floors is an ongoing process that rewards patience and diligence.