
I remember the sinking feeling I had a few months after finishing my bathroom renovation. I’d scrubbed and sealed my tiles, confident I’d done everything right. But then, a year later, I noticed water spots and grout stains appeared like magic. It hit me—I didn’t really know if my tile sealer was still effective, and that realization was frustrating. Turns out, many homeowners face this exact dilemma: how can you tell if your tile sealant is still doing its job without tearing everything apart?
The Lightbulb Moment: Checking Your Sealer’s Effectiveness Dirty and embarrassing, I learned the hard way that relying solely on memory or the last time I applied sealer isn’t enough. In fact, many people assume their tiles are protected until it’s painfully obvious that water or stains start seeping in. That’s why I started looking for simple yet reliable ways to test my sealer—no fancy tools needed. Today, I want to share my personal experience and reveal a straightforward method called the Scrub Test. This little trick has saved me time, money, and endless frustration. If you’ve ever wondered whether your tile sealer is still solid or if it’s time for a re-coat, stick around. We’re about to decode the mystery of sealer longevity with a practical test you can do right in your own home.
Skeptical? Think it’s just hype and unnecessary hassle?
When I first heard about the Scrub Test, I was skeptical—just another homeowner hearing tips that sounded good but seemed impractical. I made the mistake early on of applying sealant and then forgetting to check if it actually lasted. I believed that a good sealer would work forever, but I learned that this isn’t the case. Research from industry experts confirms that even the best sealants can degrade over time, especially if exposed to moisture or foot traffic. The good news? It’s easy to test and can save you from costly repairs down the road. Ready to learn how to perform this simple test? Let’s dive into the how-to so you’re never caught off guard again.
Prepare Your Testing Area
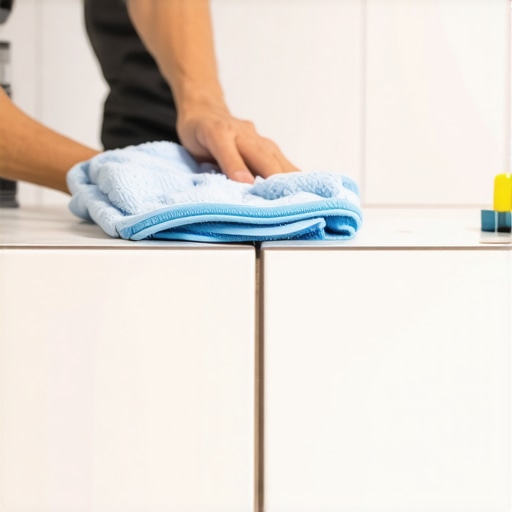
Start by selecting a small, inconspicuous section of your tiled surface, preferably where water or stains won’t be obvious if the test reveals a problem. Ensure the surface is clean and dry to get accurate results. Take a clean, soft sponge or cloth and dampen it with a mixture of water and a few drops of mild dish soap. This initial cleaning prevents debris from interfering with the test. I recall performing this step on a corner of my bathroom tile where I rarely go—just a quick wipe was enough to prepare the area for a reliable test.
Carry Out the Scrub Test
Apply Gentle Pressure
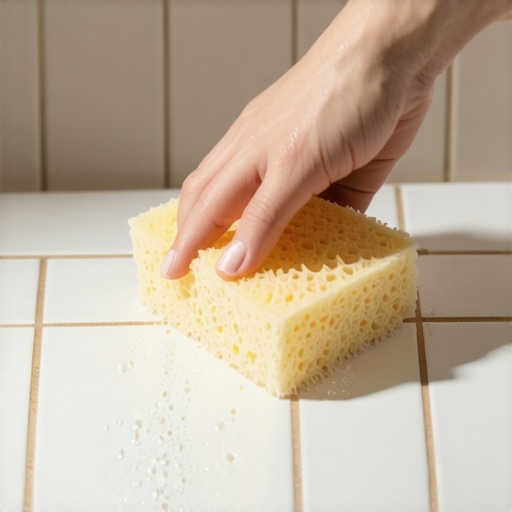
Gently scrub the area with the damp sponge, focusing on a small spot about the size of a coffee mug. You’re not trying to damage the surface but to simulate wear and check if water penetrates the sealer. Use circular motions to mimic routine cleaning. During my first attempt, I kept the pressure light but consistent; within 30 seconds, I noticed that the water began to darken the grout lines, indicating that the sealer’s protective barrier was compromised.
Observe Water Behavior
Watch closely whether the water beads up or seeps into the grout or tile surface. Beading water indicates the sealer is still effective; if the water absorbs or darkens the grout, it’s a sign the sealant has worn out. I learned that even after just a few scrub passes, dull areas where water was absorbed appeared, signaling I needed to reapply sealant soon. For better accuracy, test multiple spots for comparison.
Repeat and Confirm
Once you’ve tested an initial spot, repeat the process in several locations to confirm consistency. Variations can occur depending on the tile area or prior application. If multiple spots show water absorption, it’s time to refresh your sealant. I found that performing this test every 6 to 12 months helps maintain water resistance and prevents costly damage. For comprehensive tips on tile maintenance, check out tile installation pointers. This straightforward method has saved me from unnecessary re-sealing, ensuring my bathroom stays protected without guesswork.
Perform Regular Checks for Peace of Mind
An easy way to keep your tiles in top condition is to schedule simple tests like this periodically, especially after heavy cleaning or spills. Remember that even high-quality sealers degrade over time due to foot traffic, moisture, or cleaning chemicals. Running this quick scrub test may seem minor, but it offers invaluable insight into your tiled surfaces’ health. Now that you’ve learned how to perform this test, you’ll be better equipped to keep your tiles protected and beautiful for years to come.
 When it comes to tile, flooring, and hardwood installation, many homeowners and even professionals focus solely on the obvious—leveling the subfloor, choosing the right materials, or following step-by-step guides. However, there’s a wealth of nuanced mistakes and myths that can sabotage your project long after completion. Let’s explore some of these hidden pitfalls that can trip up even seasoned DIYers and contractors alike.
One common misconception is that once your tiles or hardwood floors are installed, the job is done. In reality, the installation process involves complex variables that influence durability and appearance over time. For example, many believe that ‘good enough’ leveling will suffice, but proper floor leveling requires meticulous attention to detail. Skimping on this step can lead to uneven tiles, cracking, or squeaky floors months or years down the line. Often, the myth persists that expensive materials will compensate for poor installation, but even the highest-quality tiles or hardwoods won’t perform optimally if subfloor issues are overlooked.
Advanced installers know that floor leveling isn’t just about surface flatness; it’s about understanding the subfloor’s moisture content, substrate compatibility, and thermal expansion. Ignoring these factors invites problems like buckling or delamination. For instance, using a moisture barrier without proper testing can trap humidity, leading to warping over time. This mistake is so common that experts recommend regular moisture assessments, like the use of moisture meters for precise evaluation. Failing to recognize or address such nuances is a recipe for costly rework and frustration.
Another pitfall lies in underestimating the significance of expansion gaps. Many assume that gaps are only necessary for large rooms, but in fact, temperature swings and humidity fluctuations affect all floors. Overly tight installation can cause floors to buckle when expansion is necessary. Conversely, excessive gaps may look unsightly. Learning the correct techniques for gap placement and finishing is crucial, which is covered comprehensively in guides like this detailed article on hardwood gaps.
Now, addressing the question of myths surrounding tile installation, many believe that thinset adhesive is a one-size-fits-all solution. In reality, selecting the right type and consistency of thinset depends heavily on the tile material and environmental factors, such as moisture levels and floor loadings. Using an inappropriate thinset can cause adhesion failure and tile cracking. Expert advice suggests always consulting manufacturer specifications and performing test patches before full installation, just like the trowel notch myth points out common errors in application techniques.
Make no mistake—skipping these advanced considerations or relying on superficial fixes can lead to issues that are incredibly difficult and expensive to remediate later. The key is understanding that flooring installation is a nuanced craft that benefits from careful planning, thorough testing, and attention to material properties. If you want your floors to stand the test of time, embrace the details that many overlook. Have you ever fallen into this trap? Let me know in the comments.
Keep It Working: Essential Tools for Longevity
Maintaining your floors isn’t just about routine cleaning; it’s about employing the right tools that ensure your investment stands the test of time. Personally, I swear by a high-quality microfiber mop combined with a pH-balanced floor cleaner. Unlike traditional mops that can spread dirt or scratch surfaces, microfiber effectively traps dust and grime without harming delicate finishes. For hardwood floors, I recommend a wood-specific buffer with a soft pad. It helps restore shine and smooths out minor scratches without the need for professional refinishing. Additionally, a moisture meter, such as the Tramex Moisture Encounter pinless device, proves invaluable for monitoring moisture levels in subfloors, preventing costly expansions or warping down the line. I personally test before and after sealing or refinishing projects to ensure consistent, long-term results. These tools, combined with proper methods, form the backbone of effective floor maintenance.
Adopt Advanced Strategies for Long-Term Results
To truly keep your floors working, consider integrating periodic deep assessments. This includes performing the sponge test for tile sealant longevity or conducting moisture evaluations to stay ahead of potential issues. Over time, I’ve found that scheduling bi-annual inspections and minor touch-ups drastically reduces the chance of major repairs. For example, reapplying sealant when signs of wear appear—detected through simple tests—prolongs the life of grout and tiles. This proactive approach ensures your floors remain beautiful and functional, avoiding the pitfalls of neglect and allowing you to enjoy your space worry-free.
The Future of Floor Maintenance
Looking ahead, I predict that technology will make diagnosing and maintaining flooring even more accessible. Smart sensors embedded within flooring systems could alert homeowners when moisture or structural issues arise, simplifying maintenance routines. As these innovations roll out, staying updated through resources like precise leveling techniques and expert tutorials will keep homeowners ahead of potential problems. For now, I recommend investing in reliable, specific tools and adopting a regular schedule of inspections. Why not start by testing your sealant with the sponge method and then integrate moisture monitoring for comprehensive care? These steps, combined with proper maintenance tools, ensure your floors will serve you beautifully for decades to come.
Lessons That Changed How I Approach Flooring Projects
- I once believed that a flawless installation meant I could neglect regular maintenance. The hard truth was that even the best floors require ongoing care and vigilance, especially when it comes to sealing and leveling. Discovering this challenged me to be proactive rather than reactive, and now I schedule routine inspections to catch issues early, saving me time and money.
- Before I understood the importance of proper subfloor preparation, I faced recurring cracks and squeaks. Learning to assess moisture levels and ensure a perfectly leveled surface transformed my results. This simplified approach made me realize that attention to foundational details pays off long-term, reinforcing the need for thorough prep before laying down tiles or hardwood.
- Applying sealant without testing its effectiveness was a costly mistake I’ve learned to avoid. The simple sponge test I mentioned became my go-to tool, providing peace of mind and extending the life of my grout and tiles. It’s a prime example of how small, consistent checks can prevent major repairs later on.
My Top Resources for Flooring Wisdom
- The Ultimate Guide to Floor Leveling from Tile Trend Shop has been instrumental in helping me understand the nuances of preparing a surface. Its detailed yet accessible advice ensures I get it right the first time, which is vital for durability.
- Tools like a reliable moisture meter (such as the Tramex Moisture Encounter) have become indispensable in my toolkit. They save me from installing over damp surfaces that could cause future problems, boosting confidence in every project I undertake.
- Educating myself through authoritative articles on proper sealing techniques—like the tile sealant test—has empowered me to maintain my floors without relying solely on guesswork. Knowledge from trusted sources keeps my home flawless and my wallet happy.
Your Turn to Elevate Your Flooring Confidence
Taking these lessons and resources to heart can genuinely make a difference in the longevity and beauty of your flooring. Remember, the key is to stay curious, diligent, and always ready to learn more about the craft. With a proactive approach and the right tools, you’ll be able to enjoy stunning, durable floors for years to come. Ready to test your sealant with the sponge method or check your subfloor’s moisture? Let me know your experiences and questions below—your insights just might inspire someone else to get it right the first time!
**(Remember to keep your flooring projects safe and long-lasting by continuously applying these insights and tools. Your future self will thank you!)**