
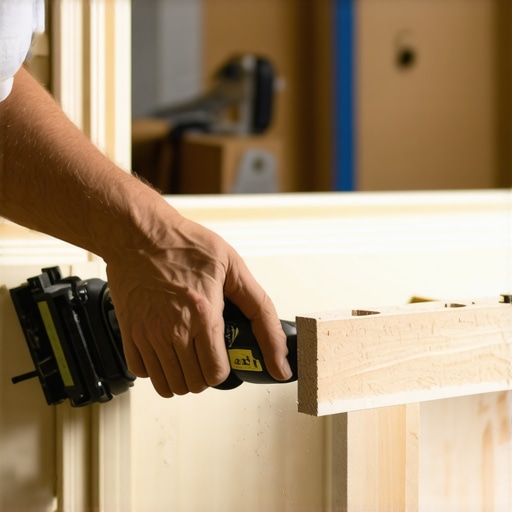
I still remember that moment vividly—the frustration of spending hours trying to align new flooring under a doorframe, only to realize the transition wasn’t flush. The typical approach of prying, sanding, or forcing the jamb just didn’t cut it, leaving gaps or uneven edges that scream amateur work. That lightbulb moment hit me when I discovered the powerful yet simpleundercutting trick—a game-changer for achieving flawless door jamb transitions.
Why Most Floor Installations Fail at Doorways—and How to Fix It
Imagine completing a beautiful hardwood or tile floor, only to face the daunting task of seamlessly integrating it with existing door jambs. Without proper undercutting, you’ll likely deal with awkward gaps, uneven edges, or awkward gaps that trap dirt and compromise aesthetics. Early in my career, I made the mistake of trying to force jambs over the new flooring, which often resulted in chipped paint, scratched surfaces, or worse, uneven transitions. It was a costly lesson that taught me the importance of precise cuts and understanding the underlying technique.
Is the Undercutting Trick Overhyped?
Admittedly, I was skeptical at first. It sounded too simple to make a real difference. But after experimenting with it, I realized how effective precise undercuts are in creating truly seamless thresholds. The secret lies in carefully cutting the jambs to accept the flooring without forcing or damaging the material. This simple adjustment not only enhances the visual appeal but also prolongs the lifespan of your flooring and doorframes. For in-depth guidance on laying different types of floors, you might want to check out installing tiles like a pro and learn more about perfecting your finish.
If you’ve ever faced these issues, stay tuned. I’ll walk you through the step-by-step process that turns this trick into a reliable skill, saving you time and headaches on your next project.
Start by removing the door and hardware, then use a measuring tape to determine the thickness of your flooring. Mark the jambs at the appropriate height to accept the flooring’s thickness with a pencil. Use a square to draw a straight line across the jamb to guide your cut—think of it as planning the perfect cut before making a clean incision, much like a surgeon preparing for surgery. During my first try, I mistakenly drew uneven lines, resulting in gaps; it was a mess, but it taught me the importance of precise marking.
Secure the jamb firmly with clamps or a vise to prevent slipping. Use a jigsaw or hand saw for the cut, following your marked line meticulously—like cutting a puzzle piece to fit perfectly. When I cut mine, I realized that even a millimeter off could create a noticeable gap, so I double-checked measurements. Remember, the goal is to create an undercut that allows the flooring to slide underneath, creating a seamless transition.
Refining Your Cut for a Clean Finish
Use a utility knife to score along the cut line for a smoother surface, eliminating splinters or rough edges. Sand down the cut edge with fine-grit sandpaper to achieve a polished finish—similar to polishing a piece of jewelry. During my project, I underestimated the roughness of the cut edge and ended up with scratches; a quick sanding corrected this. This step ensures that the flooring will seat neatly without unevenness or damage to the jamb.
Slide the flooring into place, checking the fit against the undercut jamb. Use shims or spacers if necessary to maintain even gaps around the door frame. When I did this, I noticed small gaps between the floor and jamb, which I filled with a matching color putty for a seamless look. For tiles, ensure your grout lines align with the transition—check out techniques for final leveling. This process not only looks professional but also prevents issues like dirt accumulation or tripping hazards down the line.
Many believe that flooring installation is straightforward: measure, cut, lay down, and enjoy the aesthetic. However, as a seasoned expert, I can tell you that overlooked nuances often lead to costly mistakes and unsatisfactory results. One pervasive myth is that a perfectly level subfloor guarantees a flawless finish—**but that’s only part of the story**. The real nuance lies in understanding how materials behave under different conditions and applying proper preparation techniques.
For instance, many installers underestimate the significance of moisture content and environmental factors. Excess moisture can cause hardwood to expand, cup, or even warp, despite the subfloor being impeccably flat. A detailed moisture test, such as using a pin-type moisture meter, is essential before start. Neglecting this step often results in finish failures that no amount of leveling can fix, as explained in the expert insights from the ultimate guide to floor leveling.
Another common misconception is that the same adhesive or underlayment works universally across all flooring types. In reality, different materials—hardwood, tile, vinyl—have specific requirements. For example, using the wrong adhesive for large-format tiles can lead to lippage or cracking, which many DIYers discover too late. This complexity is often underestimated, leading to failures that are difficult and expensive to correct, as detailed in flooring installation mistakes to avoid.
What sophisticated techniques are overlooked during floor leveling and installation?
Advanced installers pay close attention to how the subfloor and finish materials expand and contract with temperature and humidity changes. For example, incorporating expansion joints or strategic gaps can prevent buckling over time. Moreover, understanding the difference between Portland and gypsum-based self-levelers—something I’ve seen many overlook—can dramatically impact durability. Portland-based compounds provide better bonding and are more suited for high-traffic areas, a fact noted in subfloor preparation. Failing to account for these factors results in surface cracks and unevenness down the line.
Beware of shortcuts like skipping proper priming or not over-rolling to eliminate air bubbles in self-leveling compounds. These small oversights accumulate into major issues, such as hollow spots or peeling. The best professionals test their work with a depth gauge and a straightedge multiple times during installation to ensure consistency, which is a step often skipped by novices eager to finish quickly.
In the end, mastering the subtleties of flooring installation isn’t about complicating the process—it’s about paying attention to the details many overlook. Do you fall into this trap? Let me know in the comments. For more insights into avoiding common pitfalls, explore the comprehensive flooring installation mistakes guide.
Keep Your Floors in Prime Condition with the Right Tools
One of the most significant aspects of flooring installation and maintenance is leveraging specialized equipment to ensure long-term durability. I rely heavily on a high-quality moisture meter, such as the Protimeter Aquant, to regularly assess subfloor conditions—it’s a game-changer in preventing issues like warping or buckling caused by hidden moisture. Additionally, a precision laser level is indispensable; I use the Bosch GLL 3-80 to verify flatness continuously during and after installation, helping me catch any discrepancies before they become costly problems. Expert-level floor leveling hinges on these accurate, reliable tools. These instruments not only improve installation accuracy but serve as essential parts of routine maintenance, helping prevent minor issues from escalating into major repairs.
Technology Advancing Flooring Care
Looking to the future, I predict that smart sensors and IoT-enabled devices will become standard for flooring maintenance. Imagine a scenario where your smart home system alerts you when humidity or temperature levels fluctuate beyond optimal ranges for your specific floor type, automatically suggesting corrective actions. Such innovations could extend your flooring’s lifespan by proactively preventing damage caused by environmental conditions. Staying ahead involves embracing these technologies now; for example, using moisture meters regularly can help detect subfloor issues early, as detailed here.
How do I keep my floors looking their best over time?
Regular maintenance is critical. I recommend establishing a routine cleaning schedule tailored to your floor type, using proper cleaning agents that won’t degrade the finish. For hardwoods, sealing and refinishing every few years restores gloss while sealing out damage. Tile surfaces benefit from periodic re-grouting and sealing to prevent stains and deterioration. And never underestimate the importance of protective measures like felt pads under furniture and entry mats—these small steps drastically reduce scratches and dirt ingress. I personally add a layer of underlayment foam for floating floors to cushion impacts and suppress noise, which I find extends the investment in the flooring’s appearance and function. For detailed techniques, learn more about hardwood care.
Tools for Long-Term Monitoring
Investing in a good vacuum with HEPA filters ensures I can thoroughly clean between tiles and hardwood planks without introducing debris that could cause scratching or buildup. Additionally, using a microfiber mop with an appropriate cleaner helps maintain shine without damaging surface coatings. For me, tools like soft-bristled cleaning brushes are essential when cleaning grout lines—simple but effective for preserving the appearance of tiled surfaces. As I look to the future, I anticipate that robotic cleaning devices equipped with floor-sensing capabilities will further streamline maintenance routines, minimizing effort while maximizing results. These innovations are not distant; they are shaping the way professionals and homeowners alike maintain floors with minimal intrusion. To keep your surfaces pristine, follow the strategies detailed in this comprehensive guide.
Scaling Your Maintenance Efforts
If you need to manage multiple floors across different spaces, I suggest investing in modular cleaning systems that can be customized. For instance, using interchangeable mop heads and targeted cleaning solutions allows adaptation to various conditions—hard, soft, or uneven surfaces. With more extensive projects, setting up scheduled inspections using digital measurement tools can help catch subtle shifts in floor flatness or integrity early—saving significant repair costs down the line. As technological advances continue, integrating these tools will become increasingly affordable and user-friendly, making professional-grade maintenance accessible to everyday homeowners. Try incorporating a laser level for periodic self-assessment of your floors; it’s a small upgrade that yields significant benefits, especially for high-traffic areas.
Remember, the key to flooring longevity isn’t just in the initial installation but in consistent, informed upkeep. By choosing the right tools—like moisture meters, laser levels, and advanced cleaning devices—you position yourself to maximize your investment. To stay ahead of common pitfalls and ensure your floors remain stunning, consult resources like precise leveling techniques and keep a proactive maintenance schedule. Your floors deserve the best care—equip yourself accordingly and enjoy their beauty for years to come.
Lessons That Changed My Flooring Perspective
- Measure Twice, Cut Once: A simple motto but a profound lesson—taking extra time to double-check measurements can prevent costly mistakes and ensure perfect undercuts. I once rushed and ended up with a gap that took hours to fix, teaching me patience pays off.
- The Hidden Power of Proper Moisture Testing: Failing to test moisture content led me to cracked seams in hardwood. Now, I incorporate regular moisture checks, which save me from long-term repairs and help maintain floor integrity.
- Small Details Make a Big Difference: Smooth edges, clean cuts, and precise measurements collectively create a professional look. Neglecting these nuances often results in uneven transitions that detract from overall quality.
- Don’t Underestimate the Value of the Right Tools: Investing in a good moisture meter and laser level transformed my installation process. These tools are game-changers and worth every penny for achieving flawless results.
- Embrace Continuous Learning: Every project teaches new techniques or highlights oversights. Staying curious and seeking out expert guidance—like the tips shared in the ultimate guide to floor leveling—elevates your craftsmanship.
Tools That Became My Best Allies
- Moisture Meter: Essential for early detection of subfloor issues, helping prevent future warping or cracks.
- Laser Level: Ensures straight, even lines, saving time and frustration during installation.
- Fine-Grit Sandpaper and Utility Knife: For refining edges and smooth finishing touches, making transitions seamless.
- Quality Adhesives and Sealers: Different flooring types demand specific products; trusting reputable brands like those linked in precise leveling techniques ensures longevity.
Your Next Step Toward Excellence
Remember, achieving a flawless flooring transition involves attention to detail, proper tools, and a mindset open to learning. The more you refine your techniques, the more confident you’ll become in creating beautiful, durable floors that stand the test of time. Don’t hesitate to apply these insider lessons—your future self will thank you for the effort today. Have you ever faced a tricky threshold or transition hurdle? Share your experience below and let’s learn together!