
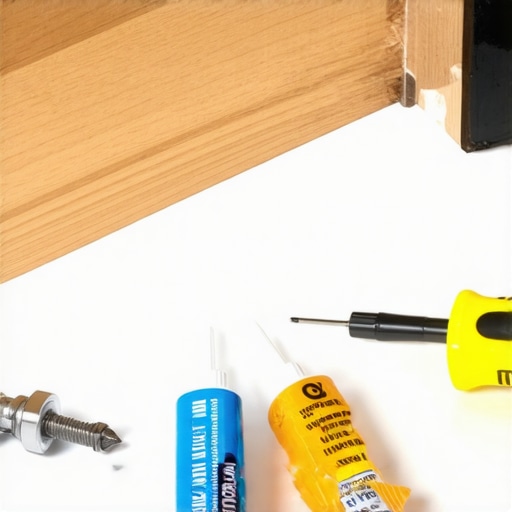
I remember the moment vividly—my foot caught on the loose stair nosing for the third time in a week. That annoying rattling sound whenever anyone ascended or descended suddenly felt like an urgent call to fix what I thought was a minor issue. Turns out, that little strip of metal is more than just a safety feature—it’s a sign of underlying installation challenges that many homeowners overlook. Have you ever experienced the frustration of stair nosings coming loose after just a few months? If so, you’re not alone, and there’s good news: with a few simple adjustments, you can secure your nosing and keep it that way.
Why Does Your Stair Nosing Slip and Come Loose?
Is This Problem Really That Common and Fixable?
Many folks, including myself early on, assume that loose stair nosing is just an inevitable result of wear and tear over time. But more often than not, it’s a sign of improper installation or unsuitable materials. Typically, the root causes include inadequate adhesion, subpar fasteners, or shifts in the subfloor underneath—the very foundation of your staircase. Early mistakes, like failing to prepare the surface properly or choosing the wrong glue, can make a huge difference. I learned this the hard way when I used a generic adhesive on my first project, only to see the nosing loosen within weeks. That experience made me realize the importance of proper techniques and quality materials.
Did you know that according to industry experts, using the correct adhesive and fasteners is crucial for the longevity of your stair nosing? Neglecting this can compromise safety and lead to avoidable maintenance issues. So, what does it take to ensure your nosing stays firmly in place? That’s what I’ll be sharing with you—simple, effective strategies to fix your current problem and prevent it from reoccurring.
But before we dive into the solutions, let’s address a question I see a lot: “Is this issue worth fixing, or should I just replace the entire staircase?” This hesitation is common, but the good news is that most loose nosings can be secured with some DIY know-how, saving you time and money. Ready to learn how? Let’s start with understanding the common pitfalls and how to avoid them.
Assess the Damage and Prepare
Start by carefully examining your stair nosing to identify loose sections and any underlying damage. Remove dust, debris, and old adhesive using a vacuum and a stiff brush. If the nosing is chipped or cracked, consider replacing it to ensure a secure fit, but small cracks can sometimes be repaired with epoxy compatible with your material.
Remove and Clean the Old Adhesive
Use a chisel or a putty knife to gently scrape away residual adhesive from the tread and the nosing’s underside. Then, clean both surfaces thoroughly with a solvent recommended for your adhesive type to ensure proper bonding. Think of this step as preparing a clean canvas for a masterpiece—you need a smooth, uncontaminated surface for the best results.
Select and Apply the Right Adhesive
Choose a high-quality, construction-grade adhesive compatible with your flooring material. For metal or hardwood nosings, epoxy or polyurethane adhesives work well due to their durability. Apply the adhesive evenly to the underside of the nosing or the tread, following the manufacturer’s instructions. Remember, a thin, uniform layer prevents excess squeeze-out and ensures better adhesion.
Tip
When applying adhesive, wear gloves and work in a well-ventilated area. It’s similar to spreading glue for a craft project but on a larger scale—precision here makes the difference. For a concrete or masonry substrate, consider using a hybrid adhesive designed for such surfaces.
Secure the Nosing Properly
Align the nosing carefully over the riser and tread, pressing firmly to ensure full contact. Use clamps or weight bags to hold it in place during curing—think of it as giving the nosing a firm hug to prevent shifting. If necessary, drive appropriate fasteners—such as finishing nails or screws—at regular intervals, making sure they penetrate into the underlying stair stringer or framing behind the tread. Countersink the fasteners and fill the holes with wood filler or matching caulk to maintain aesthetics.
Level and Finalize the Install
Check the levelness of the nosing with a bubble level or straightedge. If adjustments are needed, gently shift the nosing before the adhesive fully sets. Once in place, wipe away any excess adhesive and debris. For added security, consider installing a metal mending strip along the joint, especially on high-traffic stairs, to reinforce stability.
Allow Adequate Curing Time
Patience is key. Avoid walking on the stairs for at least 24 hours to let the adhesive cure completely. This step ensures the bond dries thoroughly, preventing future loosening. During this period, keep the steps clear of any objects or weight that could compromise the bond.
Applying these steps was a game-changer in my own home. I successfully secured a stubborn nosing using an epoxy adhesive and some extra fasteners, resulting in a sturdy, safe staircase. Taking the time to prepare and execute each step carefully can save you from more extensive repairs down the line. For additional tips on flooring installations or to troubleshoot common issues, explore our detailed guides or contact professionals through our contact page.
When it comes to flooring, many assume that following basic instructions and choosing quality materials suffices for a flawless finish. However, even seasoned DIYers often overlook subtle nuances that make a significant difference in the final outcome. One common misconception is that leveling a subfloor is merely about adding enough self-leveling compound to fill gaps; in reality, the meticulous pre-preparation and understanding of different leveling compounds are critical. According to expert industry standards, improper application can lead to cracks, bounce, or future structural issues, which is why reviewing precise techniques—like those outlined in our guide on floor leveling methods—is essential for lasting results.Maintaining your flooring over time is crucial to preserve its appearance and ensure its longevity. A key component of effective maintenance is using the right tools, which can make all the difference in keeping floors in top condition. For hardwood floors, I personally rely on a combination of microfiber mops and specialized cleaning solutions. Microfiber mops are gentle yet effective at trapping dust and debris without scratching the surface. I prefer models with adjustable handles for ergonomic comfort during routine cleaning, like the O-Cedar Microfiber Steam Mop, which allows quick and chemical-free cleaning—something that extends the life of hardwood finishes. When dealing with stubborn dirt or residue, I use a soft-bristled brush attachment for my vacuum, such as the Dyson V15 Detect, which provides precise suction and won’t damage delicate surfaces. This combination ensures that dust and grit, which can act as abrasives, are thoroughly removed, minimizing wear over the years.
For tile floors, I incorporate a grout cleaning brush and a tile-specific cleaner to maintain their appearance. The grout brush’s small, stiff bristles help remove grime from grout lines without damaging surrounding tiles, and I often use a mixture of baking soda and vinegar for natural cleaning. Regularly maintaining sealers also prolongs the life of your tile and prevents staining.
Investing in flooring-specific tools makes a significant difference in results. For example, rubberized squeegees are excellent for removing excess water after mopping, preventing moisture from seeping into seams or under the flooring, which can cause warping or swelling. When it comes to ongoing maintenance, setting a routine schedule—like weekly sweeping and bi-weekly mopping—can prevent the buildup of damaging debris and stains.
Looking ahead, I predict that smart cleaning devices integrated with IoT technology will become standard in home maintenance. Imagine a mop that not only cleans but also detects areas needing extra attention or repair, alerting you via your smartphone. This trend aims to combine convenience with preventative care, reducing long-term costs and avoiding premature wear.
A common question I receive is, “How do I maintain hardwood floors over time?” The answer lies in consistent cleaning with appropriate tools, avoiding harsh chemicals, and performing periodic inspections for scratches or wear. For deeper refinishing, I recommend consulting professionals and exploring guides such as our expert tips on hardwood refinishing. To keep your floors looking their best, I urge you to try upgrading your routine with a high-quality microfiber mop and consider integrating smart sensors that monitor your flooring’s health. While these innovations are just emerging, embracing them now can set your home up for decades of beautiful, resilient floors.Throughout my journey in flooring and tile installation, I’ve uncovered countless lessons that go beyond the basic instruction manuals. One of the most valuable insights I’ve gained is the significance of meticulous surface preparation. It’s tempting to rush through priming or skip the primer altogether, but neglecting this step has often led me to major issues like bubbling or uneven surfaces. This experience taught me that patience during prep work saves headaches during the final installation.
Another lesson is the importance of quality tools tailored for specific tasks. Investing in a good notched trowel or a laser level might seem trivial initially, but it elevates the precision and reduces frustration. For example, I once tried to save money by using a generic float for leveling, which resulted in lumpy patches. Upgrading to professional-grade tools was a game-changer, ensuring a perfectly flat and professional finish.
Additionally, I learned that understanding the material properties—whether it’s the drying time of self-leveling compound or the expansion considerations of vinyl planks—can make or break your project. Rushing a cure or ignoring expansion gaps can lead to costly repairs down the line. This awareness prompted me to always double-check manufacturer instructions and consult expert resources before proceeding.
Now, I prioritize ongoing education through trusted resources. For instance, I regularly review guides on floor leveling techniques and engage with community forums where seasoned professionals share their real-world tips. Curating my toolkit with reliable brands like Levelmax laser levels and Titebond adhesives reinforces my confidence that I can tackle any challenge.
Finally, one of the most fulfilling aspects of mastering floor craftsmanship is recognizing that perfection often lies in the smallest details—like the angle of a cut or the consistent application of adhesive. Paying attention to these nuances delivers results that feel satisfying not only visually but also in durability.
Stepping into the world of advanced flooring techniques has been both humbling and inspiring. Every project is an opportunity to refine your skills, learn from missteps, and contribute to creating beautiful, lasting interiors. Remember, mastery doesn’t come overnight—it’s built with curiosity, patience, and a commitment to excellence.
Ready to elevate your flooring projects? Share your biggest challenge or insight below, and let’s grow together in this craft.