
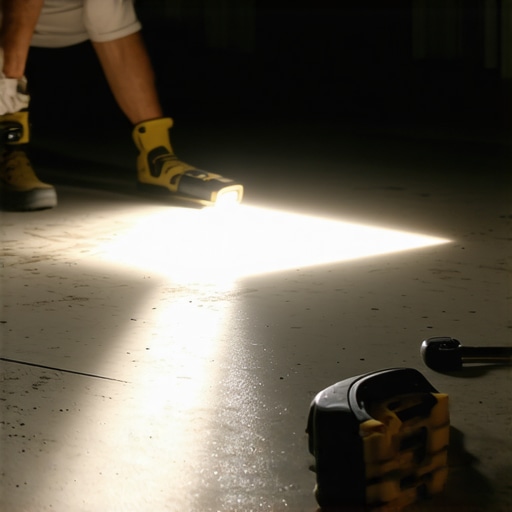
It was late afternoon, and I was sweating over a new vinyl flooring project. With the room’s lights dimmed, I grabbed my flashlight, only to realize I was missing a crucial detail. There, in the beam of light, tiny ripples and uneven spots on the subfloor stared back at me—subfloor humps hiding right beneath the surface. That moment was my lightbulb moment. I knew I had to catch these imperfections early or risk costly repairs later.
Why Spotting Subfloor Humps Matters Before Laying Down Vinyl or Hardwood
If you’ve ever installed vinyl or hardwood floors, you probably understand the frustration of discovering lippage or bumps only after the installation is complete. These imperfections aren’t just cosmetic issues—they can compromise the long-term durability and aesthetic appeal of your entire project. An uneven subfloor can cause squeaks, gaps, and even lead to premature wear.
From personal experience, I learned that the key to a flawless finish is to identify and address these humps early on. The easiest, most reliable way I found was using a simple flashlight during a light test—what’s often called “The Flashlight Test.” When shining a flashlight across the subfloor at a low angle, any high spots or humps cast shadows, making them instantly visible. This technique is cost-effective and surprisingly effective, especially when combined with a keen eye.
In fact, studies show that undetected subfloor imperfections can double the lifespan of flooring when properly addressed from the start. Taking the time to spot and fix these issues initially can save you from headaches and expenses down the line.
Have you faced issues with uneven floors after installation? Or perhaps you’re still uncertain about how to properly assess your subfloor? If so, don’t worry—there are proven methods to make this process simple and efficient. And I’ll walk you through the exact steps I use to master this crucial inspection. Ready to become your own flooring expert? Let’s dive in.
Is the Flashlight Test Actually Worth the Hype?
Early in my projects, I made a mistake that nearly cost me dearly: I skipped inspecting the subfloor thoroughly. Rushing through this step led to a stubborn hum when I installed the vinyl, which I only discovered after applying the final layer—too late to fix without ripping up the whole floor. That experience taught me that attention to detail upfront makes all the difference. Using a flashlight to identify high spots isn’t just hype; it’s a step that can prevent significant setbacks. For more tips on achieving a perfect finish, check out the masterclass on [floor leveling techniques](https://tiletrendshop.com/the-ultimate-guide-to-floor-leveling-for-a-perfect-finish). Now, let’s explore how you can perform this test effectively.
Start with a Clear Visual Overview
Begin by removing any debris and furniture from the room. Use a flat, straightedge or a long level to scan the entire floor surface. Place the level across multiple points to identify high spots—any gap underneath indicates an uneven area. My first time doing this, I laid the level, and it wobbled over a certain section. That tiny wobble saved me from future headaches.
Use the Light Test for Hidden Imperfections
Supplant your visual inspection with the flashlight technique. Dim the lights as much as possible, then shine a low-angle light across the subfloor. Shadows appearing in certain areas reveal humps or dips that aren’t obvious at eye level. I personally find this method invaluable—shadows are a dead giveaway for unevenness.
Apply the Bedrock Technique with a Straightedge
For precision, use a long straightedge, like a piece of level or straight plywood, to inspect the entire floor. Set it down smoothly across the surface; any wobble or gaps beneath highlight high humps. During my project, I noticed a slight step using this method, which I corrected with a quick sanding. This step ensures you’re not missing subtle inconsistencies that could ruin your flooring.
Mark Trouble Spots Clearly
Use chalk or masking tape to mark high areas identified during your inspections. This visual cue helps during the plan to grind, sand, or shim sections to level the surface. Effective marking saved me hours when I returned to address each hump methodically, ensuring a smoother final layer.
Employ Proper Tools for Leveling
Once humps are located, choose the right method to fix them. Light-duty sanding with a hand sander or an angle grinder equipped with a diamond cup wheel clears small bumps. For larger humps, self-leveling compounds are essential. I once faced a stubborn hump that required a quick self-leveling compound; following manufacturer instructions and allowing adequate drying time prevented future issues.
Timing Is Everything During Corrections
Begin repairs early—preferably before any flooring or underlayment is installed. Waiting can cause issues to compound, leading to uneven floor coverings. Remember, patience during this step pays off by reducing troubleshooting later. When I did intensive grinding early, it prevented unevenness from surfacing once I laid down vinyl planks.
Test After Corrections to Confirm Flatness
Reassess using your straightedge or level after fixes. Conduct the flashlight test again, and verify that shadows or wobbling are gone. This double-check guarantees your subfloor is ready for the next phase. I always emphasize resampling; a second look often uncovers spots I missed initially.
Well-Prepared Subfloor: The Key to Long-Lasting Floors
Ensuring your subfloor is smooth and level before installing luxury vinyl, hardwood, or tile is non-negotiable. Proper inspection, marking, fixing, and re-evaluation form the backbone of a flawless finish. Applying these methods consistently yields results comparable to professional standards and can save time and money in the long run. For advanced techniques on floor leveling, explore [floor leveling techniques](https://tiletrendshop.com/mastering-hardwood-floor-refinishing-expert-tips-for-2025) and ensure your project’s success.
Many homeowners and even some professionals operate under assumptions about tile, floor leveling, and hardwood installation that could actually hinder long-term durability and aesthetics. Let’s clarify some nuanced pitfalls that are often overlooked in typical advice. First, the myth that a perfectly flat subfloor isn’t crucial is widespread; in reality, minor undulations can lead to significant problems like tile cracking or squeaking floors over time. Rushing to install flooring without proper leveling can cause what I call the ‘hidden hump’ trap—a subtle bump that appears insignificant but causes uneven wear and grout cracking. Moreover, the misconception that thicker thinset always means better adhesion is misleading; using the right trowel notch size tailored to your tile and substrate is more important, as improper application can lead to tile lippage.
A lesser-known nuance involves hardwood flooring: many assume acclimation alone prevents gaps and buckling, but mismatched moisture levels within the slab or subfloor can still cause issues post-installation. Overlooking the importance of proper expansion gaps can lead to buckling in humid seasons, as pointed out by industry experts. Consider also how improper subfloor preparation—such as neglecting to remove dust and debris—compromises bonding and long-term performance. An external study from the National Wood Flooring Association emphasizes that surface contamination is a leading cause of installation failures.
A common advanced mistake is underestimating the complexity of floor transitions. Achieving a seamless integration between tile and hardwood requires precise measurements and appropriate transition strips—many underestimate this step, resulting in uneven thresholds or trip hazards. For high-traffic or commercial spaces, specialized flexible transition profiles can accommodate expansion. If you’re curious about techniques that help maintain the integrity of your flooring in challenging conditions, I recommend reviewing [mastering hardwood refinishing techniques](https://tiletrendshop.com/mastering-hardwood-floor-refinishing-expert-tips-for-2025).
Finally, I want to highlight a sophisticated question often overlooked by DIYers: How does substrate variance influence the choice of underlayment or leveling compound? Selecting the wrong type can lead to adhesion failure or uneven surfaces. According to a 2022 technical study published by flooring industry authorities, understanding the substrate’s moisture content, porosity, and structural integrity can determine whether a specific leveling product is appropriate. Therefore, always perform a detailed assessment before proceeding.
Have you ever fallen into this trap? Let me know in the comments. Remember, paying attention to these subtleties can save you countless headaches and money in the long run—invest in the knowledge now so your floors last a lifetime.
Choosing the Right Equipment for Long-Term Results
When it comes to maintaining and scaling your flooring projects, investing in the right tools is paramount. One of my personal favorites is a high-quality magnetic level, which ensures accurate readings over large areas, preventing subtle lippage that can compromise your work over time. Unlike cheaper models, a well-calibrated level with a magnetic edge allows for quick spot-checks during installation or repairs, saving you time and frustration. Additionally, a durable electric sander with adjustable grits helps keep hardwood floors in top shape, especially when touching up scratches or refinishing surfaces years after installation. I recommend models from reputable brands like Bosch or Makita, as their reliability and performance are worth the investment.
Embracing the Power of Digital Monitoring
Software tools have become an unexpected ally in flooring maintenance. Using moisture meters, such as pinless digital sensors, allows me to monitor subfloor moisture fluctuations over seasons—crucial for preventing buckling or warping in hardwoods. Modern moisture meters can store readings over time, providing data that guides whether to proceed with finishing steps or to delay installation until conditions stabilize. This proactive approach minimizes long-term issues and reduces the need for costly repairs. With ongoing advancements in sensor technology, I predict that integrating IoT (Internet of Things) devices into your flooring setup will soon provide real-time environmental data, leading to smarter and more durable flooring solutions.
Staying Ahead with Routine Maintenance
To keep your floors looking pristine, routine cleaning is essential. I swear by a combination of microfiber mops for daily dusting and periodic deep-cleaning with pH-neutral cleaners, which preserve finish integrity. For hardwood floors, applying a polish or rejuvenating oil every few years can restore shine and provide an extra protective layer. Regular inspections also help catch issues early—like minor scratches or wear—so they can be addressed before escalating. A proactive maintenance plan not only prolongs the lifespan of your floors but also enhances their visual appeal, making your space always feel inviting.
How do I maintain hardwood and tile floors over time?
Maintaining your flooring’s beauty and structural integrity over time requires consistent care and the right tools. Regular cleaning combined with periodic checks using moisture meters and straightedges can prevent issues from worsening. Additionally, implementing minor repairs—like reapplying sealers or sanding small imperfections—can extend the life of your investment. For extensive projects, consulting expert guides such as this comprehensive hardwood refinishing guide offers valuable insights. Don’t hesitate to try advanced techniques like using a portable buffer for high-traffic areas, which can significantly boost floor resilience. Remember, the key to long-term flooring success lies in relentless attention and strategic tool use.
Lessons Even Pros Sometimes Overlooked
One of the most valuable lessons I’ve learned is that rushing through subfloor inspection can lead to costly setbacks later. I once skipped the flashlight test expecting my visual check to suffice; the hum from uneven tiling revealed my mistake. Trusting simple tools like a straightedge and flashlight can uncover hidden issues, saving time and money.
Another insight is that every project teaches patience. Fixing humps before installing floors requires effort but prevents future squeaks and cracks. It’s tempting to move on quickly, but integrity in prep work guarantees durability. Remember, small details in the beginning define the quality of your entire floor.
Lastly, understanding that subfloor imperfections are unpredictable has shifted my approach. No matter how thorough you are, always double-check after repairs. This layered testing—visual, tactile, and light—creates confidence that your hardwood or vinyl will lay flat and last for years.
Tools and Guides I Always Trust
For precise leveling, I rely on a high-quality magnetic level such as those from Bosch. Its stability helps me avoid subtle lippage, especially in large spaces. I’ve also found that a good moisture meter, like the pinless digital sensors, is indispensable for assessing subfloor conditions over seasons.
When diving deeper into techniques, the comprehensive guide I recommend is this masterclass on hardwood refinishing. It’s packed with insider tips on creating long-lasting, flawless surfaces. And for overall installation strategies, the expert tips on flooring installation offer step-by-step insights that elevate your skills.
Your Next Step Toward Flooring Confidence
Now, I encourage you to take what you’ve learned about thorough inspection and testing seriously. Whether you’re installing new hardwood or tile, mastering these small but significant steps transforms your project from average to remarkable. Every flawless finish begins with dedicated preparation—so don’t overlook the power of those simple tools and methods.
Which part of your flooring process do you find most challenging? Let me know below—sharing experiences helps us all improve and avoid common pitfalls. Remember, your attention to detail today builds a beautiful, durable floor that will stand the test of time.