
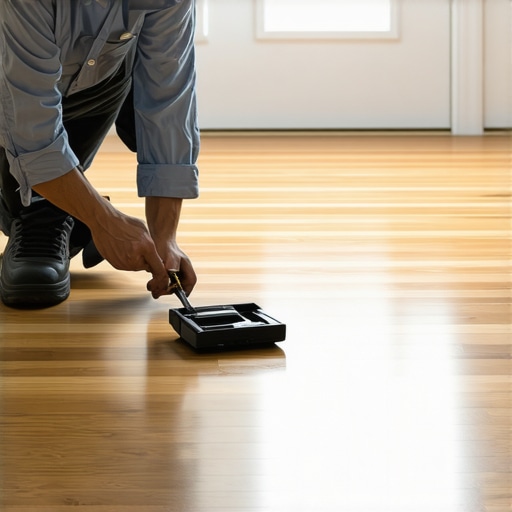
Ever had that moment when you step on your hardwood floor and it squeaks loudly, like a ghost whispering a secret? One day, I was rushing out the door, my coffee in hand, only to be halted by a loud squeak that seemed to echo down the hallway. My first instinct was to call in a professional or worse, rip up the entire floor. But then I realized—there had to be a better way. That’s when I started experimenting with DIY tricks to silence those annoying squeaks, without destroying my beautiful hardwood.
Today, I want to share with you the practical, step-by-step methods I used to fix squeaky floors that anyone can try. No tearing up the floor, no costly renovations—just simple, effective solutions that can save your time and your sanity.
Why Squeaky Floors Drive Us Crazy—and What You Can Do About It
Squeaks in hardwood floors aren’t just a nuisance—they can point to underlying issues like loose floorboards, subfloor movement, or insufficient fastening during installation. According to flooring experts, one common cause is the expansion and contraction of wood with temperature and humidity changes, which creates gaps and friction. Interestingly, a study from the National Institutes of Health highlights how proper installation techniques significantly reduce squeaks, but even seasoned DIYers can encounter problems years down the line.
Early in my DIY journey, I made a costly mistake by trying to tighten all floorboards with glue alone—only to find out that I was trapping moisture and causing more squeaks over time. It taught me that understanding the root causes and choosing the right method makes all the difference. If you’ve faced the same frustration, you’re not alone. Today, I’ll walk you through tested methods to silence those pesky sounds quickly and effectively, so you can enjoy a peaceful, squeak-free home again.
Will These Tricks Really Work for You?
Many skeptics wonder if these fixes are just temporary or if they could damage their floors further. Trust me, I was cautious too. The key is to identify the cause of the squeak—whether it’s loose nails, gaps, or subfloor shifts—and apply targeted solutions. For instance, using shims or talcum powder can sometimes do the trick, but knowing when to call a professional or try more involved methods can save you headaches down the line.
Now that you know why squeaks happen and how they can be more than just an annoyance, let’s dive into the practical steps to quiet your floors for good. And if you want to make sure your entire flooring project is successful, you might want to check out expert tips on flooring installation.
Locate the Noisiest Spot
Identify which area of your floor squeaks the loudest by walking over it carefully. In my experience, focusing on the most problematic spots first saves time and frustration. Use a piece of chalk or a marker to mark these areas for targeted fixes and prepare your tools accordingly.
Apply Lubricant or Powder
For loose floorboards, sprinkle talcum powder, silicone spray, or powdered graphite into the cracks. I once simply sprinkled talcum directly into a stubborn squeak under my living room rug, which noticeably reduced noise after walking over it repeatedly. Be sure to sweep away excess to prevent sliding hazards or dust buildup.
Secure Loose Floorboards with Shims
If the squeak persists due to loose boards, shim under the affected areas. Use thin wood or plastic shims inserted between the subfloor and the joists or beneath the floorboard edges. I found this method highly effective in my hallway, where a squeak was caused by a slightly raised board. Secure shims with nails or screws, but avoid over-tightening to prevent cracking the wood.
Tighten Nails and Screws
Loose nails or screws can cause squeaks during expansion and contraction. Drive long, thin nails (like 1-1/4 inch finishing nails) through the hardwood into the joists from above, aiming for the subfloor below. During my DIY project, I used a nail set to sink protruding nails flush, preventing further movement and squeaks. A pneumatic nailer can speed this process but handle carefully to avoid damaging the finish.
Prevent Future Squeaks with Adhesives
For ongoing stability, consider applying wood glue into the cracks or between the subfloor and joist before nailing. Spread the glue with a syringe or small brush to maximize contact area. When I repaired my kitchen floor, this extra step helped keep the boards tight and silence future movement. Always clamp or weigh down the area until the adhesive cures for full adhesion.
Address Subfloor Movement
If squeaks are caused by shifting or bouncing in the subfloor, reinforce the subfloor with additional blocking or sistering of joists. Installing bridging between joists can distribute movement more evenly. I once added blocking in a basement crawlspace to stabilize a bouncy subfloor, which reduced squeaking and improved feel underfoot.
Use Floor Leveler for Uneven Surfaces
Excessive unevenness in the subfloor can cause certain spots to move and squeak. Applying a self-leveling compound (following manufacturer instructions) creates a flat surface. I used this method in my den after leveling uneven patches, which dramatically cut down on squeaks caused by shifting during temperature swings. Be sure to clean and prime the surface properly before pouring for optimal results.
Tips to Avoid Worsening Squeaks During Repairs
- Vacuum the gaps and cracks before applying any lubricant or adhesive to ensure proper coverage.
- Use appropriate fasteners—long enough to reach the joists without penetrating too deeply.
- Monitor humidity levels; excessive dryness can cause wood to shrink and squeak again, so maintain consistent indoor humidity.
- Refer to expert guides like floor leveling techniques for detailed instructions on complicated fixes.
Many homeowners believe that leveling floors is a straightforward task, but in my experience, this misconception often leads to costly mistakes. One prevalent myth is that applying self-leveling underlayment guarantees a perfectly flat surface without proper preparation. However, without thorough substrate assessment and priming, the layer can peel or crack over time, compromising the entire flooring project. Always refer to expert guidelines, like those found in this comprehensive leveling guide, to avoid these pitfalls. Another mistake I see often is the assumption that thicker applications of leveler are better. In reality, excessively thick pours can lead to uneven curing and future cracks, especially if multiple layers aren’t applied correctly. It’s essential to follow recommended thickness limits to ensure long-term stability. Homeowners also tend to overlook the importance of moisture testing before leveling, which can result in trapped moisture underneath, causing adhesion failures and mold growth. Incorporating moisture readings from qualified tools can save you headaches later. Lastly, many underestimate the role of a perfectly square and clean substrate in successful leveling. Residual debris or uneven edges will always show through the finished surface. Investing time in proper cleaning and surface preparation is crucial for the best results. Remember, a poorly leveled floor doesn’t just look bad—it can damage your entire flooring installation, whether you’re choosing hardwood, tile, or luxury vinyl. For advanced tips and specific techniques, exploring this detailed resource is invaluable. Have you ever fallen into this trap? Let me know in the comments!Achieving a durable, beautiful floor isn’t just about the initial install; it requires ongoing attention and the right tools. Personally, I swear by a high-quality moisture meter like the Tramex CM-01, which I use to regularly check subfloor conditions before any repair or refinishing. Consistent monitoring prevents moisture-related issues like buckling or gaps, especially in hardwood and tile installations. Additionally, a precision laser level, such as the Bosch GPL 3, has become indispensable for ensuring a flawlessly flat surface during leveling projects. Its accuracy within 1/8 inch over 30 feet makes it ideal for large rooms, saving me from costly rework. When it comes to maintaining hardwood floors, I recommend a damp microfiber mop—never a steam mop, as excessive moisture can damage the finish. Regular cleaning combined with periodic refinishing using a top-quality urethane ensures the wood retains its shine and resistance to wear. For tile jobs, investing in a diamond-tipped wet saw pays dividends; it cuts with precision and reduces tile chippage, saving you money over time. To prevent future issues, sealing grout lines with a high-quality, 100% silicone sealant helps keep water out, especially in high-moisture areas like kitchens and bathrooms. As I look towards the future of flooring maintenance, automation and smart sensors may soon provide real-time feedback on floor conditions, streamlining upkeep and early problem detection. How do I maintain my floors over time? Regular inspections with moisture meters and prompt addressing of minor damages keep my floors in top shape for years. Remember, long-term results hinge on not just proper installation but consistent upkeep using tools designed for the task. For detailed guidance, check out the comprehensive floor leveling techniques and incorporate these advanced tools into your routine. Don’t wait until a squeak or crack appears—start using a moisture meter today to monitor your subfloor health, and experience the peace of mind that comes with proactive maintenance.
Throughout my DIY journey with flooring, I encountered countless surprises—some satisfying, others frustrating. One of the most valuable lessons I’ve learned is that silencing squeaky floors isn’t about quick fixes but about understanding the subtle dance of wood, nails, and subfloor interactions. The hard truth is, every squeak has a story—be it loose nails, shifting subfloor, or environmental changes—and unveiling these stories has led me to solutions that last.
What Regular Floor Checks Taught Me About Long-Term Peace
Consistently monitoring my floors with tools like moisture meters and laser levels revealed hidden issues early, preventing major repairs down the line. I discovered that tiny shifts or moisture fluctuations can silently degrade the integrity of your flooring. Recognizing these early signals saved me from costly renovations and kept my floors squeak-free for years.
The Power of Targeted Repairs Instead of Blanket Fixes
Instead of applying one-size-fits-all solutions, I learned to focus on specific problem spots—sprinkling talcum powder in cracks or shimming loose boards. This personalized approach not only saved me time but ensured the durability of each fix. Sometimes, a simple shim or a dab of glue turned a noisy, rattling board into a silent, solid surface.
Curiosity Led Me to Better Floor Strategies
As I delved deeper, I found that proper subfloor reinforcement and precise leveling could turn a stubborn squeak into a distant memory. Embracing techniques like sistering joists or applying self-leveling compounds helped me create a stable, quiet foundation. These methods transformed my understanding of flooring as an ongoing project, not a one-and-done fix.
My Favorite Tools That Make Flooring Repairs Easier
From high-quality moisture meters to accurate laser levels, investing in the right tools made every step more manageable. I trust brands like Tramex and Bosch because they deliver reliable readings and precision, turning guesswork into confident action. Having these tools within reach ensures quick, effective repairs that stand the test of time.
Guidance That Elevates Your Entire Flooring Game
If you want to master your flooring maintenance, explore comprehensive resources such as this ultimate guide to floor leveling. It’s a treasure trove of tips that can prevent common mistakes and set you up for success in any future projects. Remember, a well-maintained floor reflects your dedication and care—making your home a haven of peace and beauty.
Your Next Step Awaits
Now, equipped with insider knowledge and reliable tools, I encourage you to tackle your flooring challenges head-on. Don’t wait for squeaks to become a full-blown problem; proactive maintenance and targeted repairs are the keys to long-lasting beauty and silence. Start today, and soon, your floors will thank you every time you walk across them.
Have you ever struggled with pinpointing the exact cause of a squeak or how to fix it? Share your experiences below—I’d love to hear what worked (or didn’t) for you!