
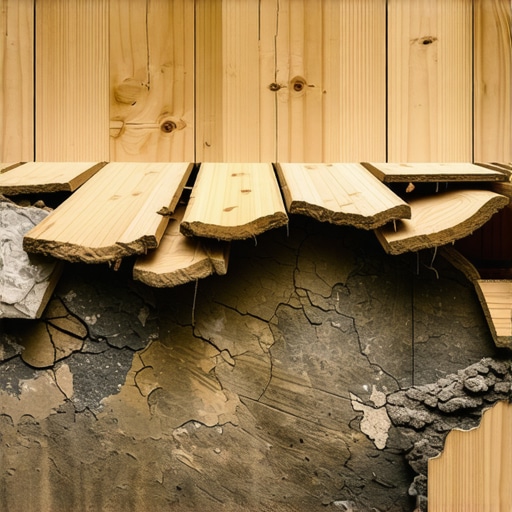
I remember the first time I realized my new hardwood floor was warping and buckling unexpectedly. It was a sunny afternoon, and I stepped into my living room only to see the planks separating and curling — right over what I thought was a perfectly sealed subfloor. The light bulb went off: I had overlooked a tiny detail during installation, which turned into a massive headache later on. That moment taught me a crucial lesson: not all moisture barriers are created equal, and a simple mistake can rot your subfloors from the inside out.
Why Moisture Barriers Can Be a Hidden Enemy
When installing flooring, especially in areas prone to humidity or moisture, a moisture barrier feels like a must-have. It’s supposed to protect your beautiful new surface, right? But in my experience, the real danger lies not in using a barrier but in using the wrong type or installing it improperly. I’d mistakenly believed that more is better — laying down multiple layers or selecting inadequate materials — which only created a trap for moisture to build up underneath. And as it turns out, trapped moisture can silently rot the subfloor layers, leading to expensive repairs and compromised structural integrity.
Early on, I made the mistake of choosing a moisture barrier that wasn’t suited for my climate, thinking any plastic sheet would do. That was a costly lesson. According to industry experts, a poorly chosen moisture barrier can create a vapor barrier that traps humidity, leading to wood rot and mold growth inside your subfloor. This is a sneaky problem—it’s invisible until damage is severe. To truly understand how to prevent this, we need to grasp the right approach to moisture management from the start.
Is Moisture Control Actually Worth the Fuss?
I’ll admit, I once dismissed the fuss about moisture barriers as overkill. I thought, “Why complicate the job?” It wasn’t until I faced a sagging, warped floor that I truly appreciated the importance of proper moisture control. I’ve learned the hard way that cutting corners or skipping essential steps can cost you dearly. The good news is, with some simple knowledge and careful planning, you can avoid this fate. If you’re curious about how to choose the right materials and install them correctly, I recommend checking out the ultimate guide on moisture management. It’s packed with expert advice that can save you from costly mistakes.
So, have you ever encountered signs that your subfloor might be moisture-affected? If so, you’re not alone. Recognizing the problem early can make all the difference. Next, I’ll walk you through how to identify potential issues and what steps you can take to prevent them, ensuring your flooring remains beautiful and durable for years to come.
Seal and Protect: Preparing Your Subfloor
Before laying down any flooring, ensure your subfloor is clean, dry, and level. Use a moisture meter to test humidity levels; if readings are above the recommended threshold, address the source of moisture first. When applying a moisture barrier, choose the right type for your climate and flooring material. For instance, polyethylene sheets are suitable for general use, but in high-humidity areas, a vapor barrier with a permeance rating below 0.7 perm is essential. I remember once applying a thin plastic sheeting without checking specifications, only to have moisture accumulate underneath, causing the floor to swell—lesson learned. Carefully unroll the barrier, ensuring overlap of 6 inches to prevent gaps, and tape seams with high-quality tape. This step acts like a raincoat for your subfloor, keeping moisture from seeping in.
Proper Installation Techniques Save Future Repairs
Think of the moisture barrier as the foundation of a sturdy building. If it’s installed improperly, the entire structure is compromised. To prevent trapping moisture, lay the barrier flat, avoiding wrinkles or folds that can create pockets for water to collect. When cutting around vents or pipes, use a utility knife to make clean, tight cuts for a seamless fit. For larger rooms, work in sections to maintain consistent coverage. I once neglected to tape the seams tightly during a basement floor upgrade, which resulted in moisture seeping through and causing localized hardwood swelling—an avoidable mistake. Remember, the goal is to create an unbreachable barrier that guides moisture away from your flooring system.
Level and Smooth: Ensuring a Flat Surface
Uneven subfloors are like waves in a pond—they create instability for your flooring. Use a self-leveling compound to fill dips and smooth out ridges, following the manufacturer’s mixing instructions precisely. Pour the compound slowly, starting at the low points, and spread evenly with a trowel. Think of this process as ironing out wrinkles in your clothes—small effort yields a sleek finish. I once poured a batch too thick, leading to bubbles and an uneven surface, which caused tiles to crack later. To avoid such issues, use a notched trowel to assess the consistency of your leveling mix and work promptly before it sets. For larger projects, a laser level helps verify the flatness across the entire room. Properly leveling your subfloor is like laying a strong foundation for a skyscraper—it determines the stability and longevity of your installed floor.
Fasten with Precision: Securing Your Flooring Material
Once the subfloor is prepared and level, install your flooring material following manufacturer guidelines. When installing hardwood, use a pneumatic nailer for consistent fastening, ensuring nails are driven below the surface without over-penetrating. As with tile installation, proper back-buttering of tiles or expanding the edges of hardwood planks prevents gaps and ensures maximum adhesion—think of it as giving your material a firm handshake. I remember when I skipped back-buttering large tiles on a kitchen backsplash, resulting in lippage and uneven grout lines, which I fixed later but should have avoided from the start. Use spacers to keep grout lines consistent, and check for any movement after locking each row in place. Precise fastening guarantees your flooring remains stable and resists moisture and movement over time.
Maintain and Adjust
After installation, give your floor adequate time to settle—at least 24 hours—before walking on it. This allows adhesives and leveling compounds to cure fully, preventing future shifts. For areas prone to moisture fluctuations, consider installing expansion gaps or moisture-resistant trims to accommodate expansion and contraction. Regularly check for signs of moisture intrusion, like discoloration or warping, and address issues promptly to prevent costly repairs. Remember, the key to a long-lasting floor isn’t just proper installation but ongoing care and adjustments as needed. Learning these practical steps will help you avoid common pitfalls and achieve professional-grade results every time.
Many homeowners and even pros operate under common assumptions about flooring installation, but some of these beliefs can lead to costly mistakes. Contrary to popular belief, perfectly leveling a subfloor isn’t just about smoothing out visible bumps; it involves understanding the subtle nuances of material behavior under different conditions. For instance, many underestimate the importance of moisture content consistency across the entire surface, which can cause warping or buckling over time, especially in high-humidity climates. Applying a moisture barrier might seem straightforward, but selecting the wrong type or installing it improperly can trap moisture, leading to unseen mold or subfloor rot. A sophisticated approach involves not just testing for moisture but also understanding vapor permeance ratings and climate-specific requirements—something I delve into in the ultimate guide on floor leveling. Another overlooked aspect is the method of fastening—fasteners should be placed at optimal intervals and depths to prevent future squeaks or shifts, especially in hardwood floors, which are sensitive to subfloor movements. An advanced mistake I’ve seen is neglecting expansion gaps in large-format tiles or hardwood planks, which can cause stress fractures under temperature fluctuations. Experts recommend leaving gaps of at least 1/4 inch per 10 feet of flooring, as detailed in professional installation tips. If you really want your flooring to stand the test of time, understanding these nuanced factors is essential. Otherwise, you’ll fall prey to common myths, like the idea that thicker adhesives always mean better bond—sometimes, over-application can cause latex migration and degrade the finish. So, what are some misconceptions you’ve encountered about flooring? Have you ever fallen into this trap? Let me know in the comments.
To ensure your flooring project remains durable and beautiful over time, having the right tools at your disposal is essential. Investing in quality equipment not only speeds up the process but also guarantees precision, which is vital for long-term results. One of my top recommendations is a laser level. Unlike traditional bubble spirit levels, a laser level provides a comprehensive view of flatness across large surfaces, reducing the chances of lippage and uneven spots, especially when installing tiles or hardwood. I personally rely on the high-precision laser level from LaserTech because it offers both vertical and horizontal lines with self-leveling capabilities, making it easier to achieve that flawless finish that lasts for decades.
Next, a reliable moisture meter is indispensable. Early in my career, I underestimated the importance of checking moisture content in subfloors and materials. Today, I use the MoistureMaster Digital Moisture Meter because of its accuracy and ease of use. Proper moisture readings help prevent issues like buckling, warping, or mold growth that compromise your flooring’s integrity over time. Remember, ignoring moisture can turn your investment into a long-term headache, so testing consistently is non-negotiable.
For leveling uneven subfloors, I recommend a self-leveling compound with superior flow properties. The LevelPro Elite ensures a smooth, durable base. My advice? Mix it thoroughly using a power mixer, following the manufacturer’s guidelines precisely; this prevents lumps and ensures even curing. A sturdy, level foundation can significantly extend the lifespan of your flooring, avoiding costly repairs down the line.
Personally, I’ve also found that a multi-tool with oscillating head attachments speeds up tasks like removing old adhesive or cleaning around tight corners. The Dremel Multi-Tool equipped with grout removal blades and sanding attachments helps maintain detail work without damaging adjacent surfaces. For large projects, investing in a pneumatic nailer enhances the speed and consistency of hardwood installation, ensuring each plank is secured properly — a key factor in preventing future squeaks or shifts.
How do I maintain these tools over time?
Regular maintenance includes cleaning after each use, checking calibration for precision tools, and storing everything in a dry, protected environment. I personally schedule monthly inspections to ensure my equipment performs optimally, extending their lifespan and ensuring consistent results. Modern tools are increasingly digital, and software updates can improve functionality; always keep your devices up to date to benefit from innovations tailored for flooring professionals. As the industry evolves, so will the tools — I predict a rise in smart, Bluetooth-enabled measurement devices that sync with your mobile apps, making calibration and documentation even easier. For now, mastering the tools I’ve mentioned and maintaining them diligently will give you a significant edge in achieving perfect and lasting results. Dive deeper into this topic with the expert installation tips and incorporate these advanced tools into your workflow to ensure every project sets a new standard for quality. Try calibrating your laser level today to see how it significantly improves your installation accuracy—it’s a game-changer.
What I Wish I Knew Before Laying My First Floor
One of the toughest lessons I learned was that even the best tools can’t compensate for a miscalculated moisture level. I once installed hardwood on a slightly damp subfloor, thinking I could handle minor moisture differences. Months later, my floors buckled unexpectedly. That taught me the importance of comprehensive moisture testing and selecting the right vapor barrier for your climate. This internal knowledge can save you from costly repairs down the line.
Another revelation was understanding that perfect leveling isn’t always about surface appearance but about the subtle interactions between material expansion and contraction. I used a quick-drying self-leveler on a sloping floor, only to find it cracked after a few temperature shifts. A deeper awareness of climate-specific requirements and proper curing times can make all the difference. Reviewing industry-standard techniques, like those found in this detailed guide, will bolster your project’s resilience.
Tools and Tips From My Personal Arsenal
Investing in a high-quality laser level changed my installation game. It’s a game-changer for ensuring perfectly straight and level joints. I trust the LaserTech professional-grade laser level for its reliability and precision. For assessing moisture, I rely on the MoistureMaster Digital Moisture Meter. These tools take the guesswork out of critical decisions and help prevent future issues like buckling or mold.
On the leveling front, I always use a self-leveling compound like LevelPro Elite for consistent results. Safety and efficiency come from proper mixing and application, which I master by following the manufacturer’s instructions carefully. For fastening, my go-to is a pneumatic nailer, ensuring each plank or tile is secured with precision, reducing squeaks and shifts over time.
Take Action and Transform Your Flooring Experience
Deciding to tackle flooring installation yourself is a rewarding challenge. With the right knowledge and tools—like a laser level, moisture meter, and quality leveling compounds—you can elevate your space to professional standards. Remember, every step, from testing moisture to final fastening, builds a durable foundation that lasts decades. Keep learning, stay patient, and don’t shy away from asking questions or seeking out expert advice—your dream floor is within reach. Want to see how proper moisture management can save your project? Explore more about essential tools here. Your perfect, long-lasting floor awaits—go ahead, make the move.