
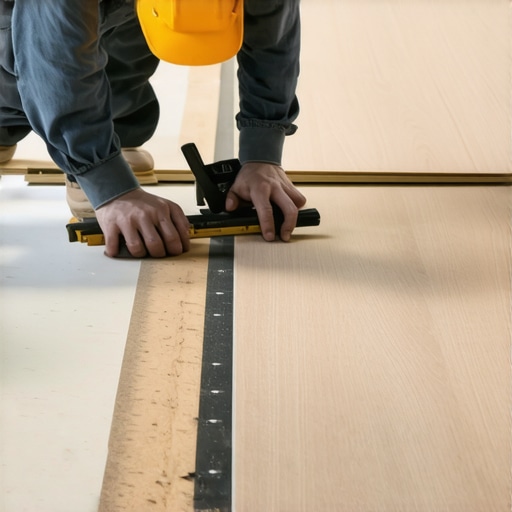
I remember the first time I laid hardwood in my living room. Excitement quickly turned into frustration when I stepped back to admire my work and noticed the flooring wasn’t quite straight. Those crooked rows drew my eye like a sore thumb. It was then I realized that my biggest challenge wasn’t the choice of wood or the fancy finish, but getting everything perfectly aligned and square. That lightbulb moment led me down the path of mastering simple, foolproof techniques—like the 3-4-5 rule—that can make your flooring installation look professionally done.
Why Getting Your Flooring Rows Square Matters More Than You Think
When you’re installing flooring—be it hardwood, tile, or vinyl—the last thing you want is crooked lines or uneven edges. Not only does this affect the aesthetic appeal, but it can also complicate future repairs, cause loose tiles, or create tripping hazards. A beautifully laid floor is like a well-tailored suit: it boosts confidence in your craftsmanship and increases the value of your home.
Personally, I made the mistake early on of trusting my eye alone, which isn’t as reliable as you might think. Without measuring properly, I ended up with a skewed layout that forced me to do unnecessary adjustments later, wasting time and money. An early error like this can be frustrating, but luckily, there’s a simple, effective method to prevent it—something I wish I knew from the start.
That’s where the 3-4-5 rule comes into play. This straightforward technique ensures your rows are aligned perfectly, saving you headache and headaches down the line. In our upcoming discussion, I’ll share how you can easily implement this method in your project, even if you’re a beginner. Ready to make your floors flawless? Let’s get started.
Is The 3-4-5 Rule Really That Reliable? My Early Mistakes to Share
When I first heard about the 3-4-5 rule, I was skeptical. I thought, “Surely, a simple triangle measurement can’t guarantee a straight line.” But trust me, I learned the hard way that overlooking precise measurements leads to crooked floors and wasted effort. I once skipped this step and ended up with a wonky row that threw off the entire layout—and it was a pain to correct. Early on, I learned that even minor miscalculations can snowball into big problems. The good news? This method is foolproof once you get the hang of it. If you’re interested in deeper insights, check out this expert guide for more installation tips to avoid common pitfalls.
Set Up Your Reference Line Early
Start by marking a straight baseline using chalk or painter’s tape along the longest wall or a central point. This serves as your initial reference, ensuring all subsequent rows are aligned. I once overlooked this step and ended up with a crooked first row, which threw off the entire pattern. To avoid this, double-check your baseline with a level or laser line to confirm straightness before proceeding.
Create Corners That Snap into Place
Identify two perpendicular walls that form a corner and use a carpenter’s square to mark a 90-degree angle. This is your springboard for perfect alignment. I remember carefully measuring and marking these corners, then snapping chalk lines to visualize the layout. This step ensures subsequent rows are square, preventing shift as you work further into the room.
Apply the 3-4-5 Triangle Method
This classic technique involves measuring three units along one wall, four units along the perpendicular wall, and verifying that the diagonal between these points is five units. If it measures exactly five units, your corners are perfectly square. I once used a tape measure that was slightly off, resulting in a non-square layout. Confirm this measurement with a precise carpenter’s square if needed. This method is your failsafe against skewed flooring, especially useful in large or irregular spaces.
Use a Long-Level or Laser for Accuracy
To ensure your reference lines stay true, employ a long carpenter’s level or laser level when marking and aligning. I recommend bouncing the laser across the room to check for deviations, as eye measurements can be misleading. This step helps catch subtle inclines or dips, minimizing unevenness in your final floor.
Continuously Recheck Your Measurements
As you install each row, stop periodically to verify alignment with your baseline and corner marks. Small deviations can snowball, causing your floor to warp or misalign. During my last project, I used a tape measure and a level after every few rows, catching errors early and correcting them before they grew unmanageable. This disciplined approach saves time and ensures professional-looking results.
Address Variations and Irregularities
Real rooms have quirks—like unequal wall lengths or slight distortions—in those cases, rely more on the measurements from your reference lines rather than the walls. I once encountered uneven walls that threw off my initial measurements, so I adapted by measuring from the established reference line instead. This technique maintains consistency across the entire floor.
Final Checks Keep It Perfect
Once your entire layout is laid out, do a quick walkthrough with a straightedge or level to identify any deviations. Use shims or adjust the subfloor if necessary before fastening the flooring. Remember, a small correction now prevents big problems down the road. I recall re-adjusting a few areas that appeared slightly off after initial installation—fixing these prevented major misalignments later.
Many homeowners believe that a straightforward approach—simply measuring and following basic guidelines—is enough for flawless flooring. However, this overlooks subtler factors that can make or break your installation. Contrary to popular belief, relying solely on general rules like ‘eye-balling’ or trusting wall dimensions can lead to significant issues down the line. Walls are rarely perfectly straight; structural shifts, settling, or previous renovations often introduce irregularities that basic measurements ignore. Ignoring these nuances can result in misaligned tiles or uneven hardwood planks, which might not be immediately visible but will manifest over time.
One common myth is that floor leveling is only necessary in new constructions or when visible dips occur. In reality, even slight undulations can cause lippage in tiles or creaking in hardwood over years. Incorporating a thorough understanding of substrate conditions—such as moisture levels, subfloor flatness, and material compatibility—is critical for durability and appearance. Experts highlight that failure to address these factors is one of the leading causes of premature flooring failure, as detailed in this comprehensive guide.
For advanced installers, the importance of precise measurement tools cannot be overstated. Laser levels and digital moisture meters are game changers, helping avoid common pitfalls like uneven bonding or warping. Additionally, understanding the subtle behavior of different materials—how engineered wood reacts to humidity, or how porcelain tile responds to thermal expansion—is crucial for long-term success. These aspects often escape the beginner’s eye but are the hallmarks of true craftsmanship.
Have you ever fallen into this trap? Let me know in the comments. Remember, when it comes to flooring, paying attention to nuance isn’t just about aesthetic perfection—it’s about ensuring your investment endures for years to come.When investing time and effort into installing hardwood floors, tile, or leveling uneven surfaces, having the right tools on hand can make all the difference in ensuring long-term durability. I personally swear by a high-quality laser level for precise alignment, as it eliminates the inaccuracies that often come with traditional bubble levels. Laser levels like the Bosch GLL 3-80 are my go-to because they project accurate, all-around lines that help maintain consistent elevations across large areas, reducing the need for rework. Additionally, a moisture meter—specifically the Protimeter Surveymaster—is indispensable for assessing subfloor conditions before installation, preventing issues like warping or buckling down the line, as detailed in this expert guide.
For leveling tasks, I rely on a quality self-leveling compound paired with a robust trowel. Applying the right kind of compound, such as Sakrete Floor Leveler, and using a gauge rake to distribute it evenly ensures a smooth surface ready for flooring. Remember, proper prep work, including verifying the substrate’s flatness using a 10-foot straightedge, is crucial. A good long-handled laser level can serve as a continuous reference to monitor the evenness during leveling, saving countless hours of corrections later.
Regular maintenance isn’t just about cleaning; it involves proactive inspections using a flashlight and a straightedge to identify any early signs of lifting, cracking, or moisture intrusion. For hardwood floors, I recommend a specialized cleaner like Bona Hardwood Floor Cleaner, which preserves the finish and prevents premature wear. Also, addressing minor issues immediately—such as filling gaps with wood filler or reapplying protectant—extends the floor’s lifespan significantly.
Looking ahead, the trend in flooring installation leans toward automation and smart tools. Digital moisture meters with Bluetooth connectivity can log data for future reference, and augmented reality (AR) apps might soon assist in planning layouts virtually before laying down a single plank, as discussed in emerging industry projections. Embracing these advancements could be your next step in elevating precision and efficiency.
**
How can I maintain hardwood and tile floors over time?**
Keeping floors in top shape requires patience and regular attention. For hardwood, avoiding excess water, using protective pads under furniture, and maintaining optimal humidity levels prevent warping and gaps. Tile surfaces benefit from sealants like
grout sealers applied after installation, which fend off stains and moisture penetration. Scheduled deep cleans and inspections can detect cracks or grout wear early, allowing timely repairs that save money and prolong the look of your floors.
Don’t settle for basic maintenance routines—try our recommended high-end tools and techniques described here to truly keep your floors working beautifully for decades to come. For detailed guidance, explore comprehensive resources like this expert article.
Lessons That Changed My Approach to Flooring
One of my most eye-opening experiences was realizing how small measurement errors could snowball into major misalignments—like the time I ignored the importance of double-checking the base line, only to end up with crooked rows that took hours to fix. It taught me that patience and meticulous attention from the start save frustration later.
Another lesson was understanding that professional-looking floors aren’t just about tools—they’re about *technique*. Relying on the 3-4-5 rule transformed my accuracy, showing me that simple geometric principles, when applied carefully, produce impeccable results, even for beginners.
The myth that walls are perfect and can be trusted as reference points was shattered for me. I learned to measure from the established reference lines instead, because walls often have irregularities that can throw off your entire layout. This shift in mindset made a huge difference in my projects.
Finally, I discovered that substrate conditions matter more than I initially thought. Moisture levels, surface flatness, and material compatibility are critical for durability. Skipping these checks, I realized, could lead to premature flooring failures—a lesson worth sharing with anyone about to start a flooring installation.