
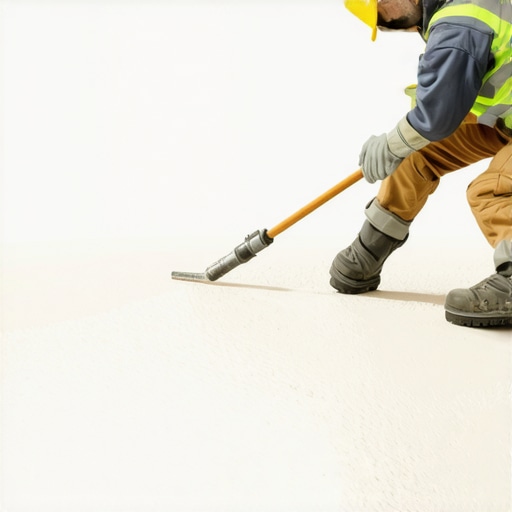
I vividly remember the first time I poured self-leveling compound into a flooring project, only to watch tiny bubbles and pinholes emerge like unwanted secret allies in my attempt at a flawless surface. It was frustrating, disheartening even—because I had invested so much time and effort. That “lightbulb” moment hit me hard: I had fallen into a common trap that sabotages countless flooring installations. The good news? Once I understood the root cause, I could finally get that perfect, smooth finish I’d been dreaming of.
Why a Smooth Floor Doesn’t Happen by Chance
Getting a truly level and bubble-free self-leveler isn’t just about pouring and hoping for the best. The surface you’re working on, the product you choose, and your preparation all play crucial roles. If you’ve experienced self-leveling compound bubbling up or developing tiny pinholes—especially after seaming your tiles or hardwood—chances are you’ve fallen victim to a common primer mistake that causes adhesion issues. Knowing the precise reason behind this can save you from hours of repair work or even starting over completely.
Is Cutting Corners Really Worth the Risk?
Early in my career, I overlooked a critical step: improperly preparing the subfloor before applying self-leveling compound. I was eager to speed things up, using a cheap primer that promised quick drying. What I didn’t realize was that this shortcut would lead to bubbling and pinholes—a nightmare for achieving that perfect flat surface. According to industry experts, poor surface prep is among the top causes of these issues, and a high-quality, appropriate primer can make all the difference. For more details on setting a solid foundation for your project, check out precise floor leveling techniques.
Have you ever faced similar problems with your flooring projects? If yes, you’re not alone—and the solution is more straightforward than you might think. Let’s explore how to prevent these issues from happening and ensure your finished floor is as smooth and durable as it should be.
Prepare the Subfloor Like a Pro
Begin by thoroughly cleaning the surface to remove dust, debris, and grease—think of it as preparing a canvas for a masterpiece. Use a vacuum and a damp mop, ensuring the substrate is dry and solid. Check for uneven spots or loose patches and secure or level them to prevent future bubbling or cracks. Remember, a stable foundation is paramount—skipping this step is like building a house on sand.
Choose the Right Primer and Leveling Compound
Select a primer compatible with your subfloor material; for concrete, a polymer-enhanced bonding primer works best. Apply it evenly using a roller—imagine spreading peanut butter smoothly—allowing it to dry fully according to the manufacturer’s instructions. For leveling, pick a suitable self-leveling compound—understanding the difference between Portland and gypsum-based formulations is crucial, so consult the product details or our guide.
Mix Your Leveler Correctly
Measure the powder and water carefully, following the exact ratios. Use a clean mixing bucket and a paddle attachment on a drill for a lump-free consistency—think of stirring hot cocoa until smooth. Pour the mix into the prepared area gradually, starting at the lowest point and working outward. For large areas, work in sections, and consider using a laser level to identify high and low spots, ensuring an even pour to prevent pooling or thin edges.
Pour and Spread Strategically
Pour the self-leveler from one corner, allowing gravity to do the work. Use a trowel or gauge rake to guide the flow into tricky spots, pushing excess material towards low points. Don’t over-trowel—excess movement can introduce air bubbles. For a truly flat surface, employ a long screed or a straightedge dragged across the surface, applying consistent pressure—it’s like shaving a rough beard down to smooth skin. This step eliminates ripples and ensures a level plane.
Control Environment and Timing
Maintain optimal conditions: temperature around 70°F (21°C) and humidity below 85%. Use fans to circulate air, but avoid direct drafts that could cause premature curing or cracks. Watch for the initial set time—usually 15-30 minutes—and avoid walking on or disturbing the surface during the working window. Patience here pays off; rushing leads to imperfections that can ruin the entire project.
Finishing Touches for Perfect Results
Once the leveling compound has cured fully—typically 24 hours—inspect the surface with a straightedge or a level for any remaining high or low spots. Sand down minor ridges with a fine-grit sander if necessary, and vacuum residue thoroughly. Only after these meticulous preparations should you proceed to tile or hardwood installation, ensuring your foundation won’t cause future issues. For detailed steps on laying tiles seamlessly, refer to professional tile installation techniques, and check your local standards before sealing the surface.
Many seasoned DIYers and even professionals often share the common belief that following basic methods guarantees perfect results in tile, floor leveling, or hardwood installation. However, as an expert, I can tell you that the devil is in the details. A frequent misconception is that perfect floors are solely about quality materials and proper tools. While those are crucial, the real secret lies in understanding nuanced factors that can undermine your effort—nuances many overlook. For example, the prevalent myth that applying a quick-drying primer is sufficient can lead to adhesion failures, bubbling, and pinholes, especially if the primer isn’t compatible with your subfloor or if the surface isn’t properly prepared (see detailed methods here).
One advanced mistake I see all too often is ignoring environmental conditions. Many installers neglect the impact of temperature and humidity during curing phases. Excess humidity not only hampers adhesive setting but can cause expansion or contraction in materials like engineered hardwood, leading to gaps or buckles over time. Studies have shown that maintaining stable environmental parameters significantly prolongs the lifespan of your flooring, especially with moisture-sensitive materials. It’s vital to control these factors, contrary to the misconception that time alone will fix curing issues (expert tips here).
What Are the Most Overlooked Aspects of Floor Preparation? The Real Experts’ Insight
Many assume that simply screeding or leveling with basic tools suffices, but the subtleties in subfloor prep dictate success. For instance, microscopic dust or residual moisture can cause bond failures, leading to bubbles and uneven surfaces years later. The industry-backed best practices include comprehensive cleaning, moisture testing, and the use of appropriate primers tailored to specific subfloor materials. Overlooking these steps is an advanced-level mistake that can ruin what might have been a flawless installation.
Furthermore, a common trap is misjudging the compatibility of materials—such as using a non-waterproof adhesive with moisture-rich concrete, or failing to back-butter large tiles to ensure proper bonding. These small oversights compound over the lifespan of the floor, causing costly repairs later. So, what’s the key takeaway? Precision in preparation and understanding material nuances is as critical as the actual installation process itself.
To truly grasp these complexities, I recommend exploring comprehensive guides like these expert pointers. Moreover, continuous learning from advanced resources helps avoid the pitfalls that can undermine your project’s success. Remember, achieving a perfect finish isn’t just about the visible surfaces; it’s about mastering the subtle behind-the-scenes choices that guarantee durability and aesthetic excellence.
Have you ever fallen into this trap? Let me know in the comments. Your experiences can help fellow enthusiasts avoid these hidden pitfalls and elevate their flooring game to professional standards.
Keep Your Flooring in Top Shape with the Right Tools
Maintaining flooring, especially after careful installation, is critical for preserving its appearance and functionality over years. One of my go-to tools is the Moisture Meter, specifically a pin-type device, which I use regularly to monitor subfloor moisture levels before any repairs or refinishing. This ensures that no hidden dampness leads to warping or mold growth down the line. Additionally, a high-quality Orbital Sander helps me smooth out minor surface imperfections on hardwood floors, restoring their shine without risking damage. Trust me, investing in these tools isn’t just about convenience—it’s about safeguarding your investment.
How do I maintain flooring over time?
Consistent cleaning is key. For hardwood floors, I recommend using a specialized hardwood cleaner and avoiding excessive water, which can cause swelling. Implementing a regular buffing schedule with a soft cloth or microfiber mop keeps the shine fresh and prevents dirt buildup that might scratch surfaces. For tile floors, sealing grout annually with a quality sealer maintains its color and prevents staining. Also, monitor for signs of wear or damage, promptly repairing chips or cracks to prevent further deterioration.
Tools That Simplify Long-Term Floor Upkeep
To quickly address scratches or small dents in hardwood, I swear by a Heat Gun and Spot Repair Kit. Gentle application of heat softens the finish layer, allowing for minor touch-ups that blend seamlessly. For deep cleaning, a steam mop (used carefully) can help remove stubborn grime without harsh chemicals. Remember, choosing low-maintenance, durable coatings like industrial-grade sealants enhances the longevity of your flooring, especially in high-traffic areas.
Scaling Up: Preparing for Bigger Projects
When expanding your flooring or undertaking large renovations, consider consulting advanced leveling systems like laser-guided self-levelers. These not only save time but guarantee precise flatness — critical for avoiding uneven wear and tear later. If you plan to add new floors over existing ones, ensure compatibility with surface materials and use appropriate underlayment systems, which I review in detail in this guide. Proper planning and the right tools set the stage for seamless scaling and long-term durability.
Trends Shaping Flooring Maintenance
Looking ahead, I predict that smart sensors embedded beneath flooring will soon revolutionize maintenance. These devices can monitor moisture, temperature, and even stress points, alerting homeowners before issues escalate. Staying ahead of these advancements means investing in materials and tools that integrate with new technologies, ultimately making upkeep more efficient. For now, mastering essential tools like moisture meters and sealing kits remains your best defense against costly repairs.
Ready to take your flooring maintenance to the next level? Start by incorporating a moisture meter into your routine and see how proactively managing moisture can extend your floors’ lifespan. For more expert insights, check out these design ideas or contact us through our contact page.
Lessons I Wish I Learned Sooner in Flooring Mastery
The biggest lesson was understanding that surface preparation is everything—skipping thorough cleaning or moisture testing often leads to bubbles and cracks down the line. I once underestimated the importance of environmental control; maintaining the right temperature and humidity during curing can prevent nasty surprises like delamination or buckling. Over time, I realized that compatibility of materials is more nuanced than just picking popular brands—knowing which primer works with your subfloor can save hours of troubleshooting. Lastly, I discovered that patience truly is a virtue; rushing through leveling or waiting for proper curing terms ensures durability and a perfect finish rather than a surface riddled with tiny imperfections.
My Go-To Tools and Literature for Better Floors
The moisture meter I use regularly has been transformative—monitoring subfloor moisture levels prevents future failures. For detailed guidance, I trust these expert floor leveling techniques, which walk through every crucial step of achieving a smooth, durable surface. When selecting primers, I lean on industry-backed best practices to make sure adhesion is reliable. For ongoing maintenance, this guide to hardwood care has helped me extend the life and shine of my floors. Lastly, books like The Ultimate Guide to Floor Leveling provide deeper insights that continue to elevate my craftsmanship.
Empower Your Flooring Journey Today
Remember, mastering flooring isn’t about avoiding mistakes—it’s about understanding the subtle intricacies that make a difference. Each project offers learning and growth. By investing in quality tools, poring over expert guides, and exercising patience, you can achieve a finish that not only looks stunning but also stands the test of time. Whether you’re a DIY enthusiast or a professional, embracing these secrets can transform your approach and results, turning every floor into a masterpiece worth proud of.
What has been your biggest challenge in flooring installation, and how did you overcome it? Share your experiences below—I’d love to hear your story!
,